Beauty Campaign, No Photographer Required
I wanted a high-gloss campaign portrait — dramatic skin, fashion glow, that editorial edge. Here's what I picked in Studio and what came back.
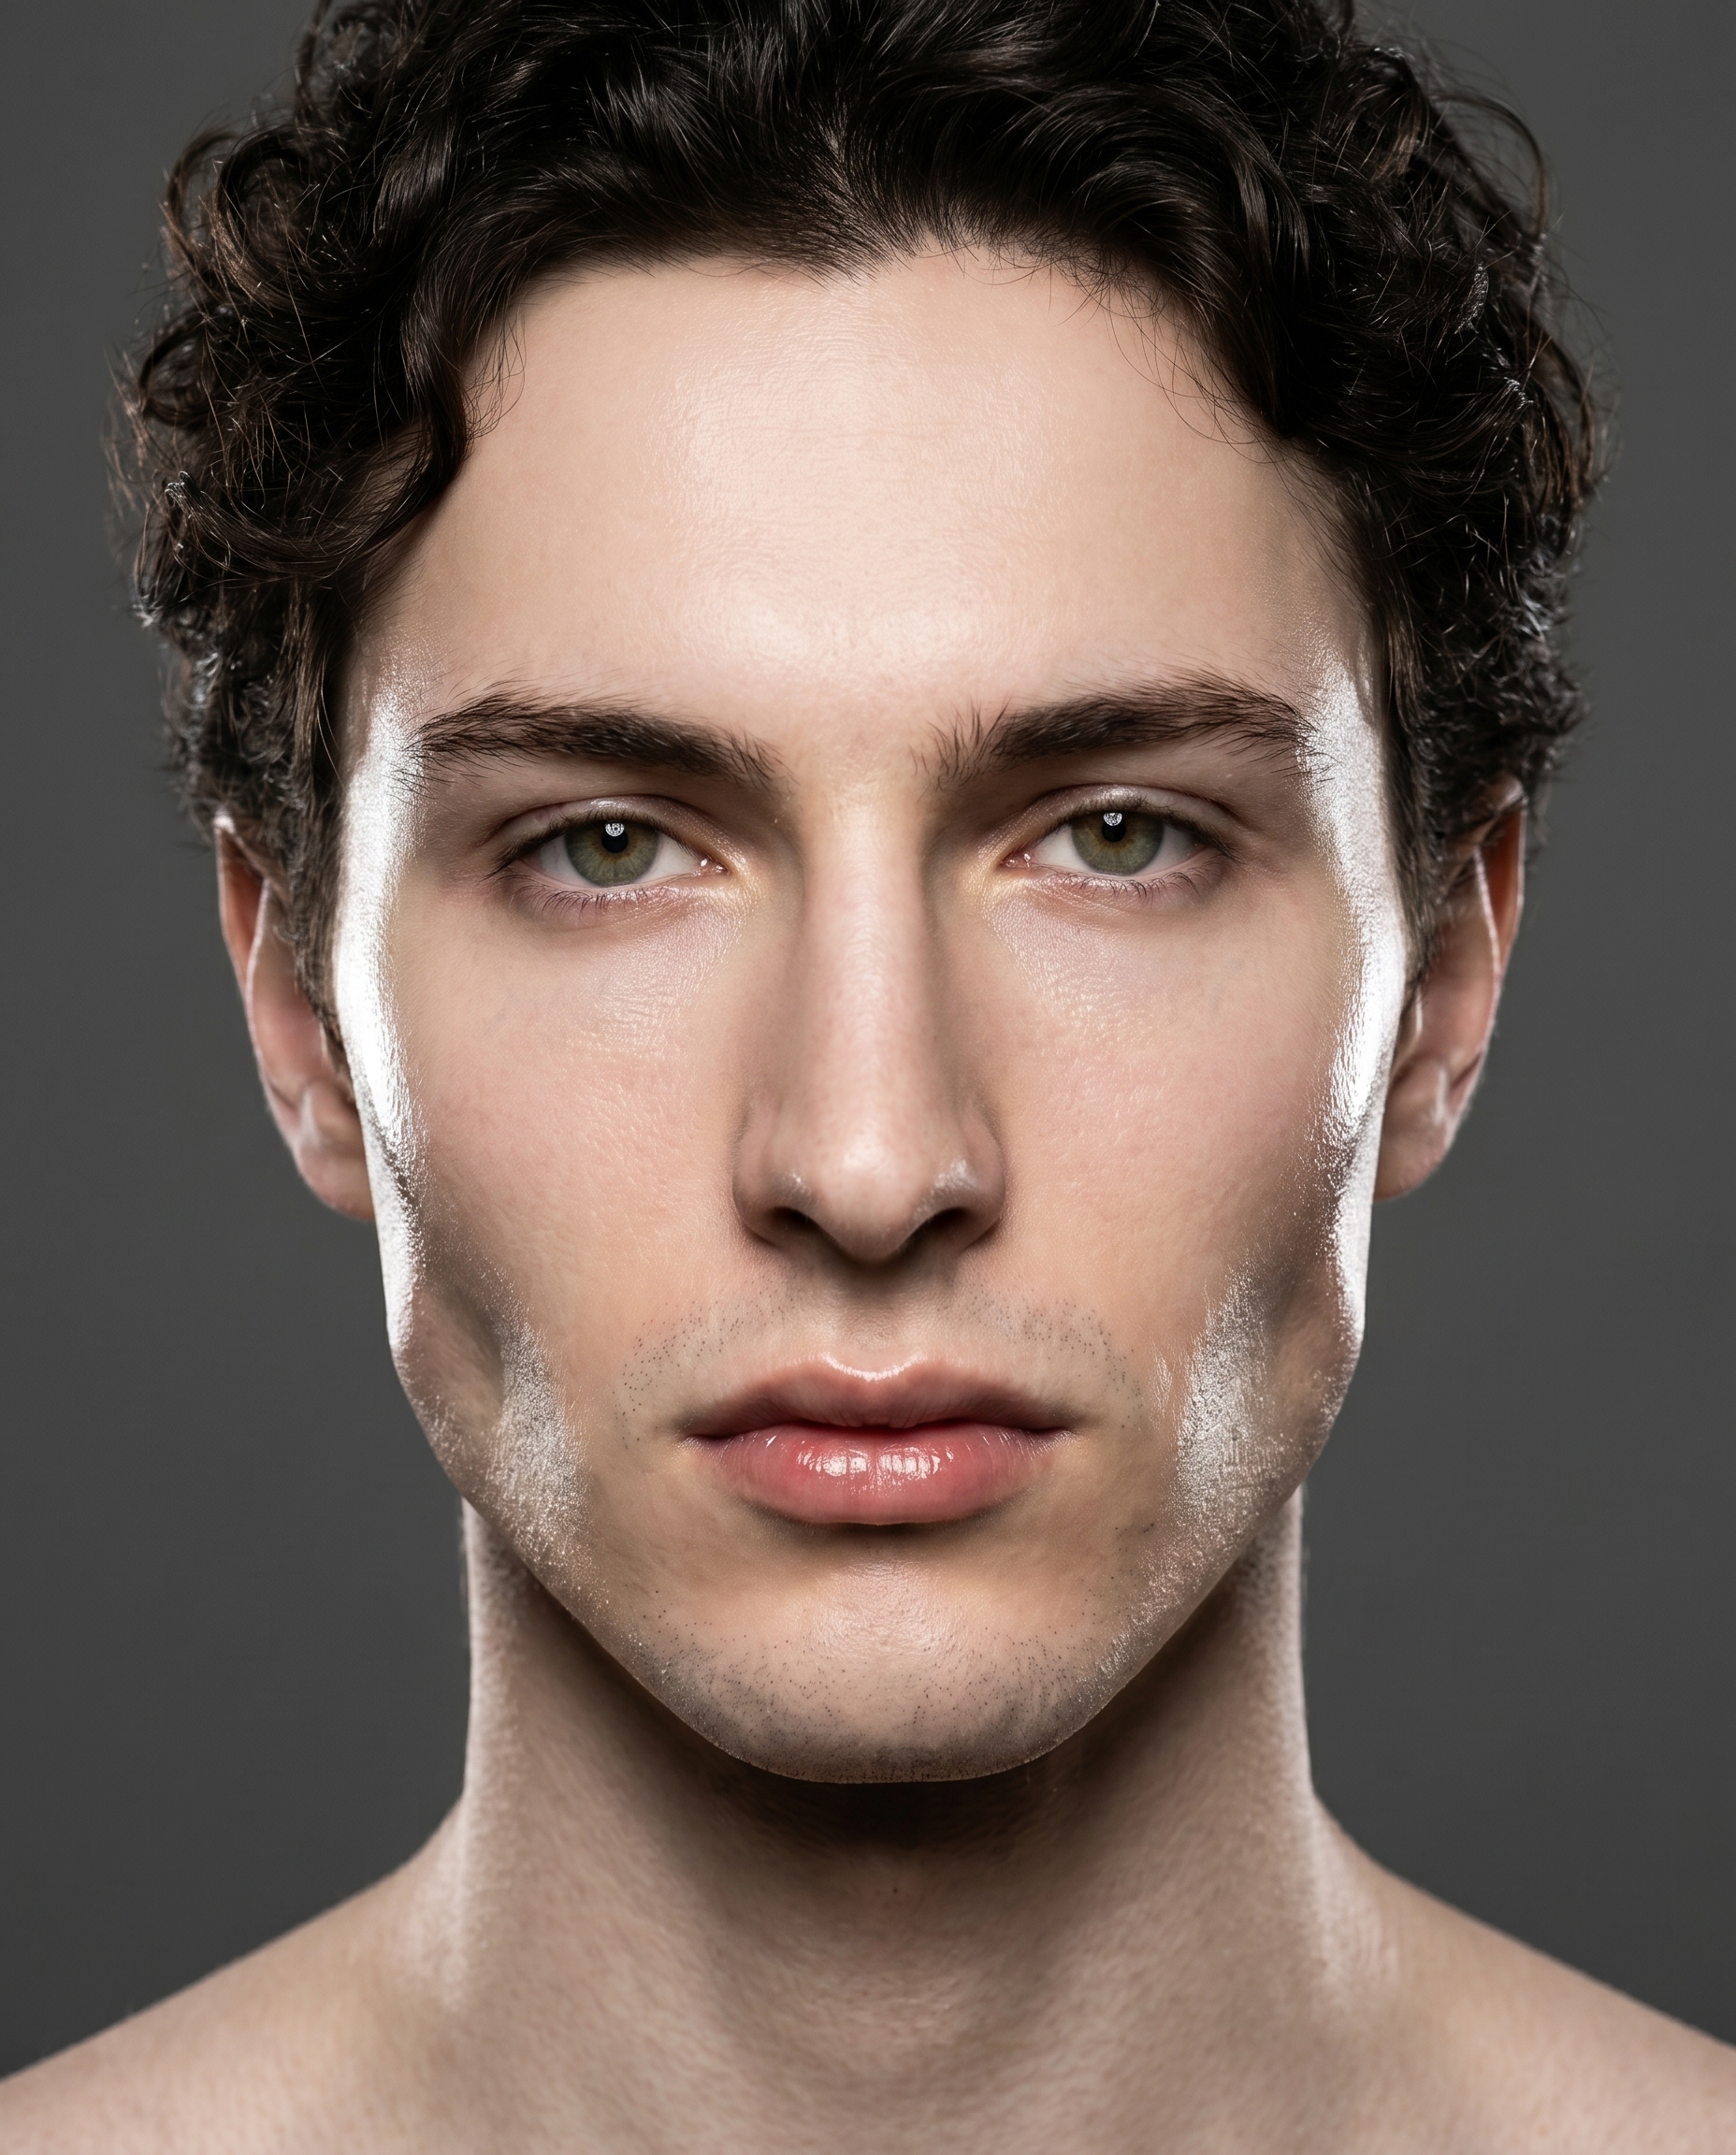
I wanted to see how close Studio could get to a real beauty campaign shot — the kind that sits on the cover of a fashion magazine and makes you stop scrolling. Not a nice headshot. Not a clean LinkedIn photo. The specific thing: luminous skin, defined jaw, a mood that reads as intentional.
So I set it up myself. My face, my character profile, a tight studio setup. Here's how it went.
How Studio actually works
Studio is form-first — meaning you don't have to write a single line of prompt to get a professional result. You pick from menus: Camera Lab, Pose Library, Camera Angle, Background, Makeup, Fashion, Location. Each section controls a different dimension of the shot. The "what to shoot" comes from those picks; the "how it's shot" — depth of field, compression, bokeh, lighting character — comes from Camera Lab. Once you've made your picks, Studio assembles a full prompt for you. You can edit it before generating if you want to, but most users never need to touch it.
What I picked from Studio
Sigma 135mm f/1.4 DG Art
This is a real lens — a telephoto prime with an f/1.4 maximum aperture that photographers refer to as a bokeh benchmark. Studio's catalog describes it as "extreme isolation" with a style of "dramatic compression, beauty/fashion sharp." What that means in practice: the background dissolves completely into smooth, creamy abstraction, and the face is rendered with the kind of sharp compression that makes cheekbones look architectural. I picked it because Camera Equipment Matters — swapping a generic lens for a named, real-world optic is one of the fastest ways to push a Studio result from "looks generated" to "looks shot." The Sigma 135mm is specifically a beauty and fashion workhorse. It earns its reputation here.
Beauty Dish
The lighting setup I chose. Studio's catalog describes it as "focused rim; skin pop" with a result of "glossy, fashion glow." A beauty dish is a bowl-shaped reflector that produces harder, more directional light than a softbox — it pops skin texture and separates the subject cleanly from the background. Pairing it with the Sigma's extreme compression gives you two things working together: the lens flattens the background into nothing, and the beauty dish makes the face the only source of visual weight in the frame. Lighting Sets the Mood — this combination is specifically the editorial beauty stack. I wanted that, and that's what I got.
The assembled prompt
This is what the form composed for me — you don't have to write any of this yourself unless you want to.
Close-up portrait of a tall, muscular young man with long dark curly hair, porcelain cool-toned skin, green almond eyes, and full lips. Shot with extreme telephoto compression that isolates his face against a seamless charcoal studio background, rendering every background detail into smooth, creamy abstraction. A focused beauty dish casts a sharp, glossy rim of light that makes the skin luminous and pops cheekbones with a fashion-editorial glow. Angular jaw is defined by precise shadow. Expression is cool, direct, unreadable. Mood: high-gloss campaign, sharp and cinematic.One thing worth noting: I picked myself as the character in Studio's character selector, which automatically loaded my reference photos and locked my identity — face, skin tone, hair, body — into the generation. That's the character reference-image system working as intended. If you have AI characters built on ArtCoreAI, you can do exactly the same thing: select your character, and Studio locks their look before the form even opens.
What I noticed
Three things stood out.
First, the compression. The Sigma 135mm did real work here. The background didn't just blur — it dematerialized. That's the difference between picking a named optic and leaving the camera section on default.
Second, the jaw definition. The beauty dish's directional quality created a shadow line along the jaw that I wasn't sure Studio would nail at this resolution. It did. The angular jaw in my character profile translated into something that reads as intentional lighting craft, not a generated guess.
One thing I'd push further next time: the expression. "Cool, direct, unreadable" is a safe editorial call, but I'd try a slightly different pose refinement — maybe drop the chin angle a fraction, open the eyes a touch more. Studio's Pose Library has the controls for that. Worth a second run.
What it cost
- Credits spent: 2.70
- What you'd pay: $0.27
- Generation time: ~25s
That's a 4:5 beauty campaign portrait at full quality. Twenty-five seconds and twenty-seven cents.
If you want to run this yourself, go to Studio, pick a lighting setup, pick a camera body, hit generate — the form does the rest. No prompt required.
— David
See what others are making


Each image links to the character's profile. The Studio — Technical Guide has the full showcase plus deeper documentation on every component.