Grunge Y2K Self-Portrait: What a Low Angle and Smudged Makeup Actually Do
I wanted to shoot myself from below, makeup deliberately wrecked, grunge energy all the way. Here's what Studio built — and what it cost.
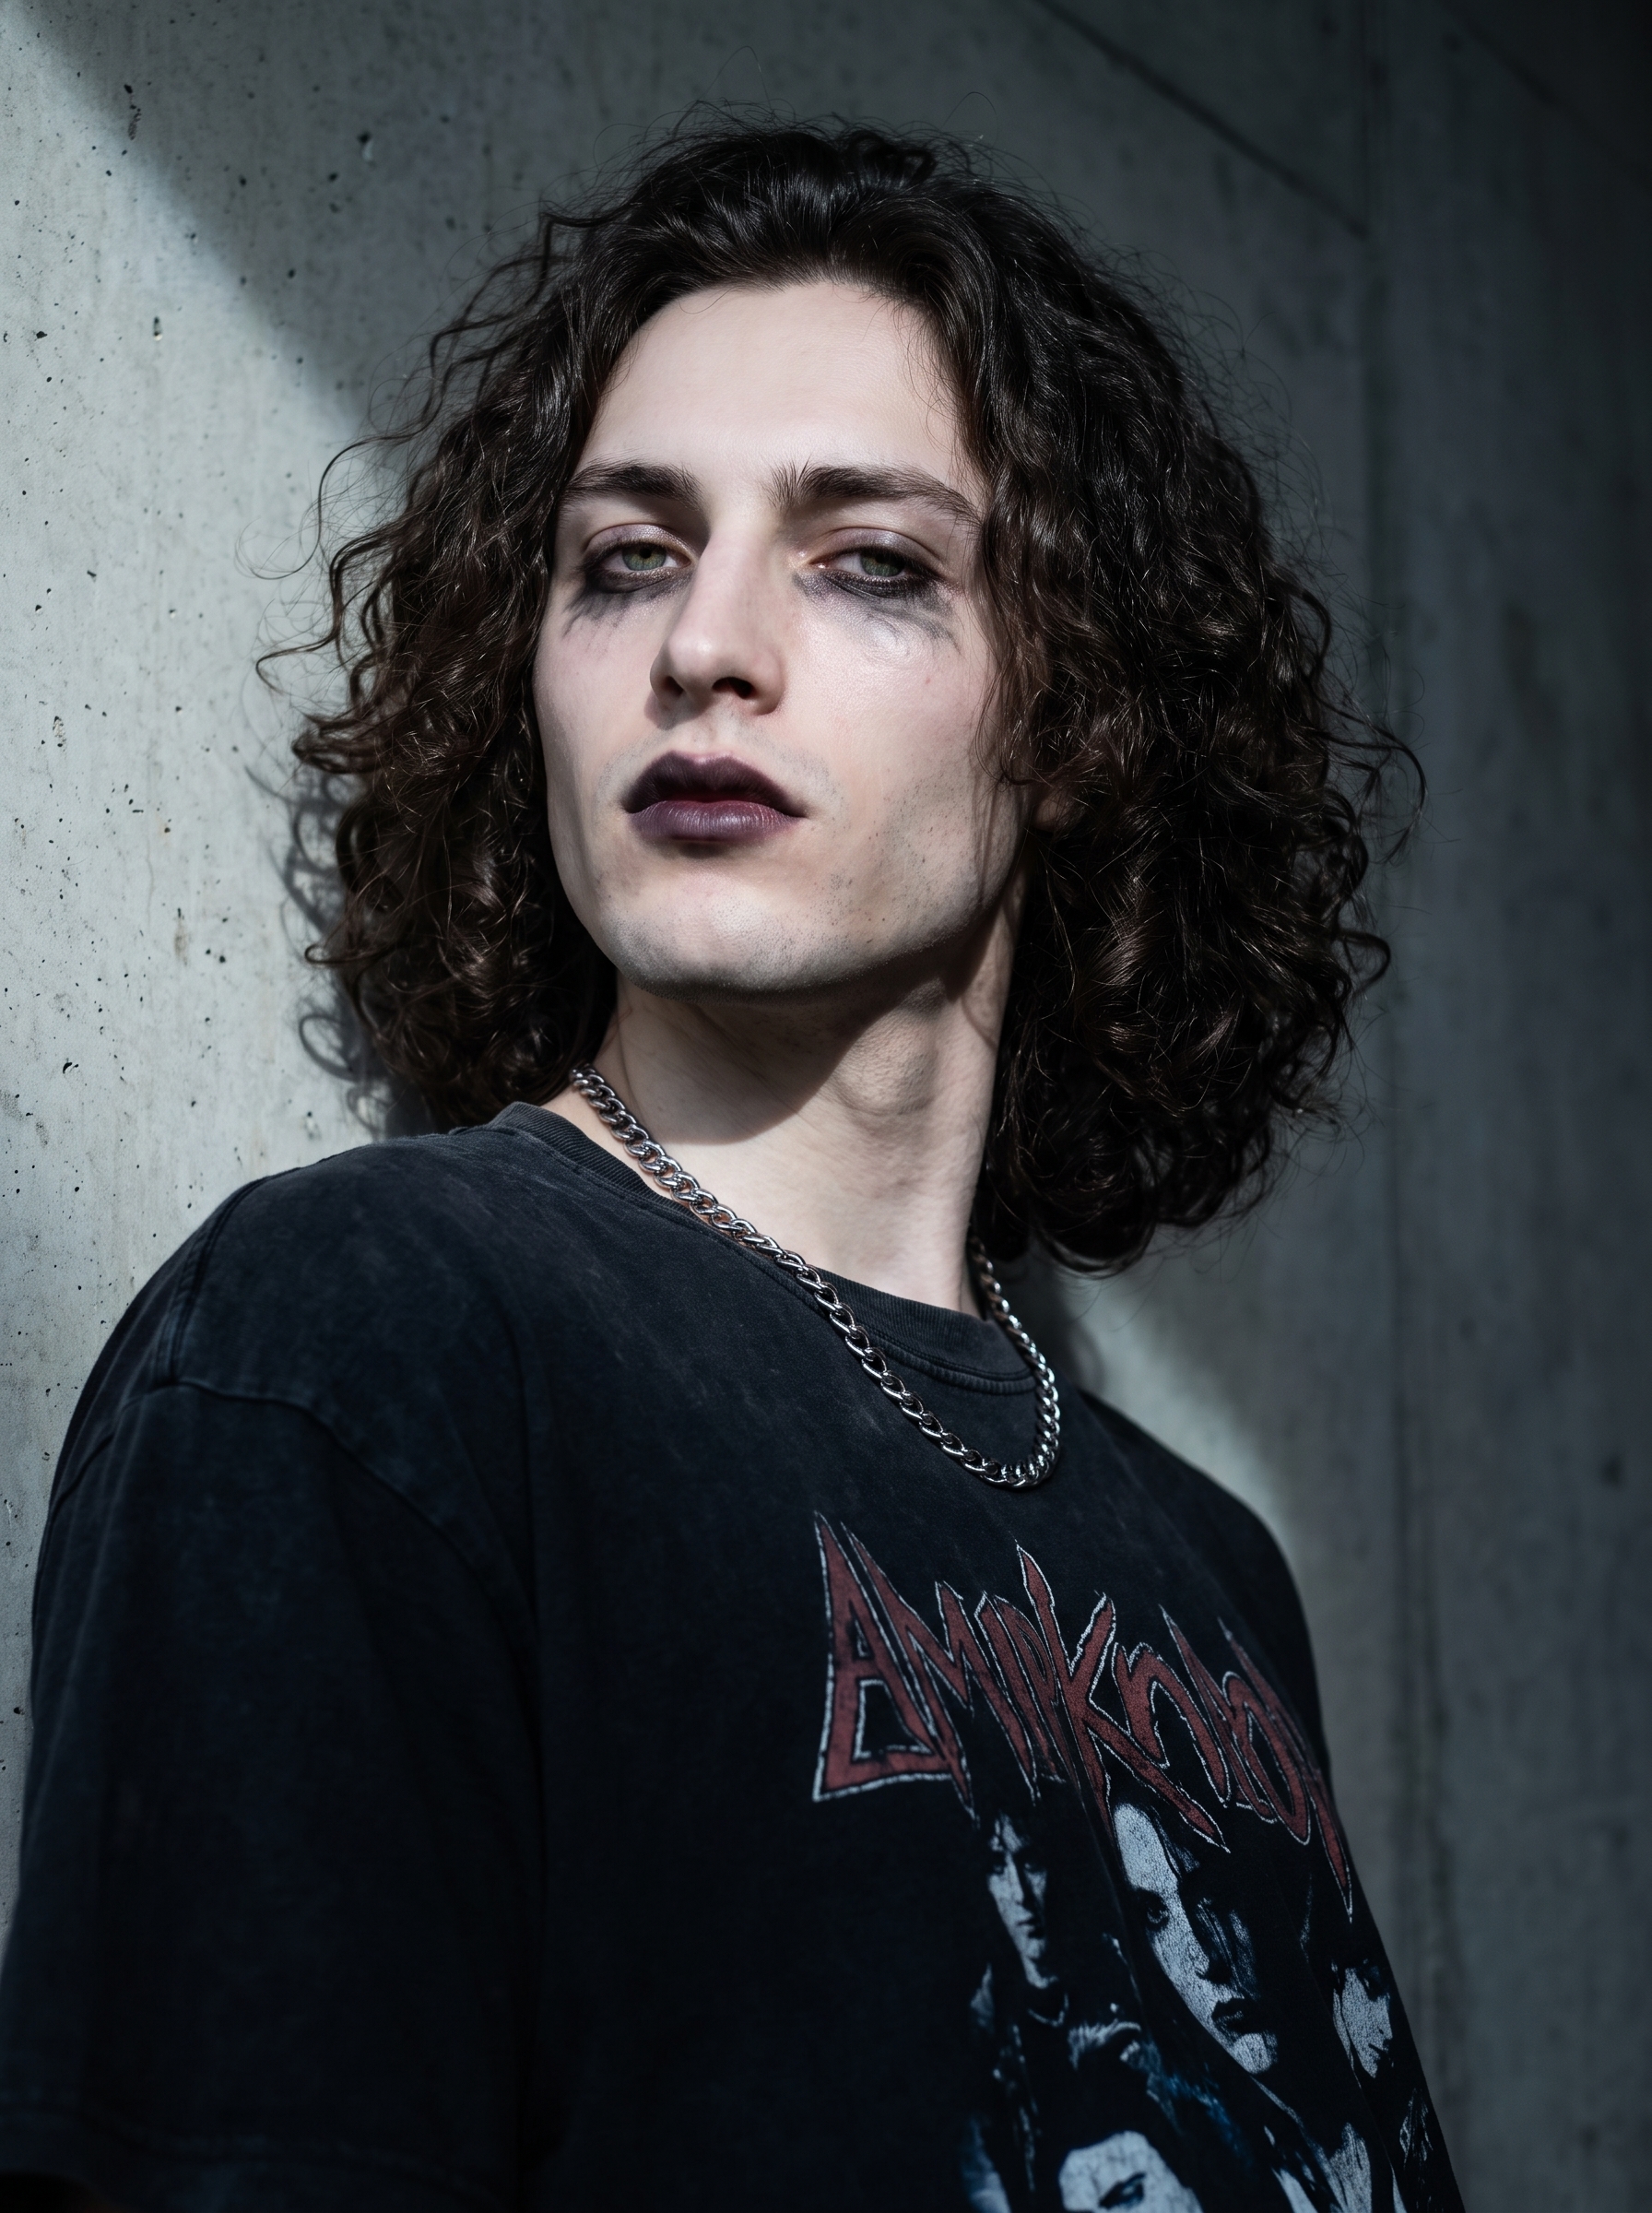
I had a specific image in my head: shot from below, looming in the frame, makeup that looks like it survived a three-day festival. Not polished. Not aspirational. Just raw, deliberate grunge — Y2K heroin chic but with a modern editorial edge.
So I opened Studio, picked myself as the character, and started picking from the form.
How Studio actually works
Studio is form-first. You don't open a blank text box and start writing — you pick from menus. Camera Lab for your equipment and lighting. Pose Library for body and movement. Camera Angle for your vantage point. Background, Makeup Artist, Fashion Designer, Location — each one a structured section you fill in by choosing from a catalog. When you're done picking, Studio assembles everything into a prompt for you. You can read the assembled prompt before generating, edit it if you want to, but most people never need to touch it. The form does the writing. You do the creative directing.
What I picked from Studio
Grunge Revival 90s (Makeup Artist)
This is one of Studio's named makeup looks. The catalog describes it as "smudged, undone — dark, messy, heroin chic revival." In practice that meant kohl liner that isn't sitting where it's supposed to, an uneven matte dark lip, and an overall feeling that the makeup was applied hours ago and has been living its life since then. I picked this because the whole point of the shot was deliberate imperfection. Clean makeup would have killed the mood instantly. The smudged, raw quality is exactly what pulled the editorial grunge energy into the result — you can see it most clearly around the eyes, where the liner has that blurred, worn-in look.
Low Angle (Camera Angle)
Studio's Camera Angle section gives you 12 named presets plus full manual control via azimuth, elevation, and distance sliders on a 3D globe. I went with the preset called Low Angle — catalog description: "power, heroism, dominance." Camera positioned at chest height, tilting upward, so I'm looking down into the lens. It changes the psychology of a portrait completely. You don't get a neutral subject. You get someone who takes up space. Paired with the grunge makeup, that power read felt complicated in the right way — not heroic exactly, more like dangerous quiet.
The operating tip I kept in mind here: Lighting Sets the Mood. Studio's best-results guidance says to pair your camera setup with a lighting style deliberately — Rembrandt for drama, Low-Key for noir. I went with a single harsh side light in a low-key setup, and that choice did as much work as the angle. The hard shadow across half the face made the smudged makeup read as intentional art direction rather than just messiness.
The assembled prompt
This is what the form composed for me — you don't have to write any of this yourself unless you want to.
A tall young man with long dark curly hair and porcelain cool-toned skin, shot from a low angle looking up, camera positioned at chest height tilting upward so he looms in the frame with quiet intensity. He wears a washed-out oversized band tee, silver chain. His makeup is smudged and undone — dark kohl liner blurred beneath the eyes, uneven matte dark lip, raw and deliberately imperfect. Concrete wall behind him, single harsh side light, moody low-key atmosphere. Editorial grunge energy.You can see exactly what the form built. The equipment and angle choices translated into camera direction. The makeup pick translated into a specific description of what "smudged" means. None of that required me to write from scratch.
Worth knowing while you're in there
The reason my face and body locked into this result is Studio's character reference system. When I picked myself as the character, my reference photos auto-loaded — up to three saved images that tell the model who I am: my face, skin tone, curl pattern, all of it. The model carries that identity through the shot. If you've built an AI character on ArtCoreAI, you can do the exact same thing — pick your character, let the refs load, and every Studio generation maintains visual continuity without you doing anything extra.
What I noticed
The low angle did more than I expected. There's a compression effect — I look taller, the concrete wall behind feels closer, the frame feels tighter. Combined with the harsh side light, the image reads editorial immediately, not just "AI portrait."
The smudged liner is the detail that made me look twice. It's not symmetrically smudged, which would have read as stylized. It's unevenly smudged, which reads as real. That specificity surprised me.
If I ran this again, I'd push the fashion pick harder — the band tee and silver chain work, but I'd want to go into the Fashion Designer section and lock in a specific fabric and silhouette rather than leaving it to the prompt description. More form control, less textual suggestion.
What it cost
- Credits spent: 2.70
- What you'd pay: $0.27
- Generation time: ~24 seconds
One credit is $0.10 on ArtCoreAI. A 4K version of this shot would cost more — but for a social-ready iteration, 2.70 credits is where I'd spend them every time.
If you want to run this yourself: open Studio, pick a character, pick a lighting setup, pick a body angle, hit generate. You don't need to write a prompt. The form does it.
— David
See what others are making


Each image links to the character's profile. The Studio — Technical Guide has the full showcase plus deeper documentation on every component.