Rain on the Glass: A Night Café Portrait in Studio
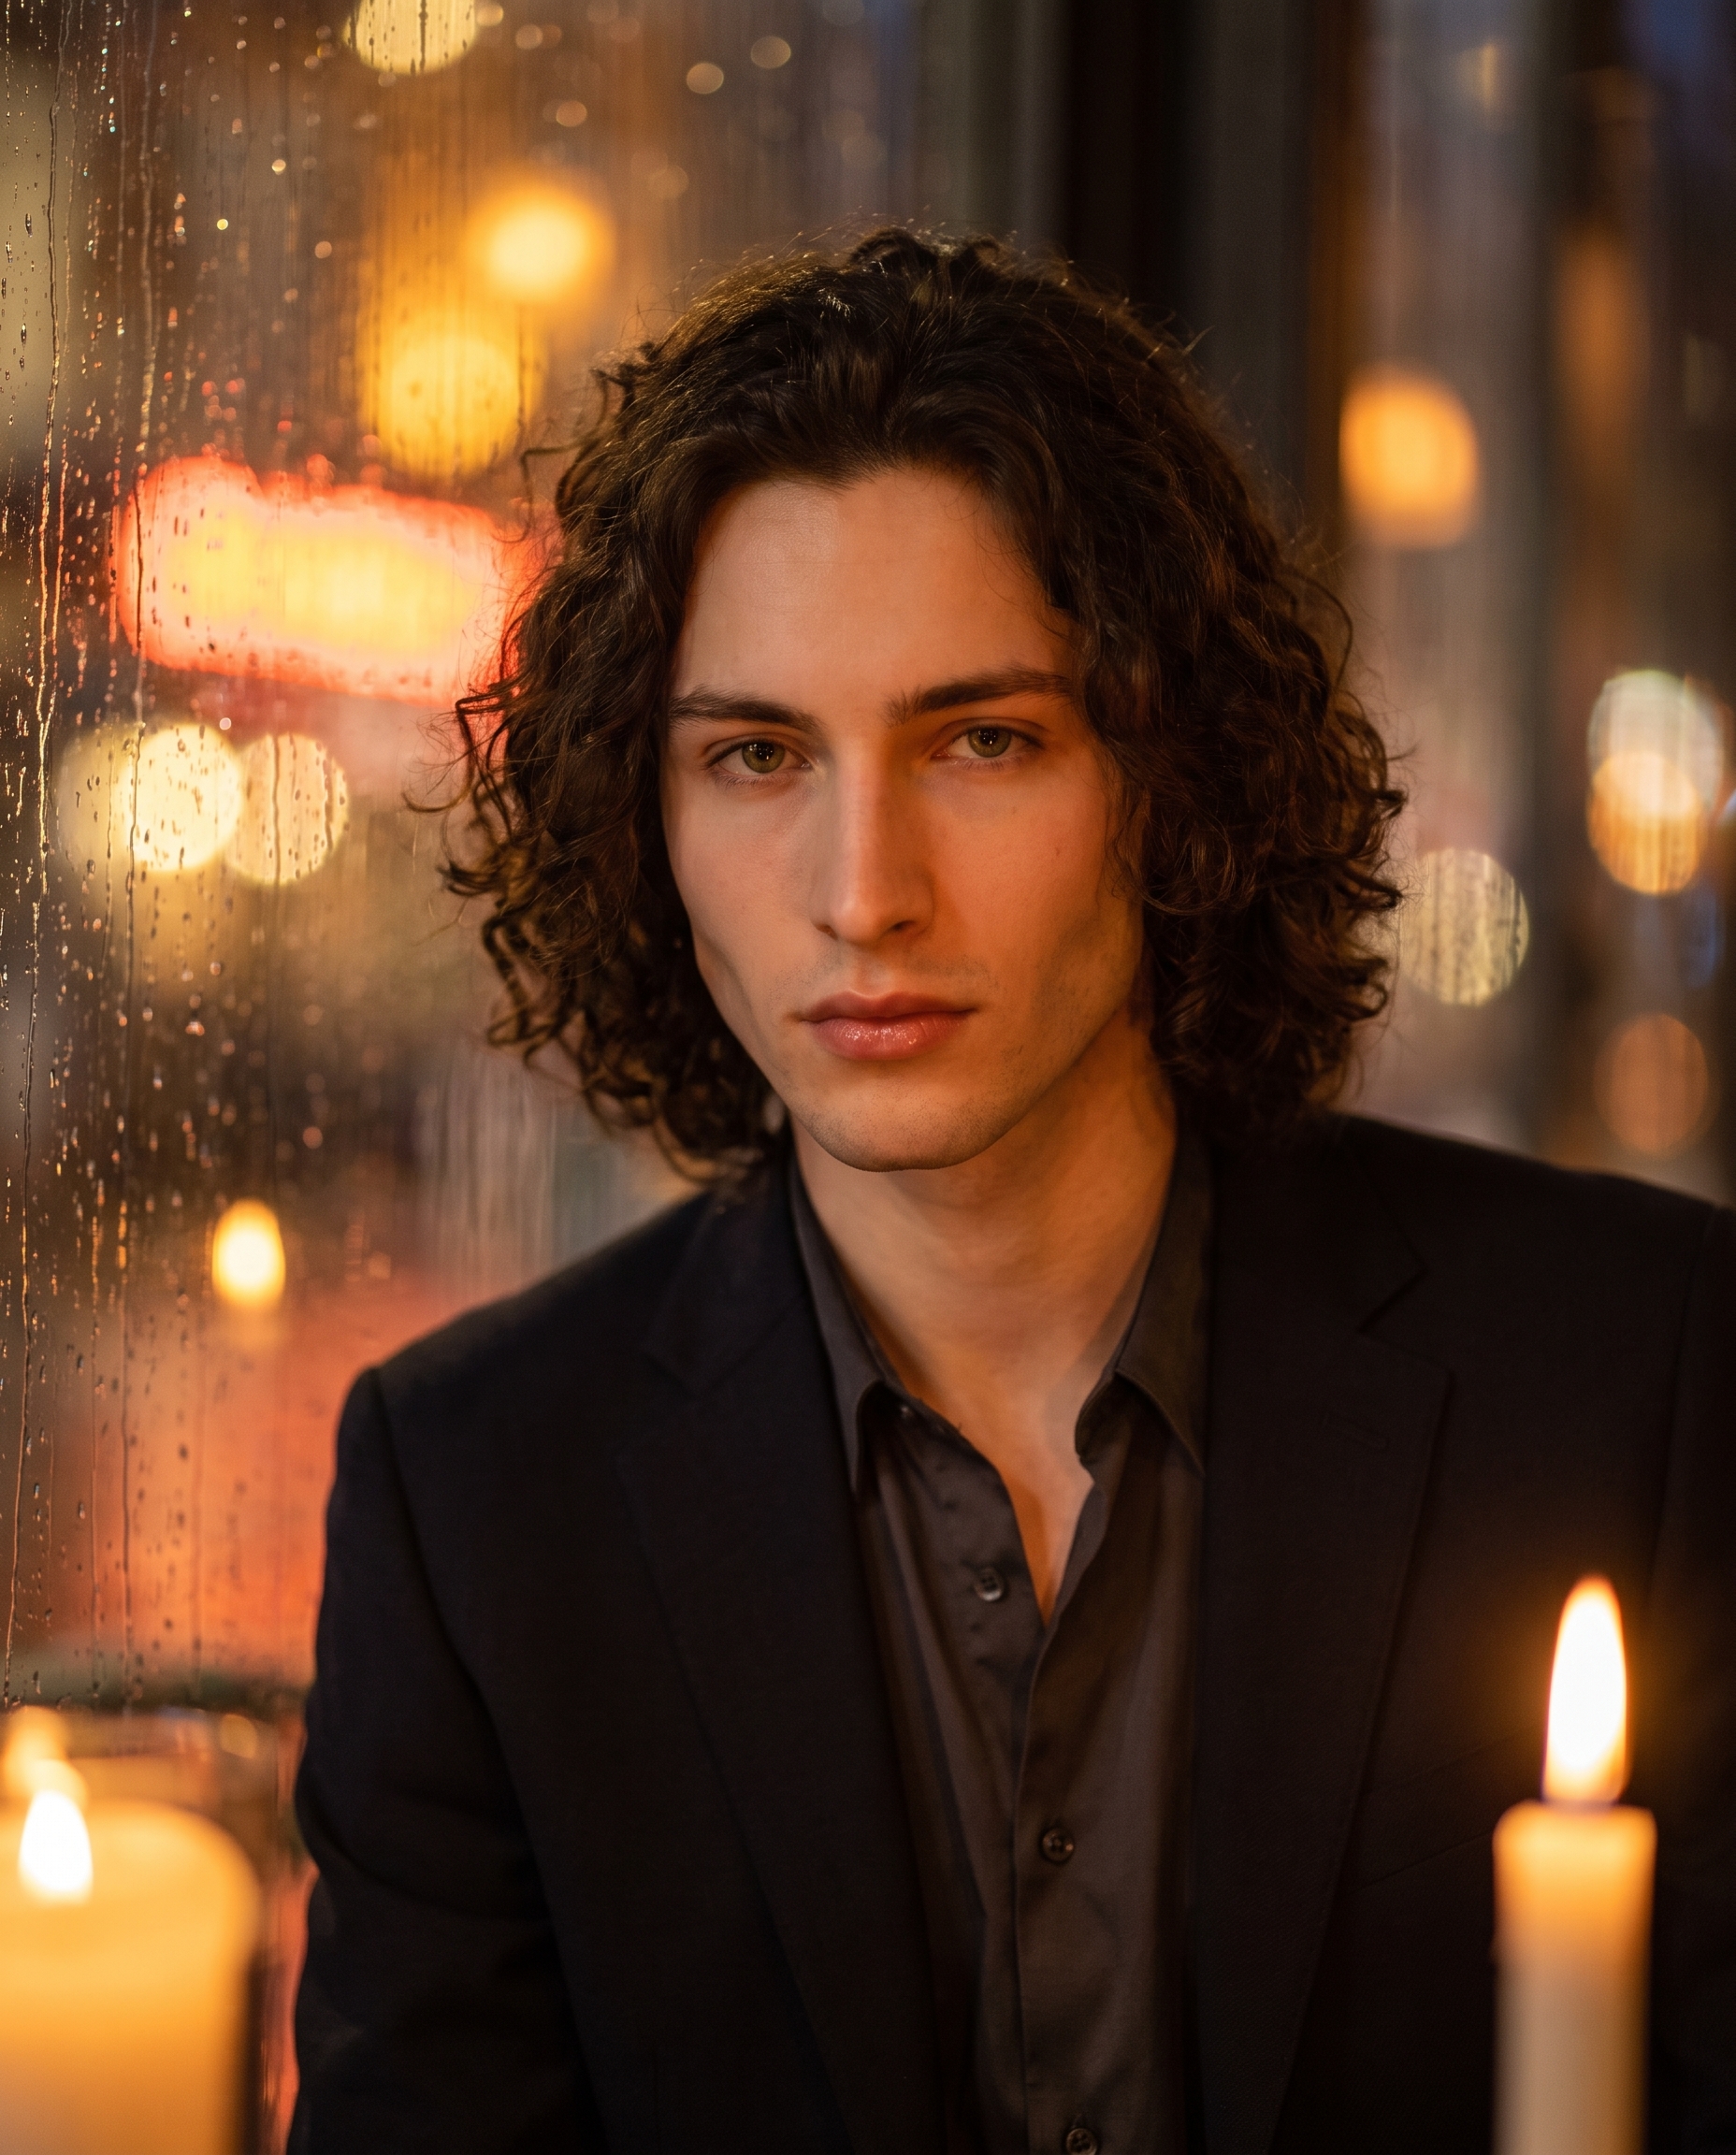
I wanted moody, intimate, editorial — warm candlelight, rain-streaked glass, razor-thin depth of field. Here's what Studio built for me.
I had a specific image in my head: me, sitting at a café window late at night, face lit by candlelight, rain dissolving the street behind me into soft neon circles. The kind of shot that looks like it took two hours to light. I wanted to see if Studio could get there in one take.
It did.
How Studio actually works
Before I walk through my picks: Studio is a form first, a prompt tool second. You open it, you load a character, and then you work through sections — Camera Lab, Pose Library, Camera Angle, Background, Makeup, Fashion, Location. Each section has named catalog entries you click, not text you type. When you've made your picks, Studio assembles a structured prompt for you. You can read it, edit it, or just hit generate without touching a word. Most users never touch it. The form is the workflow — the assembled prompt is just what's happening under the hood.
What I picked from Studio
85mm — Portrait sweet spot
The catalog describes it as "portrait sweet spot; flattering compression — isolated subjects, creamy backgrounds." That compression is the whole point for this shot. An 85mm focal length narrows apparent depth, pushing the background further away and pulling the subject cleanly forward. It also flatters facial proportions — no wide-angle distortion, no exaggerated nose or forehead. For a close café-window portrait where the face is the subject and the rain-streaked glass is the mood, this is the obvious call. Studio's Camera Equipment Matters tip is exactly right here: picking a real focal length isn't cosmetic — the AI actually simulates what 85mm compression does to the scene geometry.
ƒ/1.4 — Wide open
ƒ/1.4 is as wide as most portrait lenses go. At that aperture, depth of field becomes almost surgical — you can be sharp on someone's eyes and soft on their ears. That's what I wanted: pin-sharp green eyes, everything behind the glass dissolving into watercolor bokeh circles. The neon reflections in the rain become abstract light, not readable street signs. Paired with the 85mm, this is a classic editorial look — used in fashion and portrait photography for exactly this quality of separation.
Character reference — locked to me
I picked myself as the character, which auto-loaded my reference photo into the generation. Studio uses that to lock my face, skin tone, and build into the result — so the young man with dark curly hair and porcelain skin in that image isn't a random model. That's the reference system doing its job. If you're building AI characters on the platform, this is how you maintain visual continuity across every shoot: load the character, the identity stays consistent.
What the form composed
This is what Studio assembled from my picks — you don't have to write any of this yourself unless you want to:
A young man with dark curly hair and porcelain skin sits at a café window late at night, his face lit by warm amber candlelight. Rain streaks down the glass behind him, blurring the neon reflections of the street into soft pools of orange and gold. Shot on 85mm — the flattering compression narrows his shoulders against the background, pulling him cleanly forward. Wide open at ƒ/1.4, the depth of field is razor-thin: his green eyes are pin-sharp while the rain-blurred bokeh dissolves into watercolor circles behind him. Moody, intimate, editorial.I left it exactly as assembled. Didn't change a word.
What I noticed
What worked: The bokeh. The rain-streaked glass read exactly as I wanted — neon dissolving into warm circles, the kind of depth that takes real glass and real light to achieve. The candlelight on the face is warm without going orange-cast; there's actual shadow modeling on the cheekbones.
What surprised me: How well the 85mm compression translated. The shoulders genuinely read narrower against the background — the spatial relationship between subject and scene is correct, not approximated.
What I'd adjust next run: I'd try a slightly cooler background — push the street neons toward blue-green while keeping the candlelight amber. More color contrast between foreground warmth and background cool. One more form pick away.
What it cost
- Credits spent: 2.70
- What you'd pay: $0.27
- Generation time: ~29s
That's 4K output — print-ready resolution — for under thirty cents and half a minute. I ran this at 4:5 ratio, which is the format I'd use for Instagram portrait posts or editorial cards.
If you want to run something like this yourself: go to Studio, pick a character, open Camera Lab, select 85mm and ƒ/1.4, drop in a rainy window background, and hit generate. You don't have to write the prompt. The form does it.
— David
See what others are making


Each image links to the character's profile. The Studio — Technical Guide has the full showcase plus deeper documentation on every component.