Butterfly Light, Extreme Bokeh, and My Own Face
I wanted a single high-fashion macro portrait — all bokeh, no distractions. Here's exactly what I picked in Studio and what it cost me.
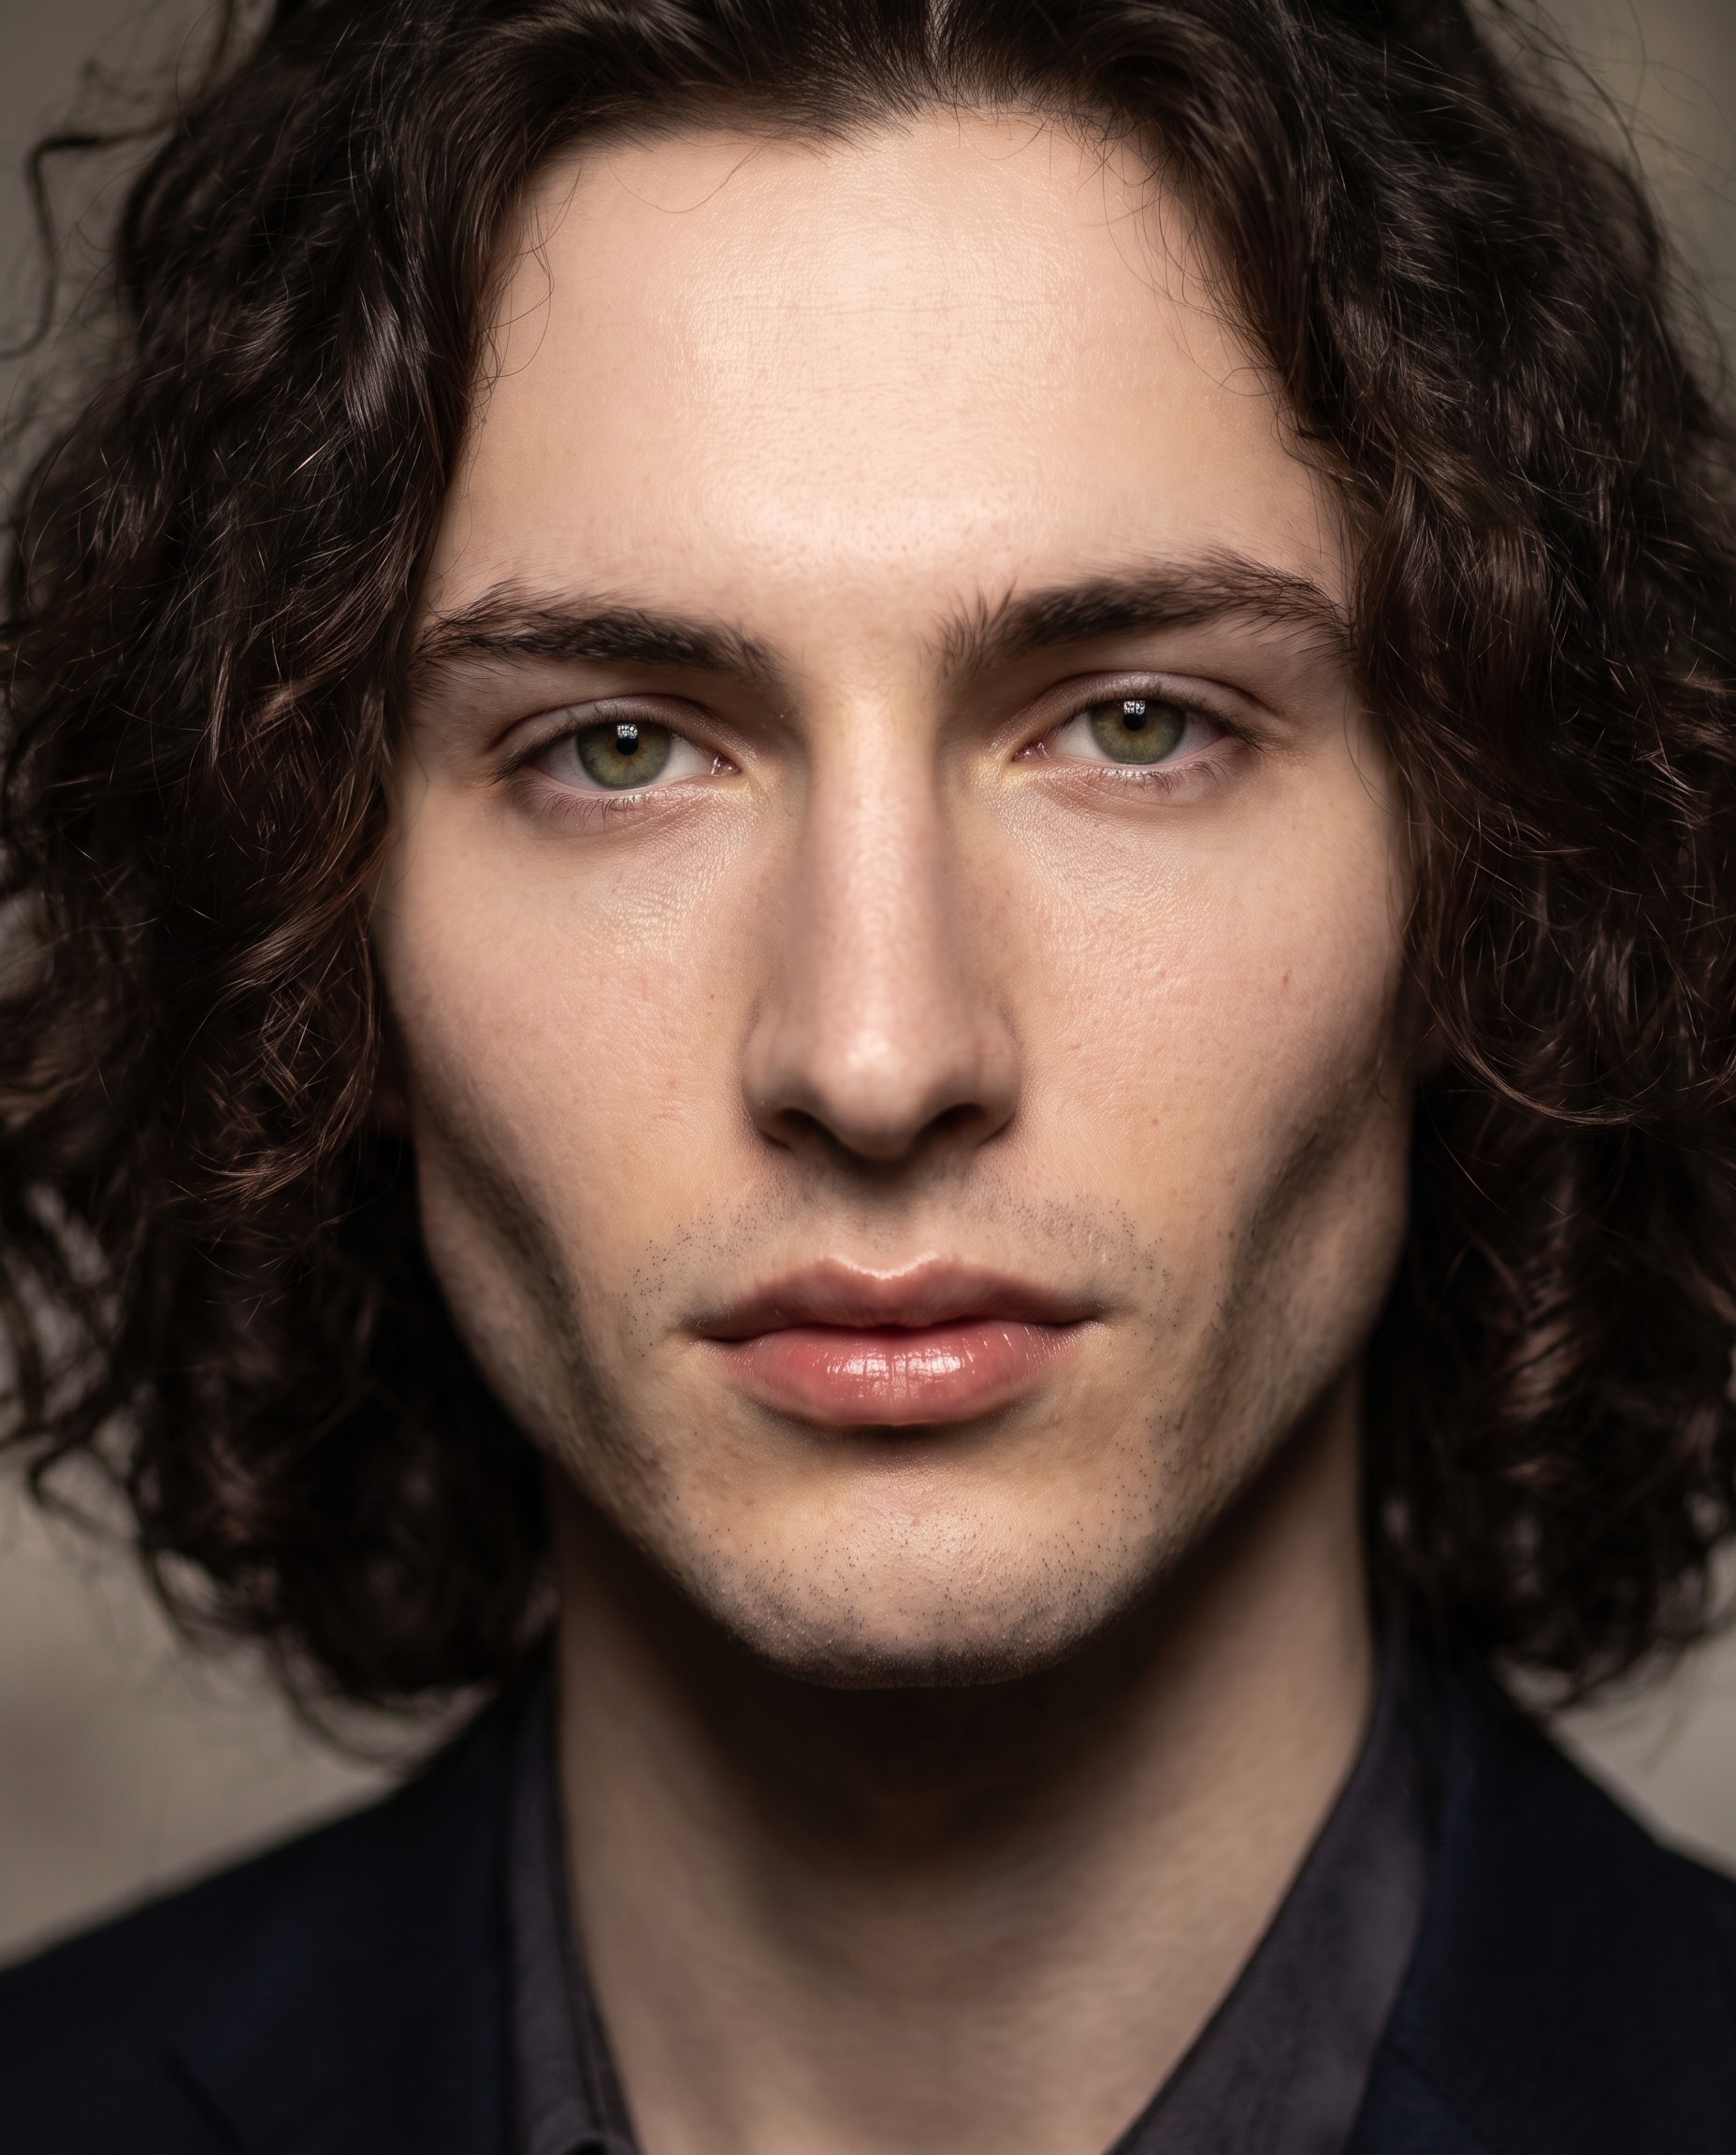
I wanted to make one image today. Not a scene, not a story — just a face. Mine, close up, lit like an editorial cover, with the background dissolved into nothing but cream and blur.
The specific idea: Butterfly lighting, extreme bokeh, green eyes sharp enough to read. Everything else secondary.
How Studio actually works
Before I walk through my picks — if you've never opened Studio, here's the short version of how it works.
You don't write a prompt. You pick from menus: Camera Lab for your equipment and lighting, Pose Library for body position, Camera Angle for where the lens sits, Background for what's behind you, Makeup, Fashion, Location. Each section is its own set of named choices. Studio reads every pick you've made and composes an assembled prompt for you. The "what to shoot" comes from how you describe the subject; the "how it's shot" comes from Camera Lab. You can edit the assembled prompt before hitting generate — but most users never need to touch it.
What I picked from Studio
Butterfly lighting was the only pick I really needed to commit to before anything else.
The catalog describes it as: overhead key light, cheek shadows, result — glamour, symmetric beauty. That's accurate and also undersells it a little. What Butterfly actually does is sculpt the face from above. The light source sits directly over the subject, angling down, which creates a small shadow beneath the nose (the "butterfly" shape that gives the setup its name) and pulls the cheekbones into relief. On a face with angular jaw and high cheekbones — mine — it hits precisely the geometry you want to emphasize.
I picked it because it's the setup that beauty and fashion photographers reach for when they want glamour without drama. Rembrandt is moody. Butterfly is precise. I wanted precision.
The operating tip I keep coming back to: lighting sets the mood more than almost any other single choice in Studio. You can have the same pose, same background, same camera — swap the lighting and you have a different photograph. If you're going into Studio for the first time and you're not sure where to start, pick your lighting style first and build the rest around it.
I also locked my identity using Studio's character reference system. When you select your character in Studio, up to three of your saved reference photos auto-load and the model uses them to maintain your face, body type, and skin tone across the generation. I picked myself as the character — which auto-loaded my reference photos and kept the result recognizably me, not a generic face that loosely matches a description. If you're building your own AI character on the platform, this is the feature that makes the difference between a consistent persona and a one-off.
What the form composed
This is what Studio assembled from my picks — you don't have to write any of this yourself unless you want to:
Close-up beauty portrait of a tall muscular young man with long dark curly hair, porcelain skin, and sharp angular jaw — lit from directly overhead with a classic Butterfly setup, casting soft symmetric shadows beneath the cheekbones and a delicate shadow under the nose, sculpting the face with glamorous precision. The background dissolves into ultra-creamy circular bokeh, razor-sharp focus locked on his green almond eyes and skin texture. Mood: high-fashion, intimate, editorial cover. Desaturated background, warm golden skin highlight.What I noticed about the result
Three things.
First — the bokeh is doing exactly what I wanted. The background isn't blurred, it's gone. Circular, creamy, no texture left. That level of dissolution at macro range is hard to describe in a prompt and easy to produce with the right camera setup in Studio.
Second — the Butterfly shadow under the nose is clearly visible and correctly proportioned. It's subtle enough to read as beauty lighting rather than a lighting accident. The cheekbone shadows are there. The geometry landed.
Third — the skin texture in the focus zone is sharper than I expected at this output size. The porcelain skin tone with the warm golden highlight reads as intended — cool base, warm catchlight. That contrast was in the prompt but I wasn't sure it would survive into the final render at this level of close crop. It did.
If I ran this again, I'd try a slightly wider Camera Angle — the current crop is almost too tight for the jaw line. A 3/4 angle with the same Butterfly rig would give me more of the face geometry to work with.
What it cost
- Credits spent: 2.70
- What you'd pay: $0.27 (1 credit = $0.10 on ArtCoreAI)
- Generation time: ~29s
For a 4:5 output at this resolution, that's a reasonable price for a shot I can use as a profile image, a thumbnail, or a character card. I ran one generation. This was it.
Worth knowing while you're in there: Studio also has a Location component that pulls real places from Google Maps — Street View reference photos included — so you can place your character at a specific real-world location. That's the next shoot I want to run.
If you want to try this yourself: go to Studio, load your character, pick a lighting setup from Camera Lab, pick a pose, pick your angle — and hit generate. The form does the rest. You don't need to write a single line of prompt to get a professional result.
— David
See what others are making


Each image links to the character's profile. The Studio — Technical Guide has the full showcase plus deeper documentation on every component.