Rim Light + Close-Up: Chasing Maximum Emotion in Studio
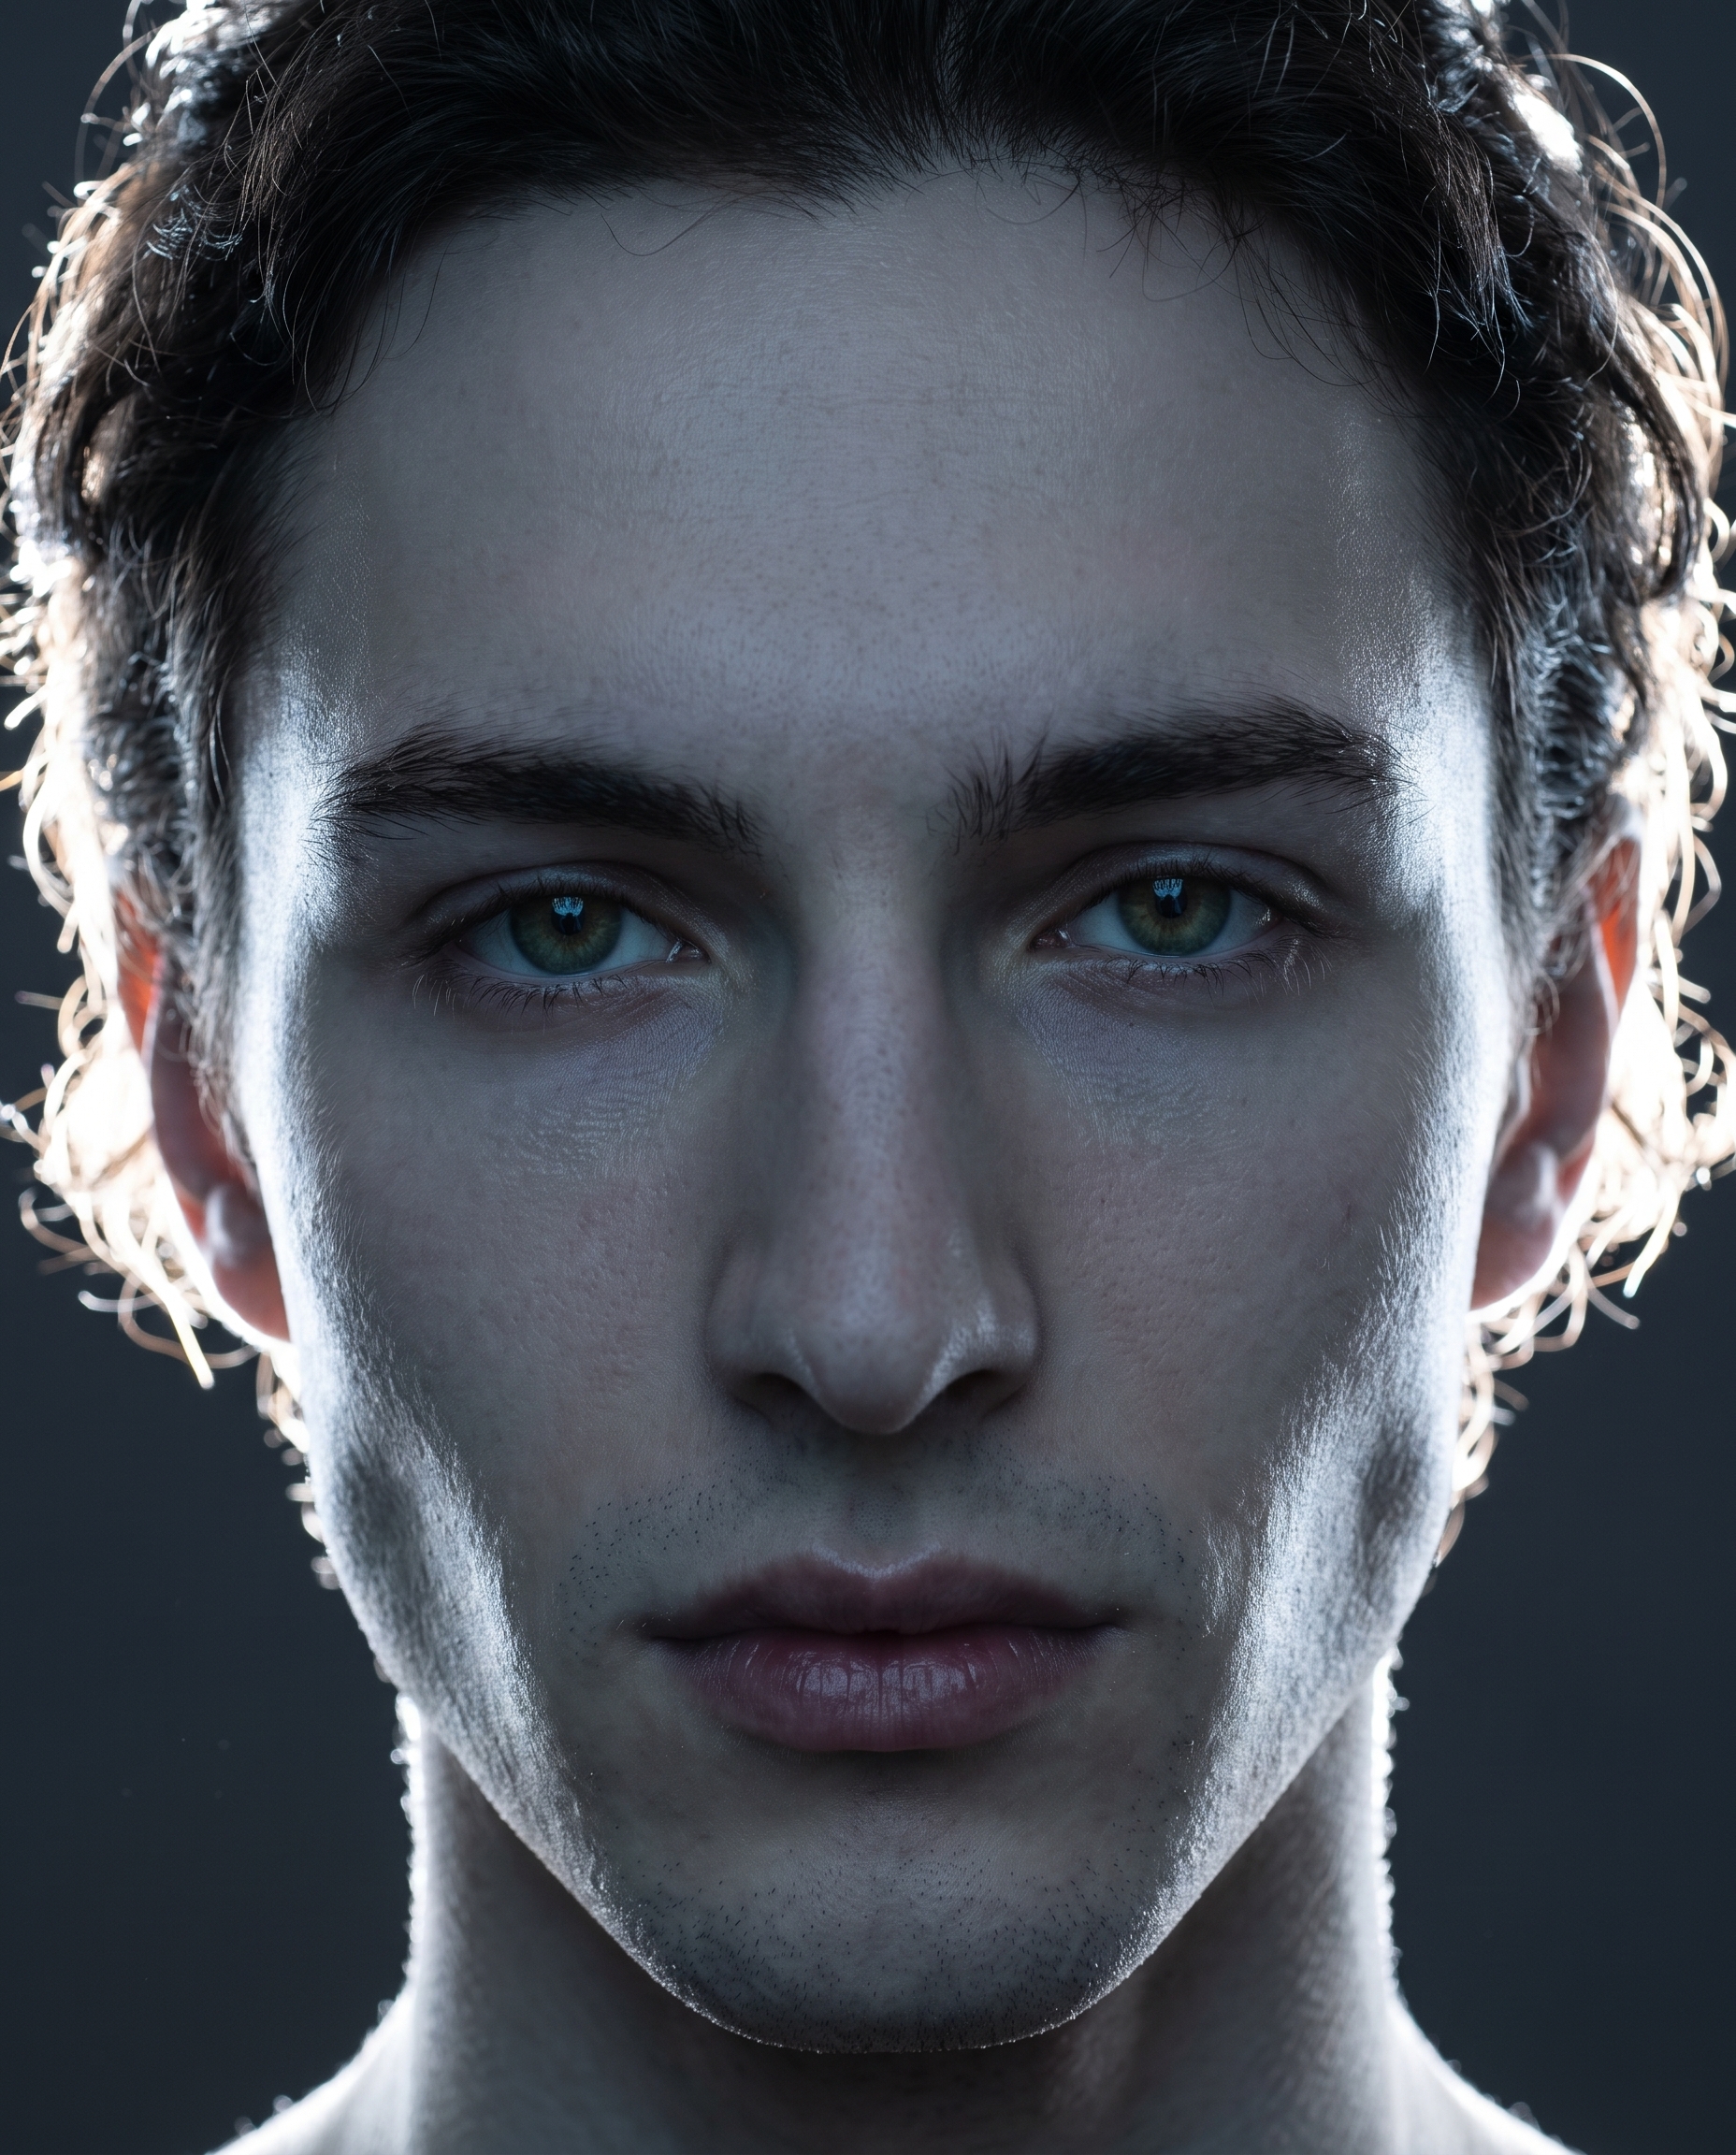
I wanted one shot — face filling the frame, hard rim light, nothing to hide behind. Here's what Studio built for me and what it cost.
I wanted to see how far I could push a single portrait before it tipped into something cinematic.
Not a lifestyle shot. Not a three-quarter pose with a soft background. Just my face, the frame, and a light source doing something dramatic. The idea was simple: maximum emotion, minimum distance, nothing to hide behind.
So I opened Studio and picked two things.
How Studio actually works
Studio is form-first — meaning you don't write a prompt to start. You pick from menus: Camera Lab for your equipment and lighting, Pose Library for body and expression, Camera Angle for where the lens sits, Background for what's behind you, Fashion for what you're wearing. Each section you fill in adds to an assembled prompt that Studio composes for you. The "what to shoot" comes from your picks; the "how it's shot" comes from Camera Lab. You can edit the assembled prompt before you generate — it's right there, fully readable — but most sessions I don't touch a word of it. The form does the thinking.
What I picked from Studio
Close-Up — This is the framing preset from the Pose Library catalog. The catalog description is "Face/detail, maximum emotion" and that's exactly why I chose it. No chest, no hands, no context — just the face filling the frame. The tighter you crop, the less the viewer can look away from. There's nowhere for the eye to wander, so every micro-expression reads loud. For a portrait that's supposed to feel intense, this was the only honest choice.
Rim Light — The lighting setup from Camera Lab. The catalog description: "Back edge; separation. Result: halo outline, 3D subject pop." What that means in practice is that the light source sits behind and to the side of the subject, wrapping a thin luminous edge around the hair and jawline — a halo that pulls the subject sharply off whatever's behind them. It creates the illusion of depth without needing a complex background. Paired with the charcoal backdrop I set, that separation went from subtle to stark.
This is what the Studio guide calls Lighting Sets the Mood in practice. Rim Light isn't a "pretty" setup — it's a confrontational one. It flattens the center of the face into shadow and turns the edge into light. That tension is the whole point of the shot.
Worth knowing while you're in there: I also selected myself as the character before building the shot. That's Studio's reference-images feature — pick any character from your roster, and their saved photos auto-load as identity references. My face, bone structure, skin tone, and hair were locked in before I touched a single setting. If you're building shots for your own AI characters, this is how you keep them visually consistent across every session.
The assembled prompt
This is what the form composed for me — you don't have to write any of this yourself unless you want to.
Extreme close-up of a young European man with dark curly hair, porcelain skin, and sharp angular jaw — face filling the frame, almond green eyes locked directly into the lens. A hard rim light wraps a luminous halo edge around his hair and jawline, pulling him sharply off a deep charcoal background. The lighting separates him with a 3D glow, leaving the center of his face in cool dramatic shadow. Moody, intense, editorial.I read it before generating. It was accurate. I hit generate.
What I noticed in the result
The rim worked harder than I expected. The halo effect on the hair is visible and clean — it's not a soft glow, it's a defined edge. That's the separation the catalog description promised, and it delivered.
The shadow on the center of the face reads as dramatic, not dark. This is the thing about Rim Light that surprises people the first time: you're not lighting the face, you're outlining it. The shadow isn't a failure of exposure — it's the point. The result reads editorial, not underexposed.
What I'd change: I'd push the charcoal background one stop deeper next time. The separation is strong, but a near-black background would make the rim halo even more pronounced. Small tweak, big visual difference.
What it cost
- Credits spent: 2.70
- What you'd pay: $0.27
- Generation time: ~29s
For a 4:5 shot I'd use in a portfolio or editorial context, that's not a number I spend much time thinking about.
If you want to try this yourself: open Studio, pick your character, set your framing to Close-Up, your lighting to Rim Light, and hit generate. The form handles the rest — you don't need to write a single word of prompt to get here.
— David
See what others are making


Each image links to the character's profile. The Studio — Technical Guide has the full showcase plus deeper documentation on every component.