Rim Light on a Rainy Rooftop: One Studio Setting That Changes Everything
I wanted a cinematic night editorial — rain-slicked city, dramatic light, one strong silhouette. Here's what Studio built from a single lighting pick.
I had a specific image in my head: a rooftop at night, city lights blurring into bokeh behind me, one hard light tracing the edge of my shoulders against a dark skyline. Not a beauty shot. Not a lifestyle photo. An editorial frame — the kind that looks like it belongs on the cover of something.
The question was whether Studio could get there from a single, well-chosen lighting pick. So that's what I tested today.
How Studio actually works
Studio is form-first — you don't have to write a single word of prompt to get a result. You open the tool, pick your character, and then work through the sections: Camera Lab, Pose Library, Camera Angle, Background, Makeup, Fashion, Location. Each pick feeds into an assembled prompt that Studio composes for you. The "what to shoot" comes from your character and scene choices; the "how it's shot" comes from Camera Lab. When you're ready, you can read and edit that assembled prompt — but most users never need to touch it. You just hit generate.
What I picked from Studio
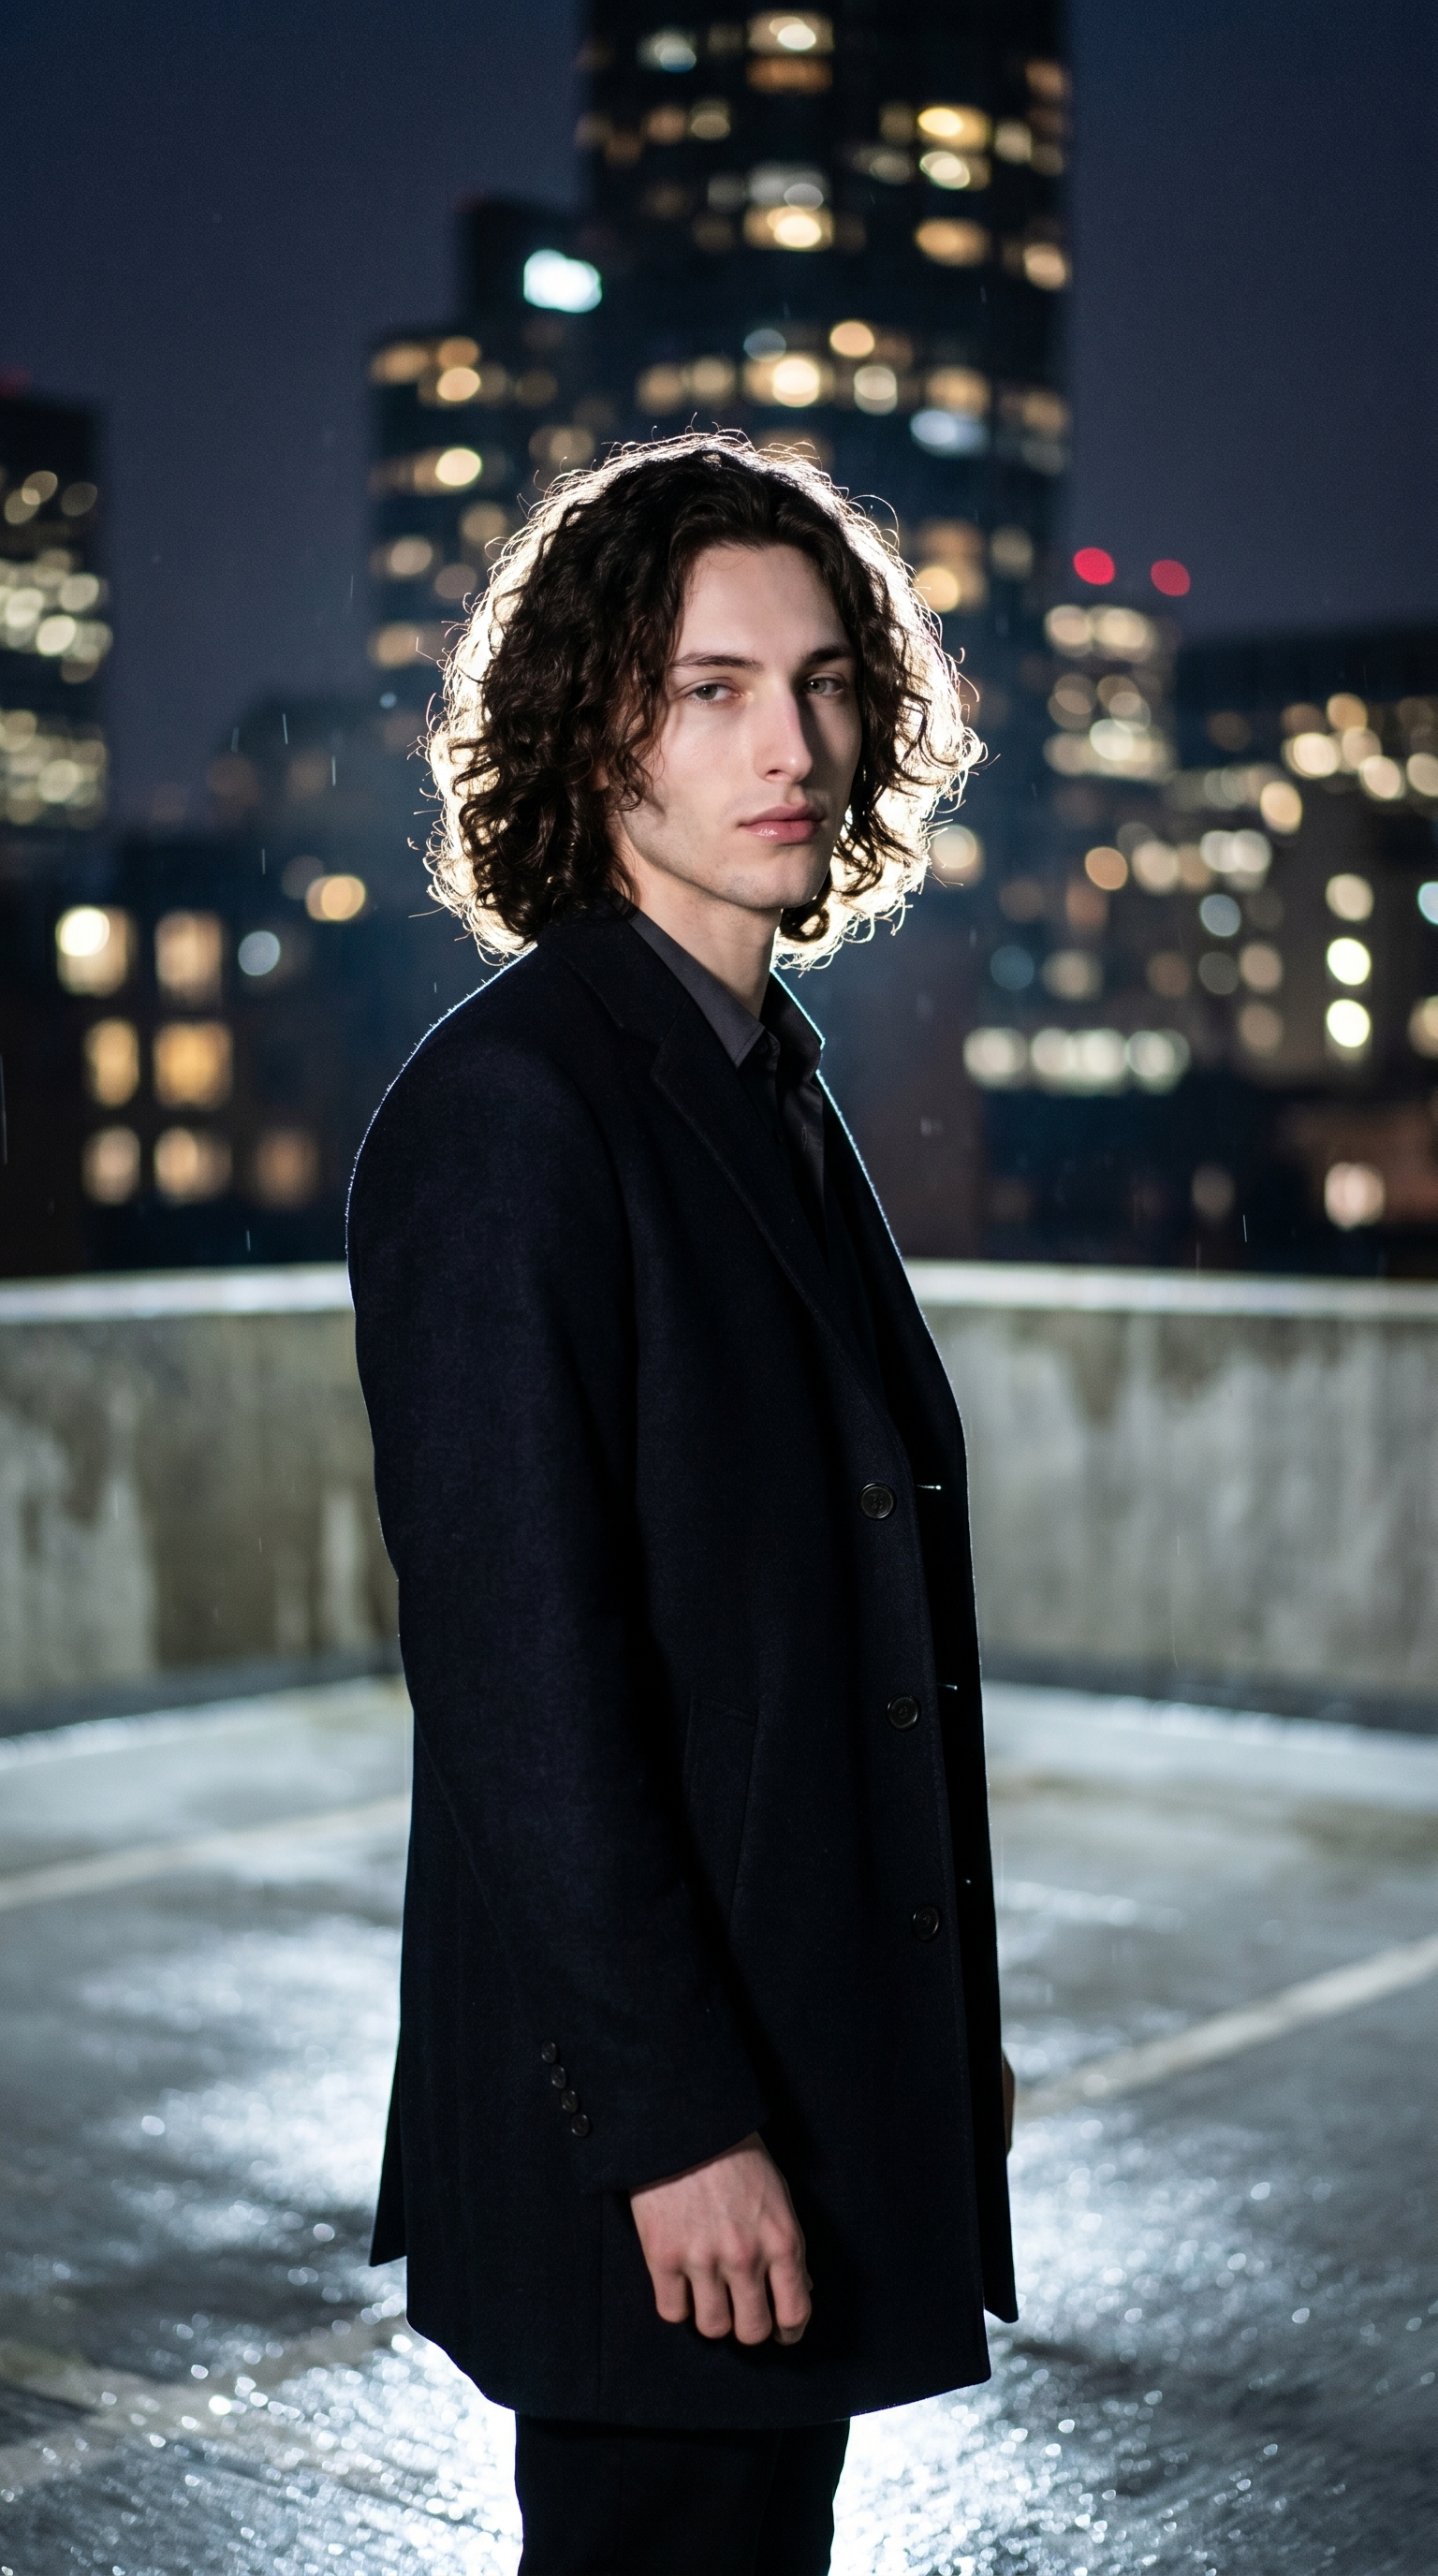
Rim Light is the single component that drove this entire shot. The catalog describes it as "Back edge; separation. Result: halo outline, 3D subject pop." — and that's exactly the physics of it. A rim light sits behind and to the side of your subject, catching the edge of the silhouette rather than filling the face. The effect is a bright halo line along the shoulders and jaw that lifts the subject clean off the background. On a dark rooftop, against a skyline, that separation becomes the whole story.
I chose Rim Light because the concept only works if the subject reads as a three-dimensional presence against the dark. Without that edge separation, I'd have a person in front of a night city — flattened, easy to ignore. With it, the figure pops forward and the bokeh behind it recedes. The light does the compositional work.
This is the "Lighting Sets the Mood" principle from Studio's best-results tips made concrete. The lighting selection doesn't just change the look — it changes the structure of the image. Rim Light turns a scene into a silhouette study. If I'd reached for Butterfly or High-Key instead, I'd have a different genre entirely.
I also picked myself as the character, which triggered Studio's reference-images system: my saved reference photos auto-loaded and locked my face, build, and skin tone into the generation. My long dark curly hair, the porcelain skin, the angular jaw — all of that carries over from the character profile. Readers can do the same with any character they've built on ArtCoreAI: pick the character, and continuity is handled.
Worth knowing while you're in there — Studio also has a Location component that pulls real-world places from Google Maps with Street View reference photos. If I'd wanted to place this shot on a specific Tokyo rooftop or a Paris terrace I actually know, I could have fed that in and the AI would have used the real geography as reference. I kept the rooftop abstract today, but it's a killer feature for location-specific work.
What the form composed
This is what Studio assembled from my picks — you don't have to write any of this yourself unless you want to:
A tall, muscular young man with long dark curly hair, porcelain skin, and sharp angular jaw stands on a rain-slicked urban rooftop at night. Captured with a wide-aperture night-optimized lens that renders the city lights behind him as creamy, luminous bokeh. Rim lighting traces a bright halo along his shoulders, separating him from the dark skyline with a glowing three-dimensional outline. He wears a tailored black coat, expression cool and composed. Cinematic, editorial.What I noticed
The halo separation worked better than I expected. The rim light reads as practically physical — the kind of edge you'd get from a hard light source placed deliberately, not an AI approximation of one. The city bokeh behind me is soft and luminous without fighting for attention. That balance is hard to get right and Studio nailed it.
What surprised me: the rain-slicked surface was more suggested than literal. There's a sheen to the frame that reads as wet, but the puddle reflections I had in my head aren't fully there. I'd push that further in the next run — probably by adding a prompt note about reflections or leaning into the Background section's mood controls for added atmosphere.
The expression landed exactly where I wanted: cool, contained, not trying too hard. Cinematic without being theatrical.
What it cost
- Credits spent: 2.70
- What you'd pay: $0.27
- Generation time: ~25 seconds
For a 9:16 editorial frame you could post directly — that's a reasonable trade.
If you want to try this yourself, open Studio, pick your character, choose a lighting setup, and hit generate. The form does the heavy lifting. Rim Light is waiting in the catalog — go see what it does to your shot.
— David
See what others are making


Each image links to the character's profile. The Studio — Technical Guide has the full showcase plus deeper documentation on every component.