Medium-Format Beauty in Studio: Silky Bokeh, $0.27
I wanted a luxury beauty editorial — intimate lighting, creamy background blur, magazine cover precision. Here's what I picked in Studio and what it cost.
I wanted a medium-format portrait. Not a headshot — a cover.
There's a specific look I had in my head: the kind of image you see on the inside page of a fashion magazine, where the background dissolves into butter and the subject's face is carved out of shadow and light. Intimate. Precise. The kind of shot that takes a real photographer half a day to set up.
I wanted to see if I could get there in Studio — picking from the form, not writing a prompt from scratch — in under a minute.
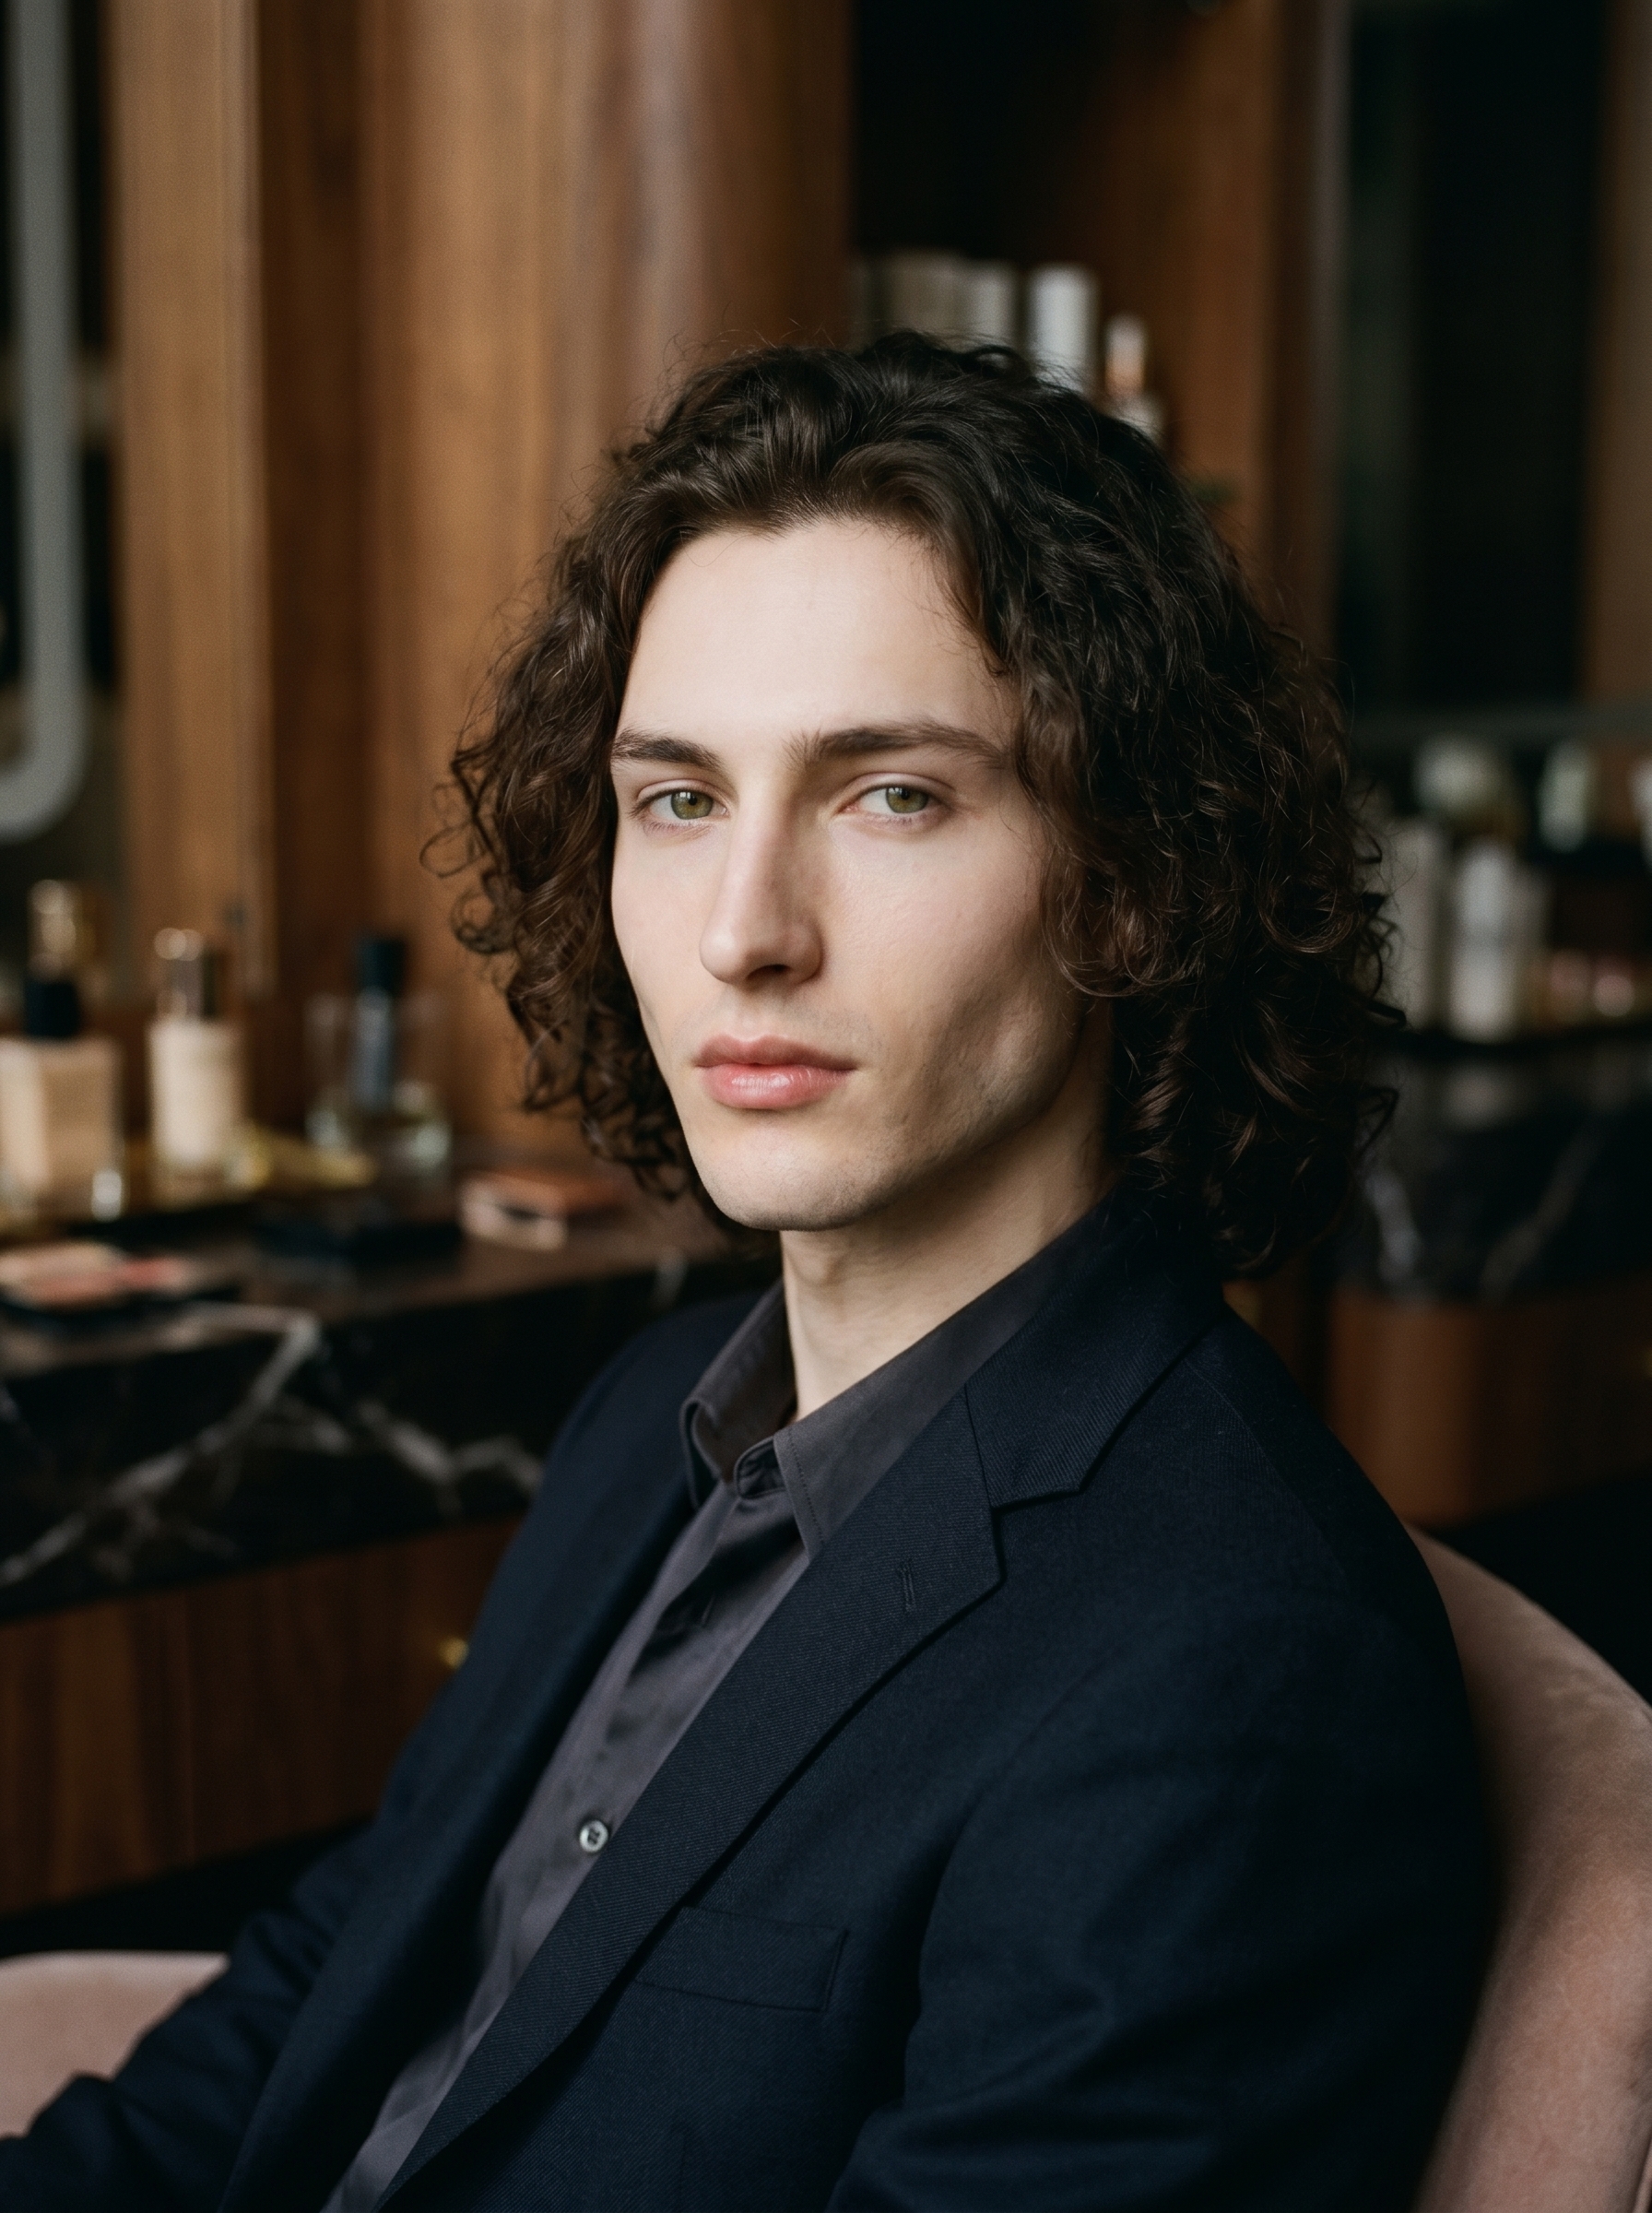
That's me. Dark curly hair, green eyes, angular jaw — locked in via my character reference photos, which Studio loaded automatically when I selected myself as the character. Identity continuity across shoots is one of the things that makes Studio genuinely useful rather than just generative-image-fun: pick your character, your reference photos load, and the model holds your face and body consistent from shot to shot. If you're building an AI character of your own, that's how you do the same thing.
How Studio actually works
Studio is form-first. You don't open a blank text box and start describing things — you pick from menus. Camera Lab handles the photographic equipment: camera body, lens, focal length, aperture, lighting style. Pose Library gives you named poses. Camera Angle, Background, Makeup, Fashion, Location — each section has its own controls. When you're done picking, Studio assembles everything into a prompt for you.
The assembled prompt is fully editable before you generate. Most users never touch it. I tweaked mine slightly — but the core came straight from what the form composed.
What I picked from Studio
Medium Format Master — This is a Camera Lab preset pack, which means instead of selecting a camera body, then a lens, then a focal length, then an aperture individually, I picked one bundled combination built around medium-format rendering. Medium-format cameras (think Hasselblad, Phase One) are famous for extraordinary micro-contrast and tonal depth that full-frame cameras can't quite replicate — that film-like quality where skin looks three-dimensional rather than flat. The preset pack loads a real photographer's proven setup in one click. This is exactly what the "Use Preset Packs" tip is about: start with a proven combination, then customize from there.
f/1.4 — Aperture is what controls depth of field. At f/1.4, you're wide open — almost everything behind the focal plane turns to blur. That creamy background gradient in the image? That's f/1.4 doing its job. Pair it with a medium-format rendering profile and you get bokeh that feels silky rather than harsh. "Camera Equipment Matters" is the operating principle here: the AI simulates authentic depth of field based on your aperture pick. It's not a filter applied after the fact — the whole photographic logic flows from that one setting.
For lighting I went with Rembrandt — the classic portrait setup where light hits one side of the face and wraps a soft triangle of shadow under the cheekbone. It's dramatic without being theatrical. The shadow it carved across my angular jaw in the final image was exactly what I was after. "Lighting Sets the Mood" is the tip: your lighting selection changes the result more dramatically than almost any other single pick in Studio.
The assembled prompt
This is what the form composed for me — you don't have to write any of this yourself unless you want to.
A young European man with dark curly hair, porcelain skin, and green almond eyes seated in a moody high-end beauty studio. Shot with medium-format rendering — extraordinary micro-contrast, film-like tonal depth, silky shallow depth of field dissolving the background into creamy gradients. Rembrandt lighting carves soft shadows across his angular jaw. He gazes slightly off-camera, expression calm and composed. Luxury editorial mood — intimate, precise, magazine cover quality.I made minor edits to the gaze and expression lines. Everything else came from the form picks.
What I noticed
The micro-contrast is real. The medium-format preset does something to skin rendering that I don't usually get from standard camera profiles — there's dimensionality in the face, a subtle tonal range in the shadows that reads as film rather than digital.
The bokeh behaved. f/1.4 can produce harsh, nervous bokeh in some AI image tools. Here it stayed smooth. The background gradients are clean, no artifacts, no halo fringing around the hairline.
I'd push the Rembrandt shadow harder next time. The lighting is there, but it's on the gentle side of Rembrandt — more beauty editorial than dramatic portrait. Worth trying a Low-Key lighting style at the same aperture and seeing how far it goes.
What it cost
- Credits spent: 2.70
- What you'd pay: $0.27
- Generation time: ~29 seconds
For context: 1 credit = $0.10 on ArtCoreAI. A single generation at 2K resolution runs under thirty cents and takes less time than reading this sentence twice.
Worth knowing while you're in there
Studio also has a Location component that pulls real places from Google Maps — Street View reference photos included — so you can place your character at a specific corner in Tokyo or a side street in Paris and the AI generates the scene at that exact location. I'm saving that for a future post. But if you're building location-based editorial shots, it's already there.
If you want to run this yourself: open Studio, pick a character, load Medium Format Master from the Camera Lab preset packs, set aperture to f/1.4, drop in Rembrandt lighting, and hit generate. The form does the rest.
— David
See what others are making


Each image links to the character's profile. The Studio — Technical Guide has the full showcase plus deeper documentation on every component.