Canon EOS R5 Mark II on a Paris street — what a medium shot actually costs
I ran a golden-hour street portrait through Studio using the Canon EOS R5 Mark II and a Medium Shot framing. Here's every pick I made and what it cost.
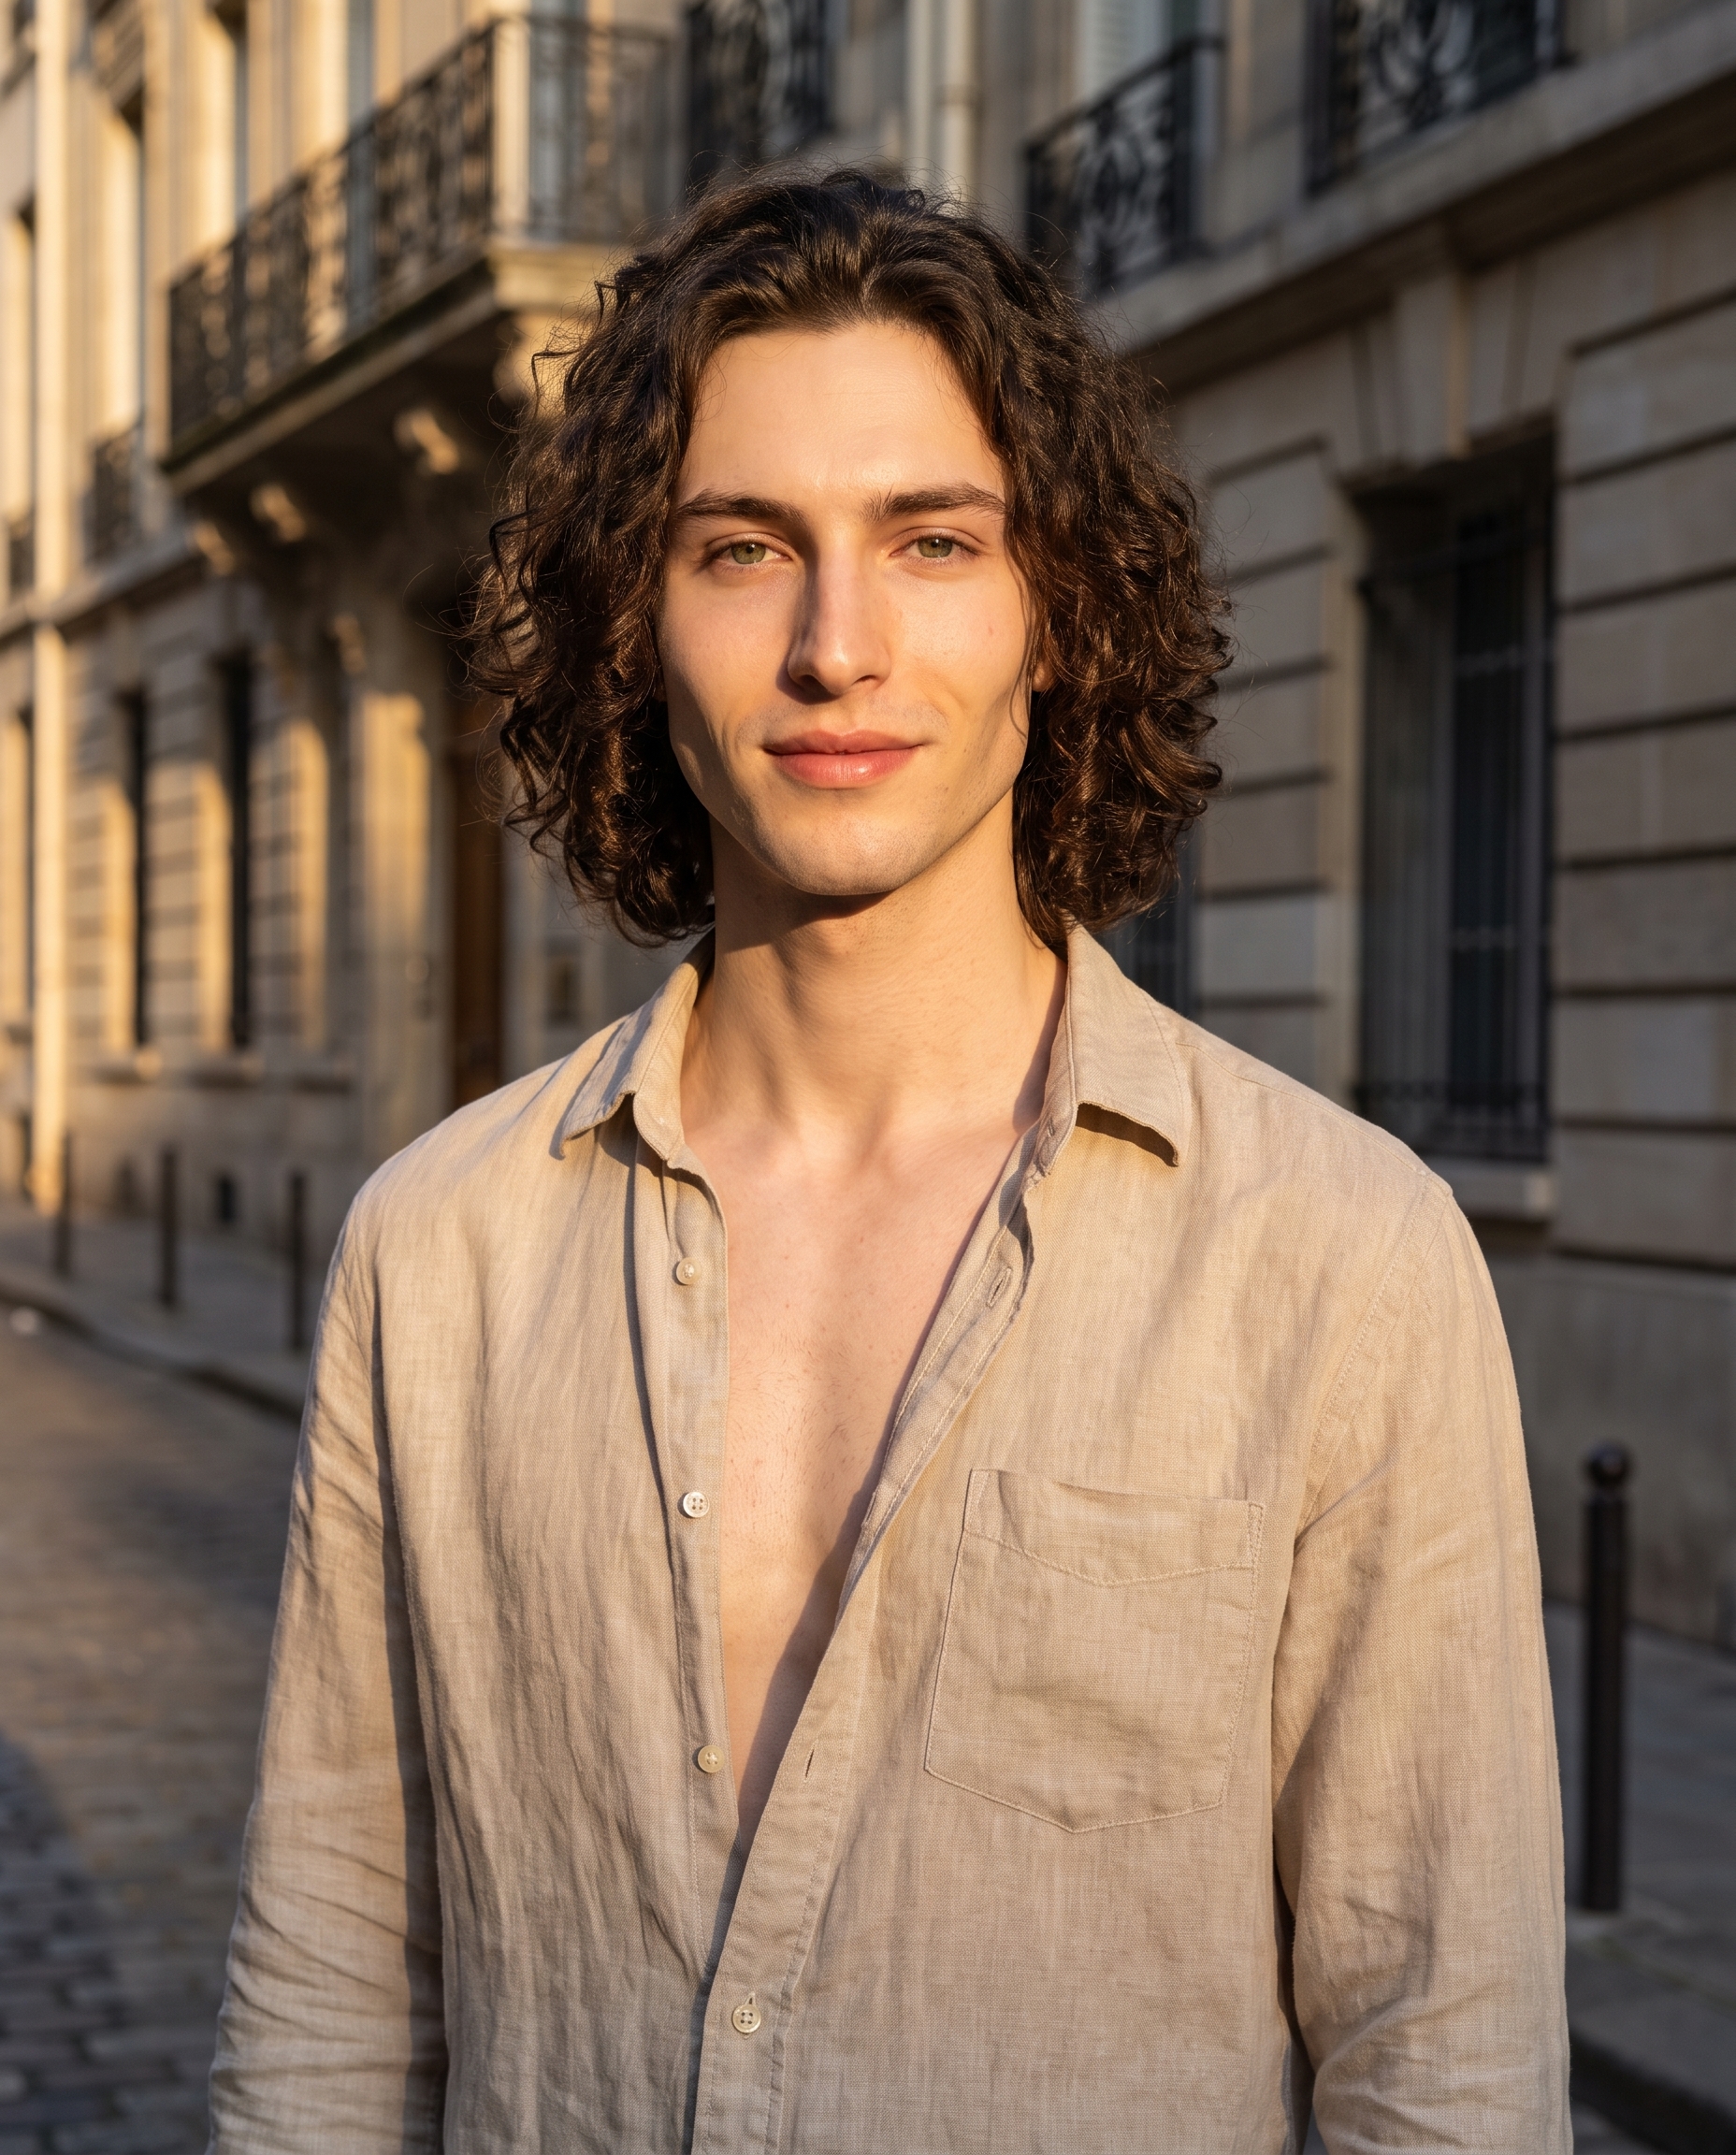
I wanted a single image that felt like the cover of a magazine you'd find on a rack at CDG — not a studio headshot, not a fashion editorial, just a confident Parisian street portrait at that specific forty-minute window before the sun drops behind the rooftops.
One image. Real camera logic. No tweaking prompts for twenty minutes.
Here's what came out.
How Studio actually works
Studio is form-first — you do not need to write a single word of a prompt to get a result. You open the workspace, pick your character, then work through the sections: Camera Lab for the body and lens, Pose Library for how the subject is standing, Camera Angle for where the lens is positioned, Background for the environment, Makeup, Fashion, Location, and so on. Each pick adds a layer to an assembled prompt that Studio composes for you behind the scenes. The "what to shoot" lives in your form picks; the "how it's shot" lives in Camera Lab. You can open the assembled prompt and edit it before generating — most users never do, and most of the time you don't need to.
What I picked from Studio
Medium Shot — Waist-up, conversational. This is the framing I reach for when I want presence without the distance of a full-body shot and without the intensity of a tight portrait. Waist to crown keeps the context — you see the shirt, the shoulders, the environment breathing in the background — but the face is close enough to read. It felt right for a street portrait because it's the frame you'd actually use if you were shooting a friend on a Paris side street with a 50mm.
Canon EOS R5 Mark II — All-around powerhouse; 45MP with stunning color science and skin tones, perfect for fashion and social media. Style: vibrant, balanced for hybrid photo and video. I picked the R5 Mark II because I wanted that specific quality of color that Canon's full-frame sensors produce — warm, vivid, but not oversaturated. The "Camera Equipment Matters" tip in Studio's best-results guide is real: the AI actually simulates depth of field, bokeh, and lens compression based on your body selection. You're not just labeling an image "shot on Canon" — the rendering changes. The cobblestone blur in the background is a direct result of full-frame shallow depth of field, not a post-process vignette.
I also want to call out something I used that goes beyond those two picks: character references. When I selected myself as the character in Studio, it auto-loaded my saved reference photos and locked my identity — face, skin tone, curly dark hair, the whole thing — into the generation. I didn't describe myself in the prompt; Studio handled it. If you've built an AI character on ArtCoreAI, this is how you keep visual continuity across every shoot. Same face, different location, different outfit, every time.
The assembled prompt
This is what the form composed for me — you don't have to write any of this yourself unless you want to.
A young European man with long dark curly hair, porcelain skin, and green almond eyes stands waist-up on a Parisian side street at golden hour. Framed in a medium shot — waist to crown, conversational and direct — he wears an open linen shirt, relaxed and self-assured. Warm amber light rakes across his angular jaw and chest. Canon EOS R5 Mark II rendering: vivid skin tones, balanced shadows, magazine-ready sharpness. Shallow depth of field blurs the cobblestone and wrought-iron balconies behind him. Mood: effortless urban confidence, late-summer Paris.What I noticed
The skin tone rendering was the main thing. Canon's color science reputation carries into the output — warm without going orange, which is a real failure mode in AI-generated golden-hour portraits. The balance here stayed clean.
The background blur behaved like a real lens. The cobblestones and the wrought-iron balconies fall off gradually, not in a hard ring. That's full-frame depth of field simulation working correctly, and it's directly traceable to the R5 Mark II pick.
What I'd change: I'd dial up the background detail slightly on the next pass — a tighter scene radius so a specific Parisian façade reads more clearly behind the blur. Studio's Location component lets you drop a real Google Maps pin and pull Street View imagery as reference, which would anchor the environment more precisely. Worth trying on the next shot.
What it cost
- Credits spent: 2.70
- What you'd pay: $0.27
- Generation time: ~28s
That's a 4:5 image — social-ready — at full quality. For a single iteration, twenty-seven cents is not a commitment.
If you want to run this yourself: open Studio, pick a character, choose your camera body in Camera Lab, set your framing in Pose Library, and hit generate. You don't need to write a word.
— David
See what others are making


Each image links to the character's profile. The Studio — Technical Guide has the full showcase plus deeper documentation on every component.