I Shot a Fashion Editorial in a Parisian Apartment — Using Studio
I wanted soft indoor natural light, a cream blazer, a Parisian window. Studio built the shot from form picks — here's exactly what I chose and what it cost.
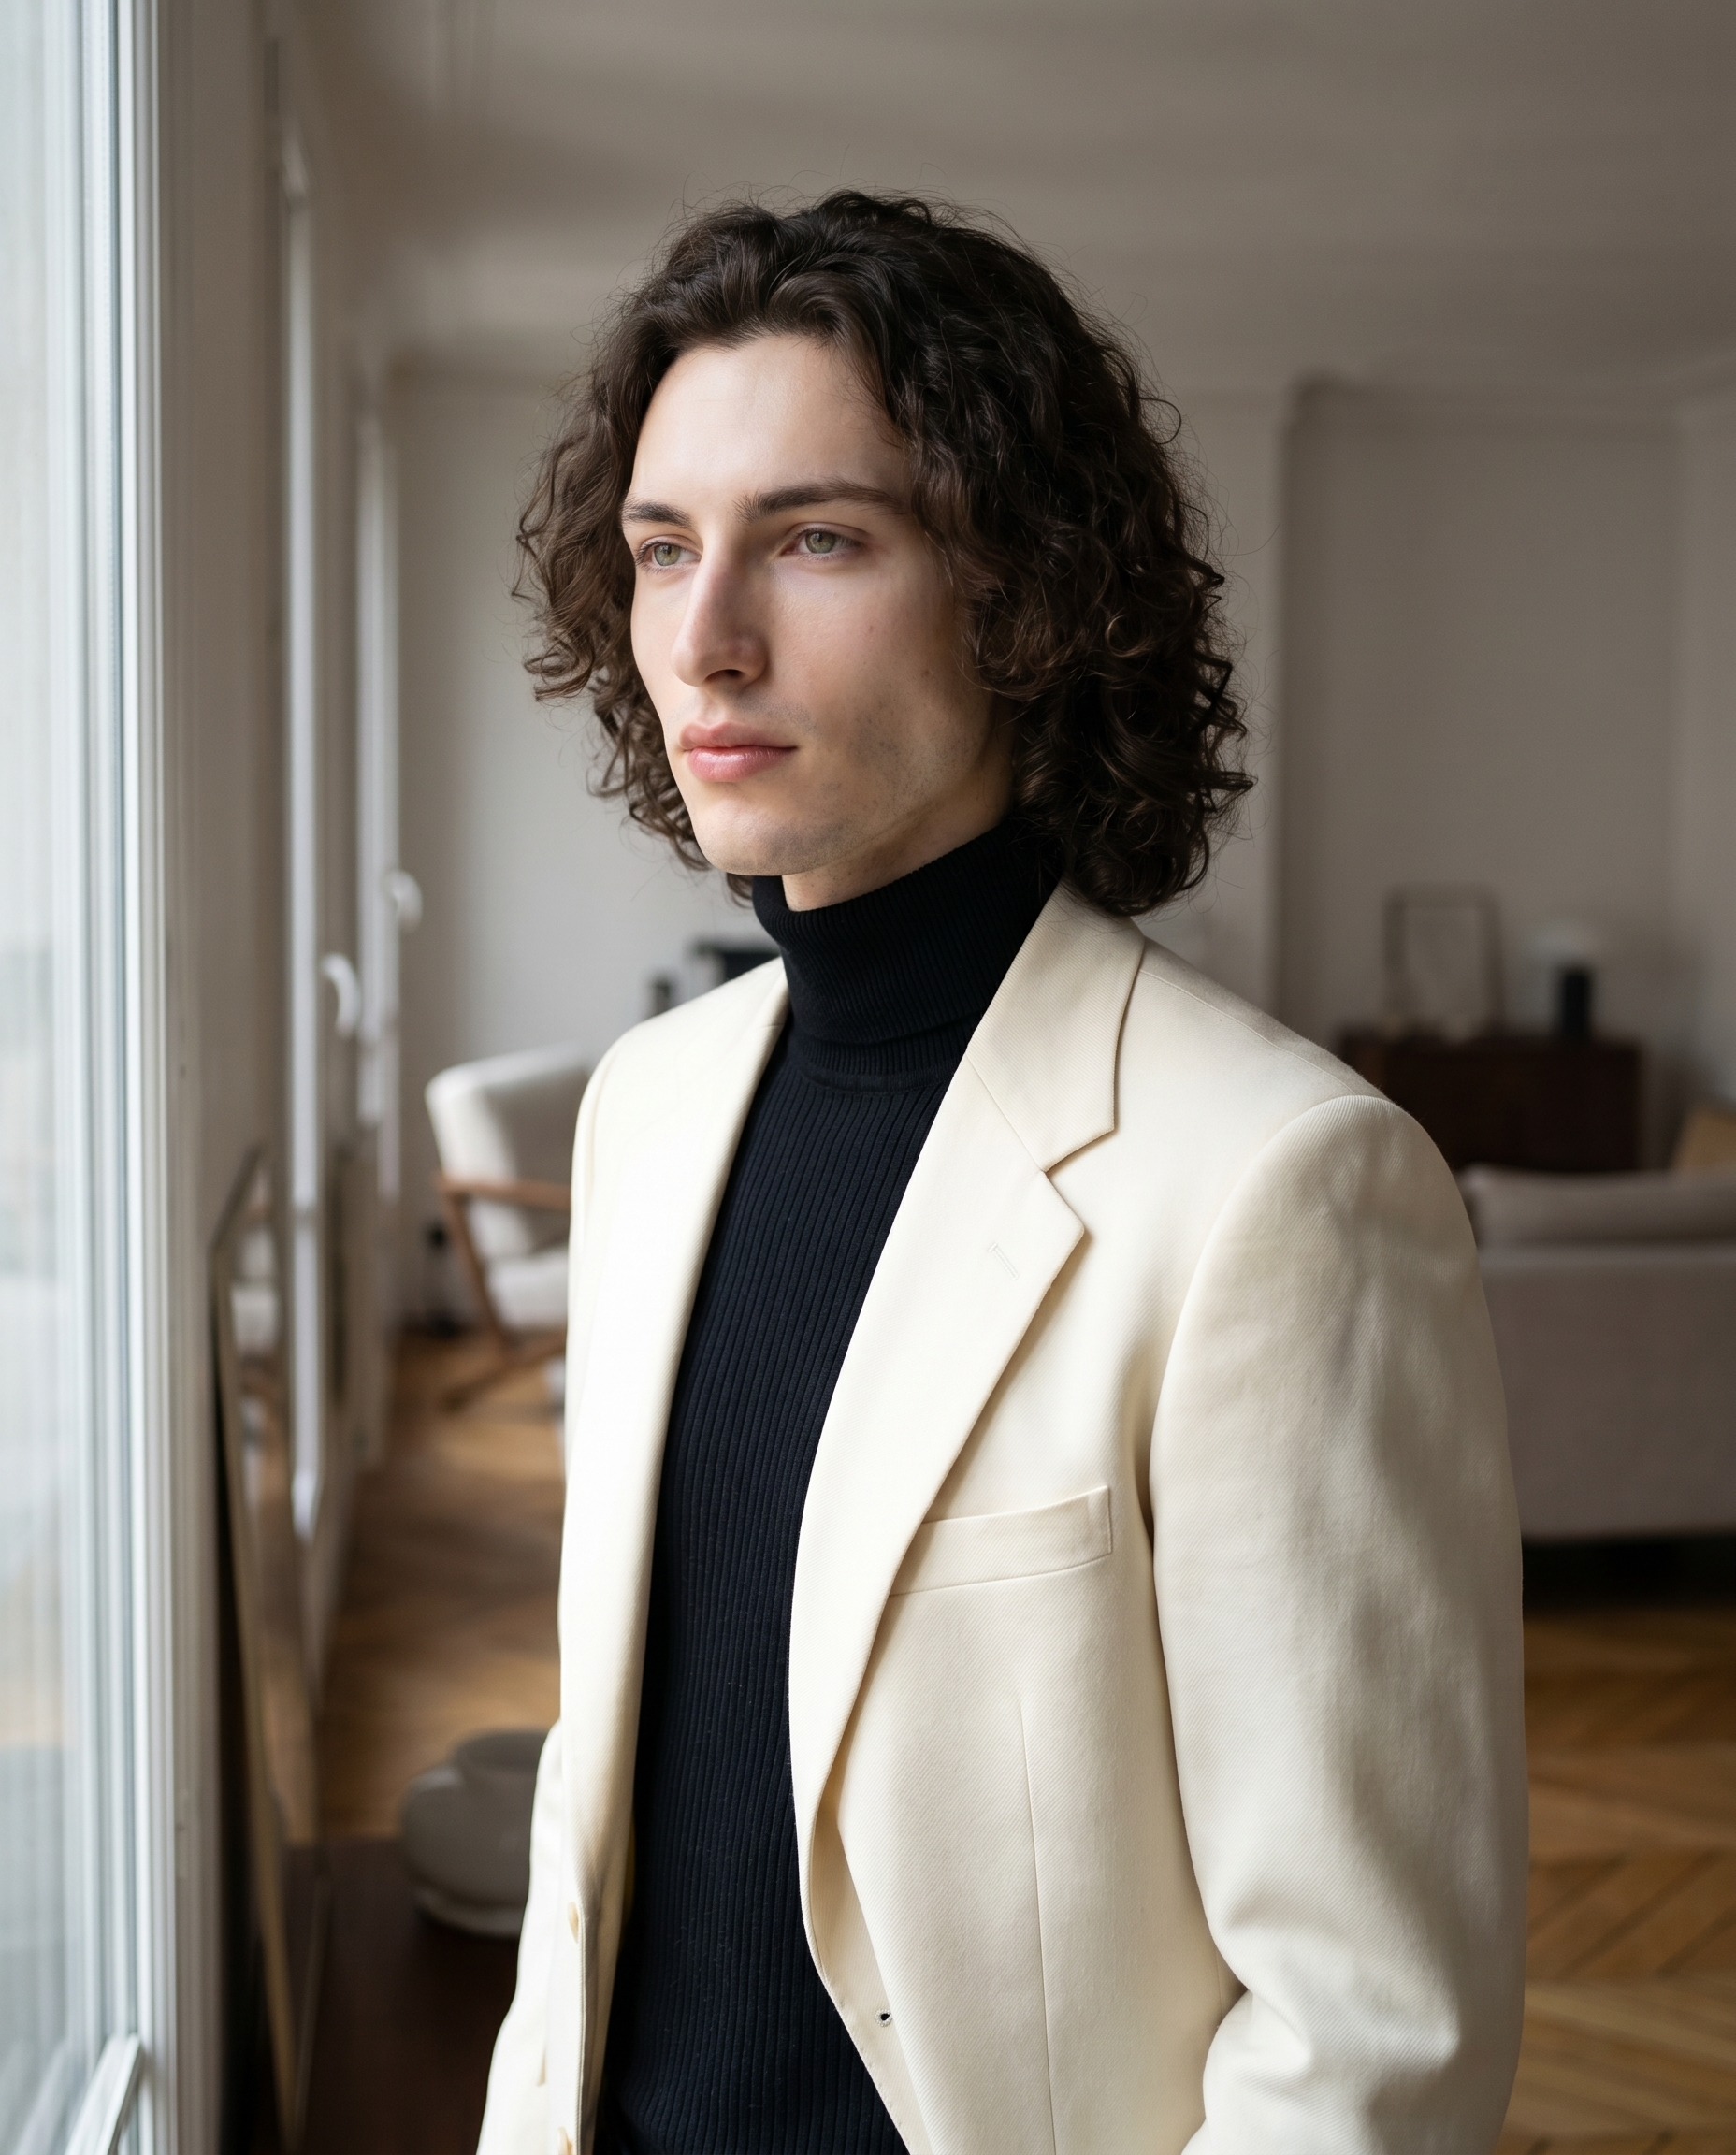
I had a clear picture in my head: me, near a floor-to-ceiling window in a minimal Parisian apartment, soft morning light wrapping across my face, a structured cream blazer over a black turtleneck. Editorial — but understated. The kind of shot that looks like it took a photographer, a stylist, and a location scout. I wanted to see if Studio could get me there from a handful of form picks.
Spoiler: it did.
How Studio actually works
Before I walk through my picks — if you've never opened Studio, here's the thing to understand: you don't write a prompt to use it. You pick. Camera Lab gives you real camera bodies, lenses, apertures, and lighting setups. Pose Library gives you named poses. Camera Angle, Background, Fashion, Makeup, Location — all form menus. You make your selections and Studio assembles the prompt for you. The "what to shoot" comes from your form picks; the "how it's shot" comes from Camera Lab. The assembled prompt is fully editable before you generate, but most people never need to touch it. I'll show you mine below so you can see what the form actually builds.
What I picked from Studio
Canon EOS R5 Mark II — This is the camera body I chose from Camera Lab. Full-frame mirrorless, 45 megapixels. The catalog describes it as an "all-around powerhouse" with "stunning color science and skin tones, perfect for fashion and social media" — and that's exactly why I picked it. I wanted my porcelain cool-toned skin to read as skin, not a texture or a mask. Vibrant but balanced. On the result, I can see it: the skin tones have gradation, the shadows have depth without going muddy. This is what the "Camera Equipment Matters" tip is about — when you name a real camera body, the model simulates that camera's actual characteristics. It's not cosmetic.
f/1.8 aperture — I chose this to separate me cleanly from the apartment interior behind me. f/1.8 is a wide aperture — shallow depth of field, background blur, subject isolation. You can see it in the result: the wall and interior details behind me soften into a gentle haze while the blazer, face, and hair stay sharp. On a full-frame sensor like the R5, f/1.8 produces exactly the kind of clean editorial bokeh that makes a shot feel considered rather than snapshoty.
For lighting, I kept it natural — soft indoor light from the window — which I described in the prompt rather than selecting a dramatic lighting preset. The "Lighting Sets the Mood" tip applies here: if I'd swapped to Rembrandt or Low-Key, the whole emotional register of the image would shift. Soft natural window light was the right call for the mood I wanted.
One thing worth knowing while you're in Studio: when I picked myself as the character, my reference photos loaded automatically and locked my identity into the generation. Face, body, skin tone — all held. If you're building your own AI character on ArtCoreAI, you can do the same thing: select your character from the character picker, and Studio loads their saved reference images and keeps them consistent across every shot you run.
The assembled prompt
This is what the form composed for me — you don't have to write any of this yourself unless you want to.
A tall muscular young man with long dark curly hair, porcelain cool-toned skin, angular jaw, and full lips stands near a large floor-to-ceiling window in a minimal Parisian apartment. Soft indoor natural light from the window wraps across his face with gentle gradients and flattering shadows. He wears a structured cream blazer over a ribbed black turtleneck. The Canon EOS R5 Mark II renders vibrant, balanced skin tones with stunning color science. The f/1.8 aperture separates him cleanly from the soft blurred interior behind him. Upper body framing, relaxed confident posture, editorial fashion mood.You can edit this before generating. I left it as-is.
What I noticed
The light is doing real work. The window source reads as directional — there's a clear side to the face that's catching it and a side that's in soft shadow. It doesn't look flat, which is the failure mode for "indoor natural light" when a model doesn't handle it well.
The blazer held up. Cream structured fabric with lapels and clean seams. I've seen fashion shots where the model generates the clothing description as a vague blob of color — this one didn't. The construction of the garment reads.
What I'd change: I'd push the Camera Angle slightly — maybe 3/4 left instead of straight-on — to get more dimensional light across the face and jacket. And next run I'd experiment with the Location component: drop a real Parisian address into Studio's Google Maps picker and let it use Street View imagery to place me at an actual window on an actual street. That's a feature I haven't fully stress-tested yet and it's the obvious next step for this kind of editorial work.
What it cost
- Credits spent: 2.70
- What you'd pay: $0.27
- Generation time: ~27s
That's 4K resolution, full-frame camera simulation, fashion styling, and character identity locking — for just over a quarter. I'll keep saying this until it stops being surprising: the cost-per-image at this quality level is genuinely hard to argue with.
If you want to run your own editorial shot — or anything else — open Studio here, pick a camera body, pick a lighting setup, pick your character, and hit generate. The form does the heavy lifting.
— David
See what others are making


Each image links to the character's profile. The Studio — Technical Guide has the full showcase plus deeper documentation on every component.