Sharp Architecture: Sony A7R V at f/11 for a Hyper-Detailed Urban Scene
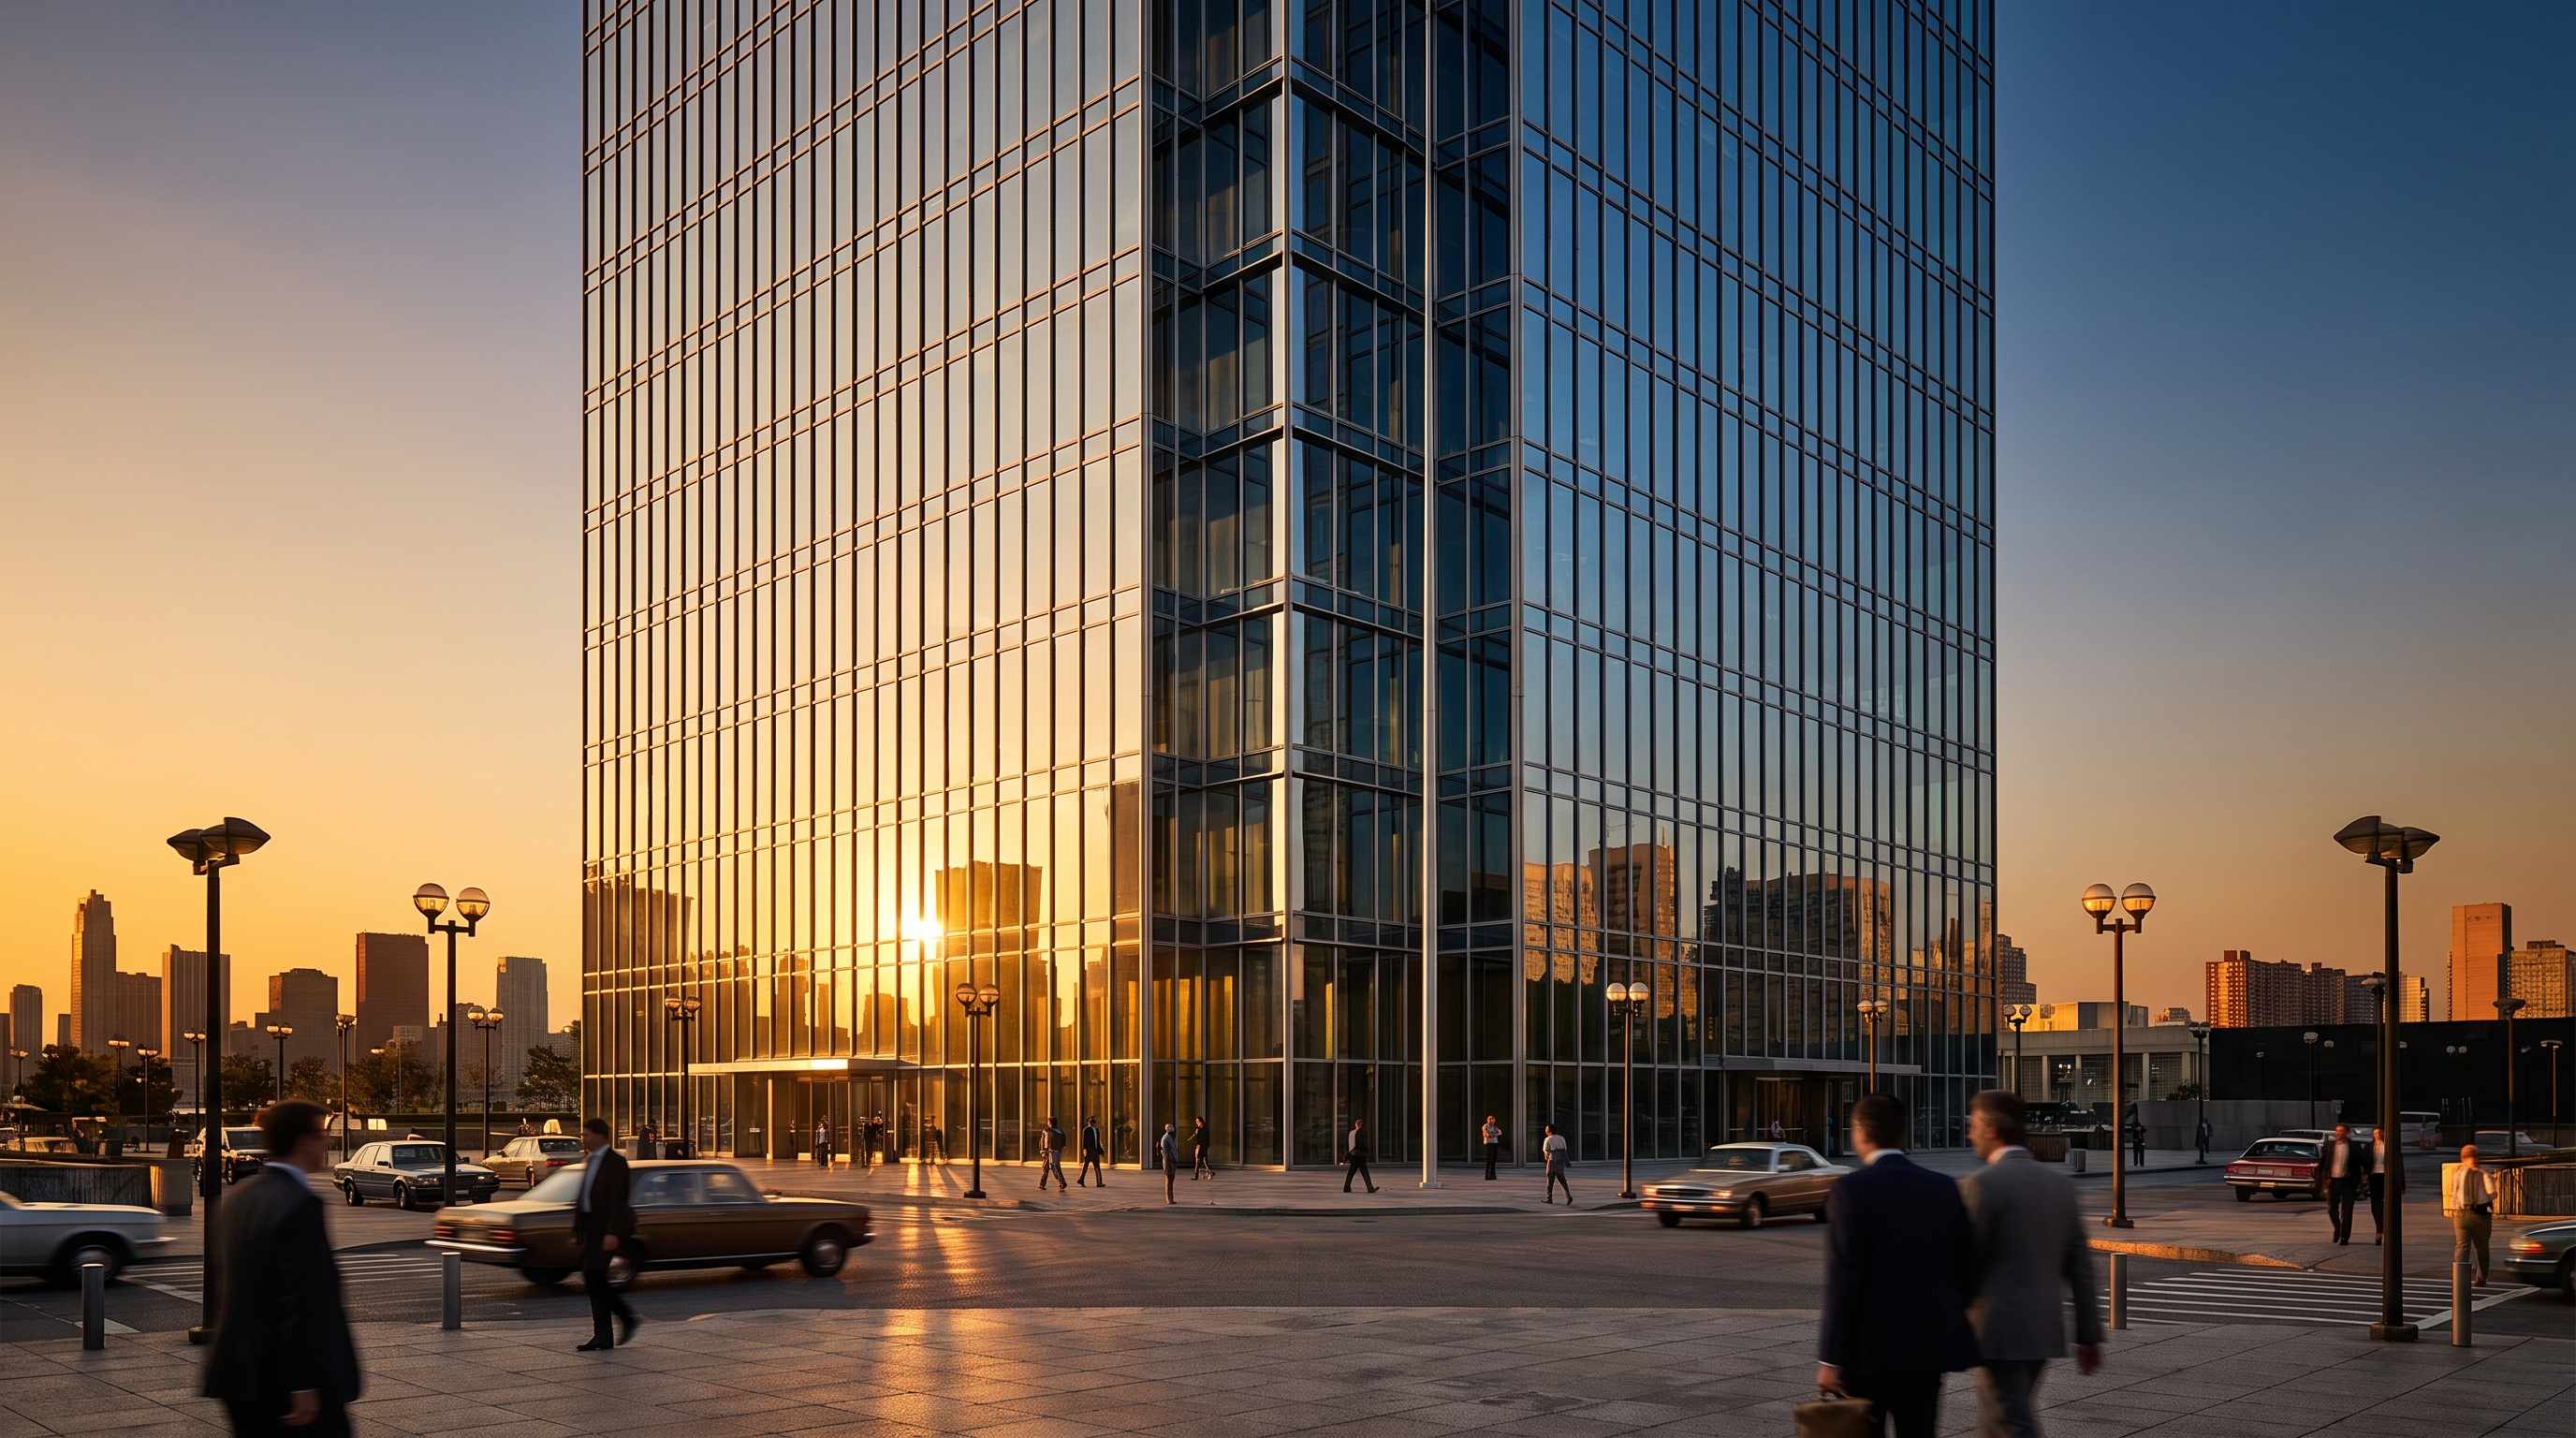
I wanted to see how far Studio could push architectural detail. One camera pick, one aperture, 26 seconds.
I had a specific question going into today's demo: can Studio produce the kind of image that holds up at print scale — the sort of shot where you zoom in on a glass facade and every reflection is still crisp?
Not a portrait. Not a character. Pure architecture. A towering modernist glass building at golden hour, shot for maximum resolution and depth of field. Let's see.
How Studio actually works
If you've never opened Studio, here's the thing that surprises most people: you don't start with a blank text box. You pick from menus — Camera Lab, Pose Library, Camera Angle, Background, Makeup, Fashion, Location — and Studio assembles the prompt for you based on what you selected. The "what to shoot" comes from your form picks; the "how it's shot" comes from the Camera Lab. There is an assembled prompt you can read and edit before you hit generate, but the honest truth is most users never need to touch it. The form does the work.
What I picked from Studio
Sony A7R V
This is the camera body I loaded from Camera Lab's catalog. The description that shipped with it nails why I chose it for this shot: high-res king, 61MP full-frame sensor, AI autofocus, razor-sharp and versatile for commercial and magazine crops. That 61MP sensor is not a cosmetic number — it's what makes the difference when you're generating at 4K and then zooming in on a glass panel six stories up. Camera Equipment Matters is the operating tip I kept in mind here: selecting a real camera body tells the AI exactly what kind of optical character to simulate. Depth of field, sharpness falloff, sensor-level detail — it all shifts depending on what body you load.
f/11
Aperture f/11 sits in a very specific spot on the aperture scale. It's not the widest (shallow depth of field, soft backgrounds) and it's not the tightest (diffraction softness starts creeping in past f/16 on most sensors). f/11 is the sweet spot for maximum sharpness across an entire scene — architects and landscape photographers know it well. I wanted every element to stay in focus: the facade, the plaza, the distant skyline. No excuses, no soft corners. f/11 is how you get that.
Pairing a high-resolution body with a stopped-down aperture is intentional stacking. The Sony A7R V brings the pixel budget; the f/11 makes sure every pixel is earning its place.
What the form composed
This is what Studio assembled from my picks — I didn't type any of this myself, though you can edit it freely before generating:
An ultra-detailed architectural scene of a towering modernist glass building at golden hour, every surface edge and reflective panel rendered with razor-sharp precision from corner to corner — the kind of hyper-resolved clarity only a 61MP full-frame sensor delivers. Shot at f/11 for maximum depth of field, no element falls soft: the geometric facade, the surrounding plaza, the distant skyline. Warm amber light rakes across the structure. Cinematic, commercial, print-ready.What I noticed
The amber light hit harder than expected. "Golden hour" is a phrase that can get soft and generic in AI image generation. Here it didn't — the warm rake across the facade has real directionality, casting shadows that read as actual late-afternoon sun, not a filter.
The depth of field is genuinely uniform. Near foreground, mid-structure, distant skyline — all sharp. That's the f/11 doing its job, and it's satisfying to see the aperture choice actually register in the output rather than being cosmetic.
What I'd change: I'd push the plaza detail further with a Location component pull. Studio lets you pick a real-world location from Google Maps and bring in Street View reference imagery — so instead of a generic urban plaza, you could anchor this to Canary Wharf, La Défense, or wherever fits your project. That's one I want to run as a dedicated demo soon.
What it cost
| Credits spent | 2.68 |
| What you'd pay | $0.27 |
| Generation time | ~26s |
One credit is $0.10 on ArtCoreAI. Sub-30-cent architecture at print resolution is genuinely hard to complain about.
If you want to try this yourself: open Studio, load Camera Lab, pick a body, pick an aperture, choose your background and lighting mood, and hit generate. You don't need to write a single line of prompt to get a result worth looking at.
— David
See what others are making

Each image links to the character's profile. The Studio — Technical Guide has the full showcase plus deeper documentation on every component.