Vintage Prep on a Rooftop at Golden Hour — Studio Demo
I wanted a clean editorial shot — preppy outfit, city skyline, that warm late-afternoon light. Here's exactly what I picked in Studio and what came back.
I had a specific image in my head this morning: a rooftop, golden hour bleeding across glass towers in the background, and an outfit that feels collegiate without trying too hard. Not a fashion ad. More like a still from a film where nobody told you the character's name yet but you already have a read on him.
So I opened Studio and started picking.
How Studio actually works
Studio is form-first. You don't sit down and write a prompt — you make picks: Camera Lab for your equipment and lighting, Pose Library for body position, Camera Angle for the shot, Background for the scene, Fashion Designer for the outfit. Each pick feeds into an assembled prompt that Studio composes for you. There's a preview of that prompt before you generate, and you can edit it if you want to — but most people never need to. The form handles the "how it's shot"; your picks handle the "what to shoot."
I picked myself as the character before any of that, which auto-loaded my reference photos and locked my identity — face, hair, skin tone — into the result. If you have an AI character on the platform, that's exactly how it works: select them, and their references travel with the shot.
What I picked from Studio
Vintage Prep (Fashion Designer)
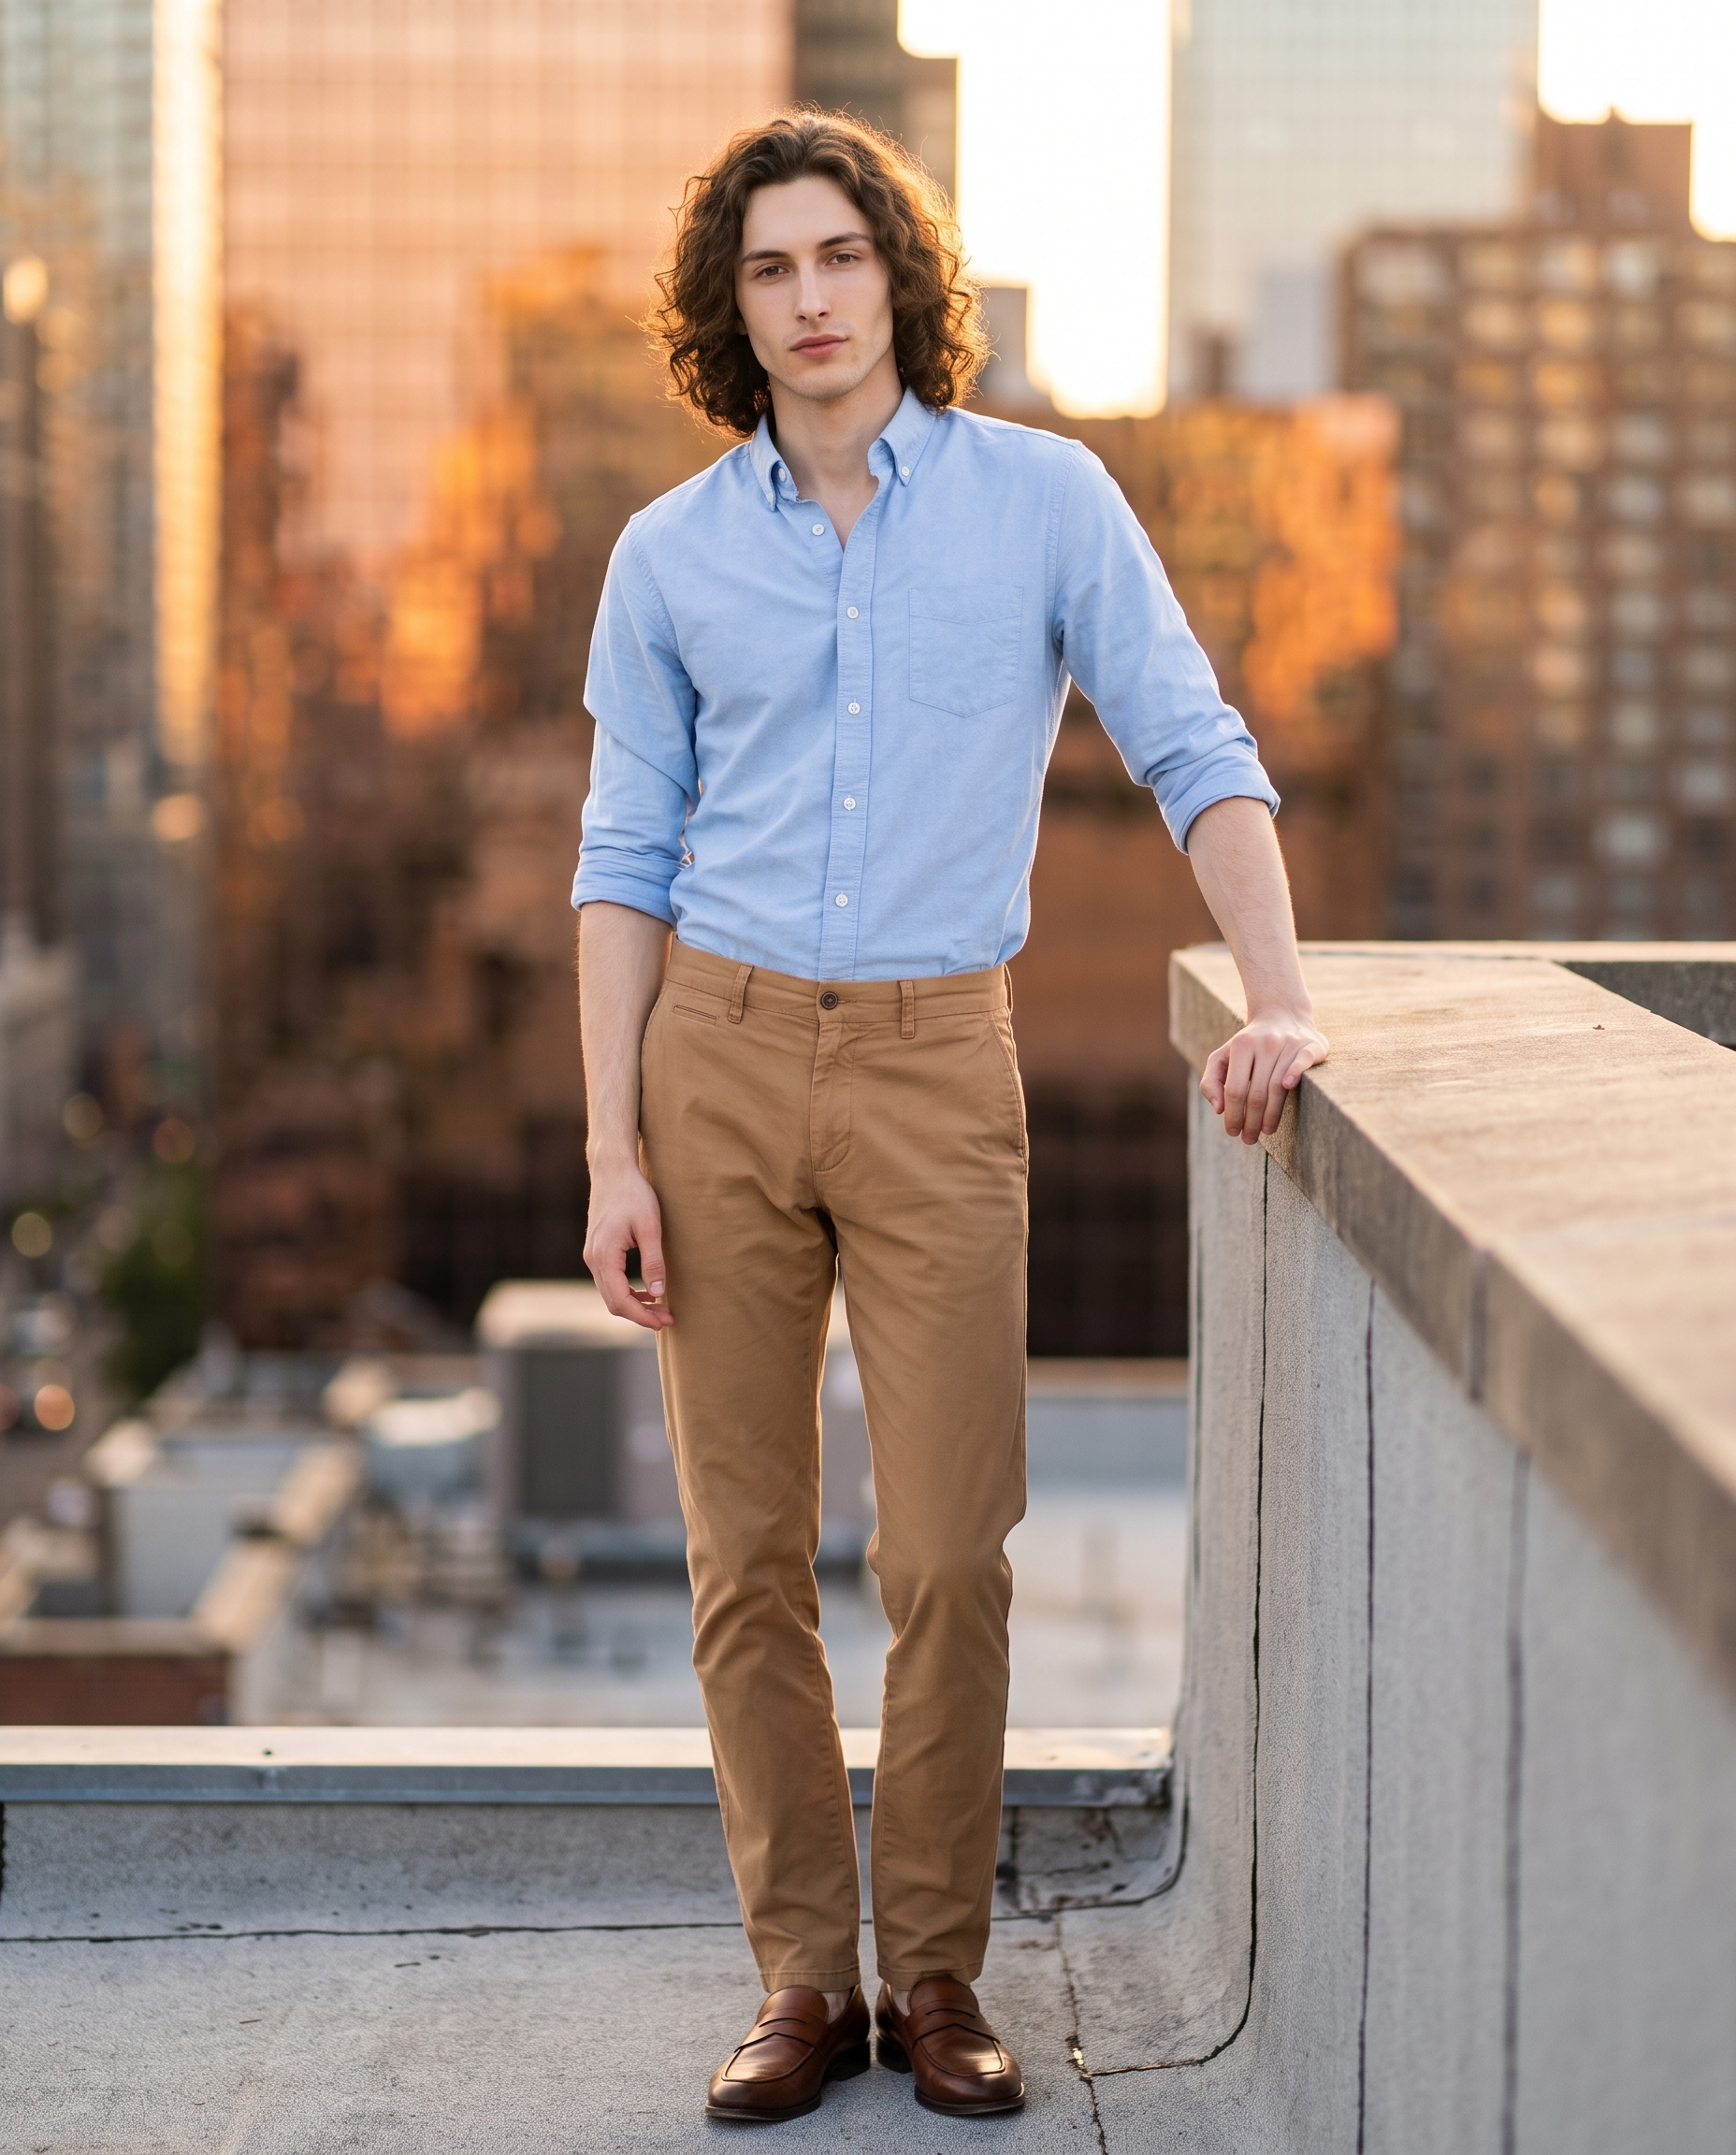
This is one of Studio's outfit presets — classic preppy: sky blue cotton oxford shirt with camel chinos. I picked it because the combination is specific without being loud. Sky blue reads warm against golden-hour light; camel chinos have enough texture to catch detail without competing with the background. The word "collegiate" is doing real work here — it gives the shot a tone before the camera even enters the picture.
Rooftop Skyline (Background)
City rooftop, skyline blur, golden hour urban light. That's the catalog description, and it's exactly what landed. What I was after was the bokeh — amber and copper tones bleeding softly across blurred glass towers — and Studio delivered it cleanly. The background doesn't compete with the subject; it frames him. That separation between sharp foreground and dissolved skyline is the whole mood of the shot.
One operating tip that applies directly here: Lighting Sets the Mood. The golden-hour descriptor in the Background component functions as a lighting directive — warm, directional, late-afternoon. Combined with the Camera Lab settings, that's what produces the amber-toned depth of field rather than a flat or overexposed cityscape.
What Studio assembled — the actual prompt
This is what the form composed for me. You don't have to write any of this yourself unless you want to.
A tall, muscular young man with long dark curly hair, porcelain cool-toned skin, almond green eyes, and a strong angular jaw. He wears a classic sky blue cotton oxford shirt with camel chinos — clean, collegiate, effortlessly styled. He stands relaxed on an urban rooftop, one hand resting on a low concrete ledge, slightly turned toward camera. Behind him the city skyline dissolves into warm golden-hour bokeh, amber and copper tones bleeding softly across blurred glass towers. Fashion editorial tone, confident yet unhurried.I did make one small edit to the assembled prompt before generating — the phrase "confident yet unhurried" came from me, not the form. The form was already close. That's the part I'd encourage: read the assembled prompt before you generate. You might not change a word. Or you might drop in one phrase that shifts the energy of the whole shot.
What I noticed
The bokeh is doing heavy lifting. The background blur is soft enough that the skyline reads as atmosphere rather than location. That was intentional — I didn't want the city to pull focus — and the Rooftop Skyline preset handled it without me having to specify aperture values or blur intensity manually.
The oxford shirt caught light well. Sky blue against a warm golden background could easily go flat or oversaturated, but the fabric texture came through. You can see the weave slightly. That kind of material fidelity is one of the things Gemini 3 Pro handles better than I expected.
What I'd change: The pose is static — relaxed, one hand on the ledge, looking toward camera. It works for an editorial read, but I'd love to run a second generation with a slight turn and a downward eyeline. The Pose Library has refinements for exactly that: posture, energy level, eyeline direction. Worth a second pass if you're building a shoot rather than a single frame.
Worth knowing while you're in there — Studio also has a Location component where you can pull a real place from Google Maps and use Street View imagery as a scene reference. If you wanted this same shot placed at a specific rooftop in Paris or Tokyo, that's the component to reach for.
What it cost
- Credits spent: 2.70
- What you'd pay: $0.27 (1 credit = $0.10 on ArtCoreAI)
- Generation time: ~29s
I ran this at 4:5 aspect ratio — standard for a social editorial frame. 4K resolution, which is why the fabric and background separation hold up at full size.
If you want to run something like this yourself, go to Studio, select your character, pick a Fashion preset, pick a Background, and hit generate. The form does the writing. You do the picking.
— David
See what others are making


Each image links to the character's profile. The Studio — Technical Guide has the full showcase plus deeper documentation on every component.