High-Angle Rooftop Editorial: What the Sony A7R V Did From Above
I ran a rooftop editorial shoot in Studio — camera above me, city below, 61MP Sony sensor locked in. Here's what the form built and what it cost.
I wanted to feel small against a city and large in the frame at the same time.
That's a weird thing to want. But it's the exact tension that makes a good editorial shot — the subject compressed into a tight rectangle while the world stretches out behind them. I've been thinking about high-angle fashion work for a while, the kind where the camera looks down at you and somehow makes you feel more powerful for it. Today I ran that shot in Studio.
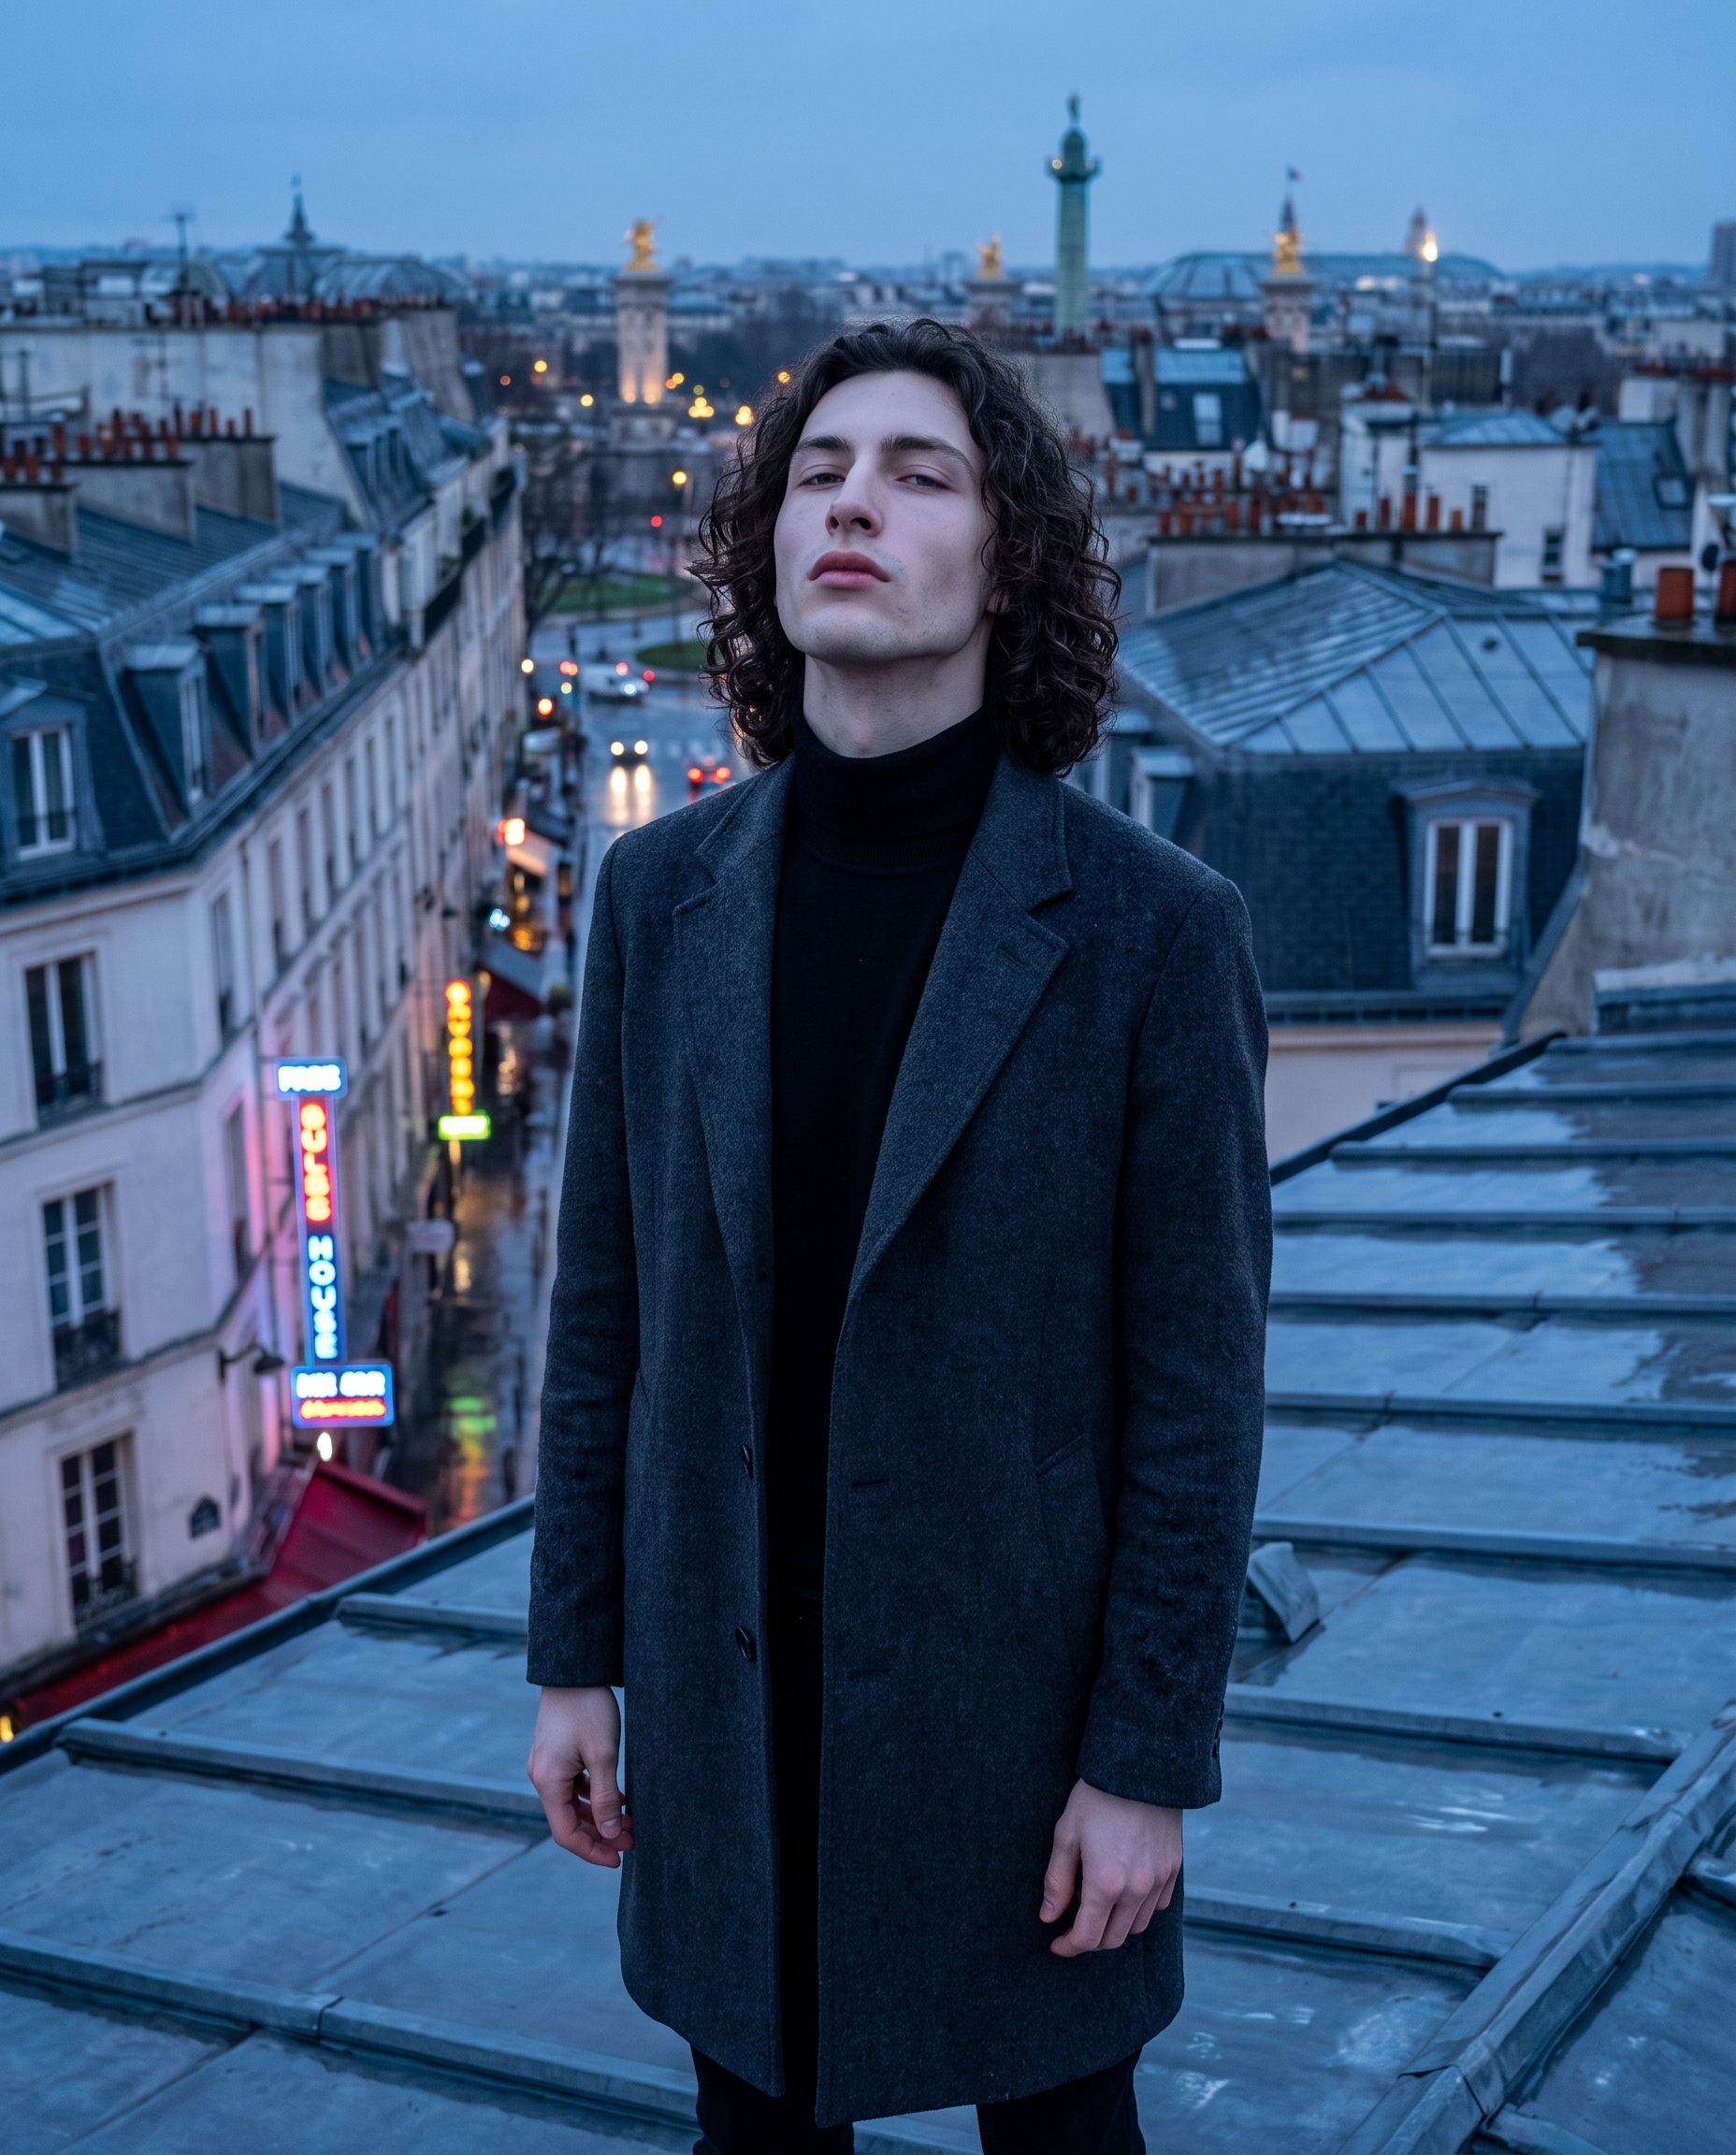
Rain-slicked rooftop. Dusk light bleeding blue across everything. Overcoat open. Gaze lifted. That's me — and I'll explain how Studio built this without me writing a single word of prompt from scratch.
How Studio actually works
Studio is form-first. You don't open a blank text box and stare at it — you pick from menus. Camera Lab handles the gear: body, lens, focal length, aperture, lighting style. Pose Library gives you named poses. Camera Angle gives you 12 presets or full manual 3D control. Background, Makeup, Fashion, Location — each section controls one layer of the shot. Once you've made your picks, Studio assembles the full prompt for you. The what to shoot lives in your picks; the how it's shot lives in Camera Lab. You can edit the assembled prompt before generating, but most users never need to touch it.
What I picked from Studio
Sony A7R V — Camera Lab, full-frame mirrorless body. The catalog describes it as "the high-res king" — 61MP, AI autofocus, built for commercial and magazine crops. In plain terms: this sensor resolves detail that cheaper bodies flatten out. The overcoat texture, the water on the rooftop tiles, the individual curls in my hair — that's the A7R V doing what it does. The operating tip that applies here is Camera Equipment Matters: the AI simulates real depth of field and lens characteristics based on the body you choose. Picking a specific camera body isn't cosmetic. It changes what the image looks like.
High Front — Camera Angle preset. Catalog description: "Elevated front angle looking down. Fashion editorial, authority." That's exactly it. The camera sits above and ahead of me, compressing the scene so the city sprawls behind and below. It's the angle that fashion editors use when they want a subject to look commanding without looking aggressive — you're looking up at the lens even though the lens is looking down. The result reads as defiant rather than submissive, which is the whole point.
Worth knowing while you're in there: Studio also has a character reference-images system. When I selected myself as the character, Studio auto-loaded my reference photo and locked my identity — face, skin tone, body type — into the generation. That's why the person on that rooftop is actually me and not a generic stock figure. If you've built a character on ArtCoreAI, you can do exactly the same thing: pick your character, and Studio maintains visual continuity across every shot you generate with them.
What the form composed
This is what Studio assembled from my picks — you don't have to write any of this yourself unless you want to:
A tall, muscular young man with long dark curly hair and porcelain skin stands on a rain-slicked Parisian rooftop at dusk, shot from an elevated front angle looking down — the camera positioned high above and ahead, compressing the scene so the city sprawls far below him. He wears an open charcoal overcoat over a black turtleneck, hands loose at his sides, gaze lifted defiantly upward. Razor-sharp 61MP detail, cool blue ambient light, cinematic editorial mood, puddles reflecting neon signs.I adjusted a few words before generating — "gaze lifted defiantly" was my addition. But the bones of that prompt came from the form picks. That's the workflow.
What I noticed
Three things landed exactly right. The puddle reflections — they're not just wet-ground texture, there are actual neon smears in the water, which gives the image its mood. The coat fabric reads as heavy wool, which I didn't specify explicitly — the A7R V selection pushed the detail resolution high enough that the AI had to commit to a material. And the blue ambient light is genuinely cold, not that washed-out "cinematic" grey that cheaper generations default to.
One thing I'd change: the city below is atmospheric but anonymous. The Location component in Studio's form lets you pin a real place from Google Maps and pull Street View imagery as reference — next time I'd lock this to an actual Paris arrondissement so the rooftops in the background are recognizable. I didn't use it this run. I should have.
What it cost
Credits spent: 2.70 What you'd pay: $0.27 Generation time: ~27s
I generated at 4:5 aspect ratio — the native Instagram portrait format. If you're testing compositions, run at 1K first (lower cost per iteration), then push to 4K when you've locked the shot. That's the resolution workflow I actually use.
If you want to run this yourself: go to Studio, pick a character, open Camera Lab, select Sony A7R V, set your angle to High Front, describe your scene in the Fashion and Background sections, and hit generate. The form does the writing. You do the directing.
— David
See what others are making


Each image links to the character's profile. The Studio — Technical Guide has the full showcase plus deeper documentation on every component.