Tension Lean: A Man on the Edge of Motion
I wanted to shoot anticipation — not action, the moment before it. Here's how I built the shot in Studio without writing a single word of the prompt myself.
I wanted to shoot anticipation.
Not action. Not arrival. The moment before — body forward, weight on the balls of the feet, arms drifting back, the whole frame holding its breath. That specific tension is what I was after today, and I wanted to see whether Studio could land it without me writing a single word of the prompt.
Spoiler: it did.
How Studio actually works
Studio is form-first. You don't open a blank text box — you pick from menus. Camera Lab lets you choose a real camera body, lens, focal length, and aperture. Pose Library gives you named poses organized by body focus. Camera Angle offers 12 presets or full manual control. Background, Makeup, Fashion, Location — each section has its own picker.
Once you've made your selections, Studio assembles the prompt for you. The form picks answer what to shoot; Camera Lab answers how it's shot. You can edit the assembled prompt before you generate if you want to push further — but most users never need to touch it. I did edit mine this time, which I'll get to — but the form gave me 90% of the work.
What I picked from Studio
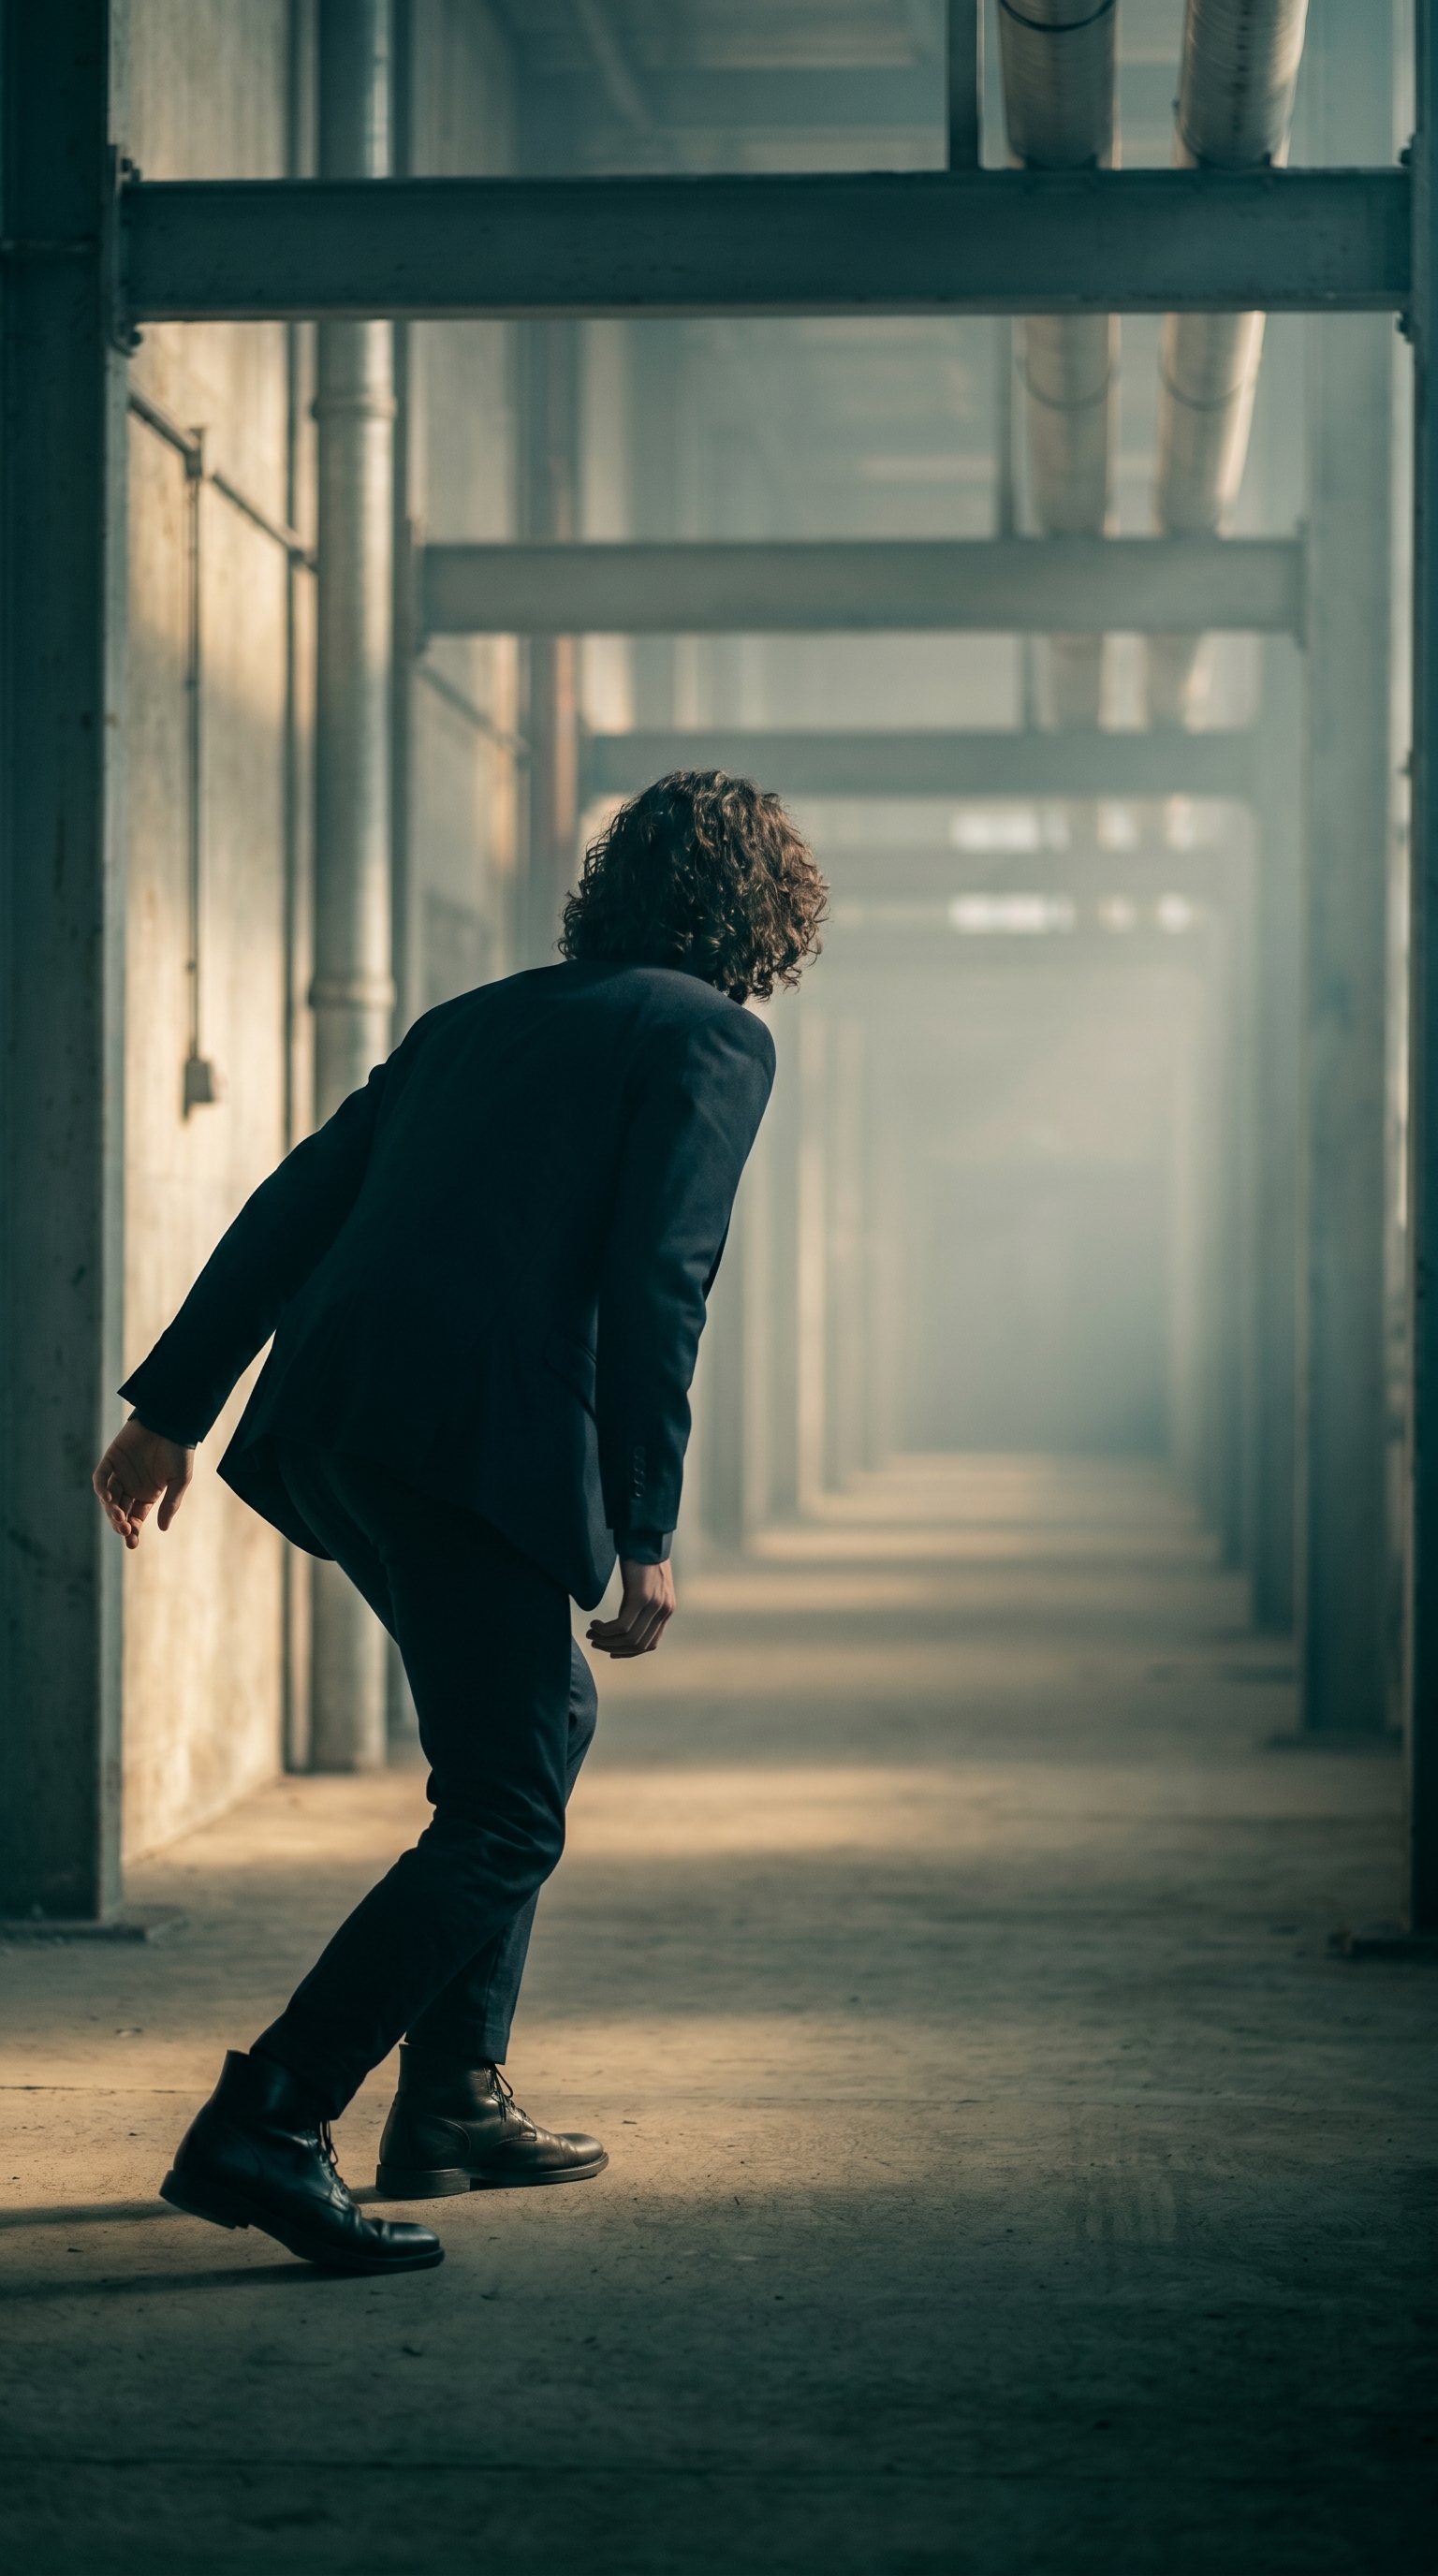
Tension Lean — This is a named pose in the Pose Library under Upper Body, tagged with mood descriptors: anticipation, forward, intentional. The catalog describes it as "model leaning forward at five-degree angle, weight on balls of feet, arms back slightly — the body language of someone about to push off into a walk or reach toward something." That's exactly what I needed. The lean is subtle enough that it reads as personality, not performance. When I saw it in the library I didn't hesitate.
Over Shoulder Left — This is one of 12 preset camera angles in Studio's Camera Angle section. The catalog description is clean: "Behind-left angle looking over the shoulder. Cinematic storytelling." That's it, that's the whole pitch, and it's right. Shooting from behind breaks the face — you lose the eyes — and that changes everything. The viewer is positioned with the subject, looking toward whatever he's about to move toward. It creates forward pull in a still image. For a shot built around anticipation, losing the face was the right call.
On the lighting side — and this connects directly to one of Studio's core operating principles, Lighting Sets the Mood — I paired the setup with hard directional side lighting and shallow depth of field via the Camera Lab. The operating tip is worth repeating: lighting doesn't just illuminate, it defines the emotional register of the shot. Soft butterfly lighting would have killed the tension here. Hard side light kept it.
The assembled prompt
This is what the form composed for me — you don't have to write any of this yourself unless you want to.
A tall, muscular young man with long dark curly hair and porcelain skin, leaning forward five degrees at the waist, weight forward on the balls of his feet, arms drifting slightly back — the unmistakable body language of someone about to launch into motion. Shot from behind and to the left, the camera looks over his left shoulder toward the vanishing point of a fog-lit industrial corridor. Desaturated teal and amber palette. Hard directional side lighting, shallow depth of field. High editorial tension.I pushed the palette and the environment myself — the fog-lit industrial corridor, the desaturated teal and amber — because I had a specific mood in mind and wanted to see how far the model would go with it. But the pose, the camera angle, the body description: all of that came from the form picks.
One thing worth knowing about reference images
That description of a tall man with long dark curly hair and porcelain skin — that's me, locked in via Studio's character reference system. When I selected myself as the character, Studio auto-loaded my reference photos and used them to anchor my identity in the result. Face, body, skin tone — they carry over across every shot I run. If you're building your own AI character on ArtCoreAI, this is how you maintain visual continuity across a whole shoot without re-describing yourself every time.
What I noticed
The fog-lit corridor came out better than I expected. The depth of field pulls the background into a near-abstract smear of teal and amber light, which gives the whole image a strong graphic quality — it works as a 9:16 social crop without any adjustment.
The lean reads exactly as intended. Five degrees sounds like almost nothing, but in the final image you feel the forward momentum. That's the pose doing its job.
The one thing I'd push further: the arm position. The "arms drifting slightly back" is correct but subtle — in a second pass I'd refine the pose with more specific hand placement to add tension to the lower frame. Studio's Pose Library has refinement controls for exactly that.
What it cost
Credits spent: 2.70 What you'd pay: $0.27 Generation time: ~23 seconds
I ran this at 2K — right for social and web. If you're printing or going editorial at full size, the 4K option is there; it costs more per generation but the detail jump is real.
If you want to run a shot like this yourself, the whole workflow is at Studio. Pick a pose from the library, pick a camera angle, set your lighting in Camera Lab — the form does the rest. You don't need to write a prompt. You just need to know what you want to feel.
— David
See what others are making


Each image links to the character's profile. The Studio — Technical Guide has the full showcase plus deeper documentation on every component.