Grunge Revival in Studio: A 90s Dusk Encounter
I ran a grunge editorial demo in Studio today — POV street encounter at dusk, smudged liner, sodium light. Here's every pick I made and what it cost.
Grunge Revival in Studio: A 90s Dusk Encounter
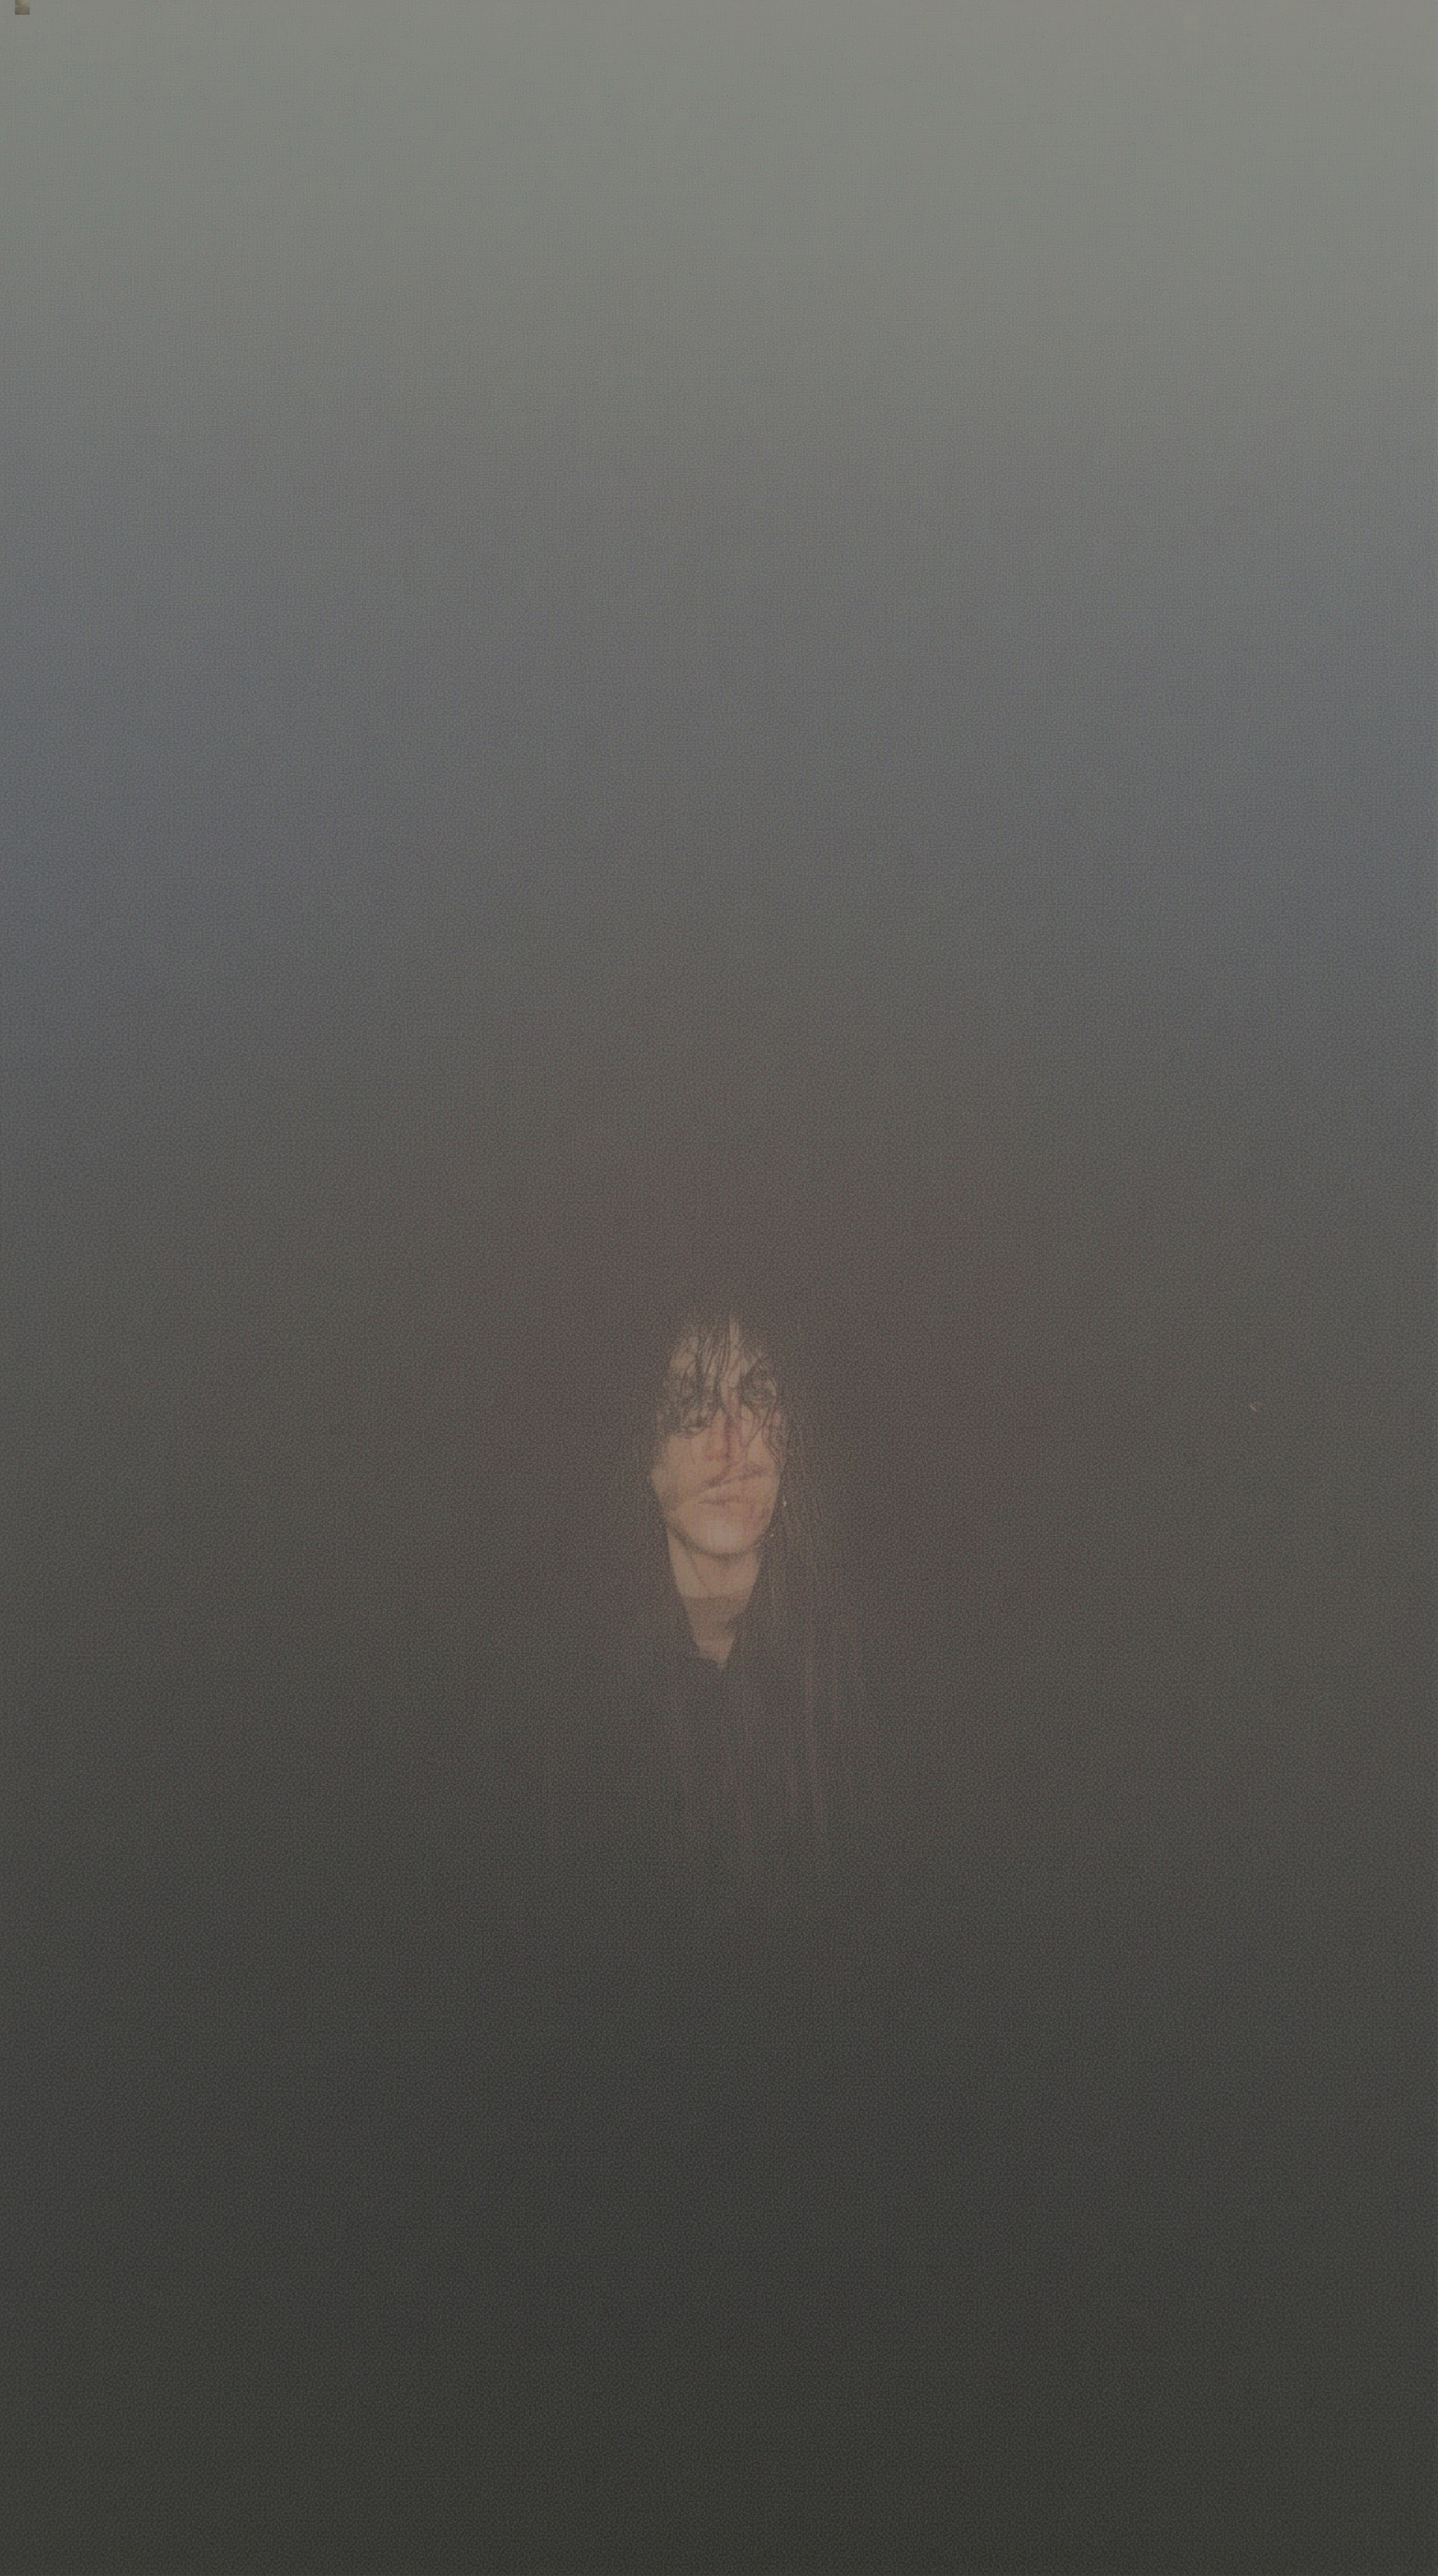
I wanted to feel caught — not posed. Not the clean editorial where the subject knows they're being photographed. The other kind: a rain-slicked street at dusk, a tall guy with smudged liner and a heavy flannel, sodium light bleeding orange behind him, and you're standing close enough that it's almost uncomfortable.
That was the shot. So I opened Studio and started picking.
How Studio actually works
Studio is form-first — which means you don't have to write a prompt at all. You work through sections: Camera Lab for your equipment and lighting, Pose Library for body position and energy, Camera Angle for your framing, Background for environment and mood, Makeup Artist, Fashion Designer, and more. Each pick feeds into an assembled prompt that Studio composes for you. The "what to shoot" lives in your picks; the "how it's shot" comes from Camera Lab. You can edit the assembled prompt before you generate — and sometimes I do — but most users never need to touch it.
What I picked from Studio
Makeup: Grunge Revival 90s
The catalog describes this one as "Smudged, undone — dark, messy, heroin chic revival." That's exactly the brief. What it actually did to the result: the liner isn't precise, it's deliberately smeared beneath the lower lash line, the lips read stained rather than painted, and the skin has that slightly unwashed, imperfect quality that no clean beauty look would touch. It's the difference between editorial and authentic editorial. If you want a character who looks like they've been somewhere, Grunge Revival 90s is the makeup pick.
Framing: POV
The catalog entry is simple — "First-person immersion." What that translates to visually: the subject is close, slightly below or level with the viewer's eyeline, and the frame feels like you're the one standing there. It collapses the fourth wall. Combined with the street setting and the confrontational body language I described in the prompt, POV made this feel like a stolen moment rather than a set piece. The Pose Library tip worth noting here: energy level matters as much as the pose itself. A POV frame with relaxed energy reads very differently from a POV frame with confrontational energy — I leaned hard into the second one.
On the Camera Lab side, I used shallow depth of field to push everything behind the subject into a soft blur, and paired it with a gritty film grain texture — this is what the best-results guide means when it says "Lighting Sets the Mood." The sodium streetlight backlight is doing heavy lifting: warm halo against deep blue twilight is a hard thing to fabricate, and Studio rendered it without me fussing over color values.
Worth knowing while you're in there: I picked myself as the character before building the shot — which means Studio auto-loaded my reference photos and locked my identity (face, long dark curly hair, porcelain cool-toned skin) into the generation. You can do the same with any character you've built on the platform: select them, and their saved reference images travel with the shot. No manual re-uploading each time.
The assembled prompt
This is what the form composed for me — you don't have to write any of this yourself unless you want to.
First-person POV shot: a tall young man with long dark curly hair and porcelain cool-toned skin stands close, as if caught mid-conversation on a rain-slicked urban street at dusk. His eyes are rimmed with smudged, heavy dark liner — slightly smeared beneath the lower lash line — lips stained a deep bruised burgundy, skin deliberately undone and imperfect. Oversized dark flannel, chain detail. Sodium streetlights backlight him, casting a warm halo against deep blue twilight. Shallow depth of field, gritty film grain texture. Intimate, slightly confrontational.What I noticed about the result
Three things stood out.
The backlight is better than I expected. Sodium orange against deep blue twilight in a single frame is a tricky color relationship, and Studio held both without either washing the other out. That warm halo is genuinely there.
The grain reads as intentional, not as compression artifact. That distinction matters — a lot of AI-generated images fake grain poorly and it looks like noise. This reads like a film stock decision.
The one thing I'd push further next time: the flannel. It's dark and oversized, which is right, but I'd open the Fashion Designer section and build the garment properly — specific fabric weight, visible wear on the cuffs — rather than leaving it to the prompt description alone. Studio's Fashion component is worth the extra two minutes.
What it cost
- Credits spent: 2.70
- What you'd pay: $0.27 (1 credit = $0.10 on ArtCoreAI)
- Generation time: ~23 seconds
I generated at 9:16 vertical for social — if I wanted this at 4K for print, the cost scales up but the workflow is identical. For iteration and testing, 1K is the move. For anything going on a feed, 2K is the sweet spot.
If this is the kind of shot you want to make — go to Studio, pick a character, pick a lighting setup, pick a makeup look, hit generate. The form does the compositing. The craft is in the picks.
— David
See what others are making

Each image links to the character's profile. The Studio — Technical Guide has the full showcase plus deeper documentation on every component.